1. Welcome to Tacoma World!

    You are currently viewing as a guest! To get full-access, you need to register for a FREE account.

    As a registered member, you’ll be able to:
    • Participate in all Tacoma discussion topics
    • Communicate privately with other Tacoma owners from around the world
    • Post your own photos in our Members Gallery
    • Access all special features of the site

Z's Approach/Utility Build

Discussion in '2nd Gen. Builds (2005-2015)' started by Zebinator, Dec 11, 2016.

  1. Dec 11, 2016 at 12:25 PM
    #1
    Zebinator

    Zebinator [OP] Well-Known Member

    Joined:
    Nov 30, 2014
    Member:
    #143381
    Messages:
    783
    Gender:
    Male
    Norcal
    Vehicle:
    06 Tacoma TRD Offroad
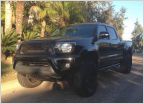
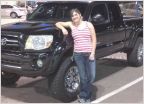
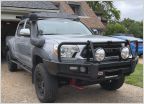
    The kids originally named it Bambi, but "Trucky" is what has stuck over the years.

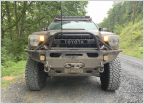
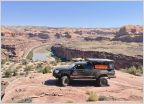
    Here is it's current state:


    The idea is to create a real Swissarmy Knife of a truck. Something pretty good at just about everything, but not so specialized at one thing that other “normal” uses become a total compromise. I want a vehicle that can get me to just about any trail head, fishing spot, or lookout with all my biking, fishing, or hiking gear but still be comfortable cruising from our home in CA to destinations in CA, OR, WA, ID, MT, UT, and CO. So, I found this moderately used TRD 4x4 Access Cab as the starting point. Things I like about the Access Cab are that there is enough cab space to haul the younger kids or lock up a bunch of stuff without needing a camper shell, It's got a full size bed for hauling crap for our property and my fabrication habit, but the wheelbase still short enough to be somewhat maneuverable. And, the TRD Offroad for the stock locking rear dif. Here's the starting point:


    Completed (linked) mods are:
    Planned mods:
    • essential armor bits (transfer case? gas tank?)
    • uca's, maybe
    • solar power system (maybe?)
    • Longer Billsteins & bump stops as per Crom...
    • Tire carrier
    • -----
    GFC Camper has inspired a new list of mods:
    Still need to:
    • Dust control. I just need to knock it down by 90% and I'll be so much happier. Thank you Crom for this reference post...
    • Ham Antenna re-rout.
    • Grab handles. I am so short i can barely reach the top of the tent.
    • Center console electronics - saving this post for later

    I got started in spring 2015 with the front lift. Leveled the truck out - looked so much better.
    • Billstein 5100 shocks front and rear (lowest lift setting)
    • OME front coils


    Then that summer added:
    • Home-made sliders (see below)
    • MT 16x8 Wheeler style +.0” Wheels
    • 255/85 - 16 Mud Terrain KMT 2's


    And, before the rain came i got a few more bits done:


    I'll detail out some of this stuff in subsequent posts, but keep this current with the projects current status.
     
    Last edited: Mar 30, 2022
    Impoy47 and ChadsPride like this.
  2. Dec 11, 2016 at 1:49 PM
    #2
    Zebinator

    Zebinator [OP] Well-Known Member

    Joined:
    Nov 30, 2014
    Member:
    #143381
    Messages:
    783
    Gender:
    Male
    Norcal
    Vehicle:
    06 Tacoma TRD Offroad
    DIY Rock Sliders

    Throwing good sense to the wind, I decided to make some sliders myself. I'm pretty sure I spent about 4x what these would have cost from a reputable vendor, and taken me 10x as long to get on the truck, but it was definitely fun. The two big questions were whether or not to incorporate kickouts and whether to weld-on or bolt-on. Since I was paying for the bends, I decided to keep it super simple and skip the kickouts. And, Reading up on instructions for bolt-on sliders, I noticed they many said "for serious off-road use, we recommend welding the bottom of the bolt-on plate to the chassis." Well, if you're going to weld at all, might as weld on the whole thing and avoid all the complication of figuring out where to bolt, is it going to be strong enough, blah blah... So, bolt on.

    First, a sketch:


    The simple design would let me use 4 of the same pieces of 1.75" OD 0.120 DOM steel tube with one bend each.


    As I thought about it, i decided it would be slightly cooler to only notch the interior tube, and leave the business tube coming across the front, thinking that round edge would shed a rock better than a squared-off round tube.

    Next, I got busy with a hole saw and my mill cranking out the short spacers:


    And then I tried to figure out how to mark off where to use the notcher:


    This did not go so well at first. I ended up chunking one whole piece and that meant another trip to get a bend made which was a lot of setup $$$. GRRR. Measure thrice, cut twice. The biggest bummer is that I could have paid for quite a bit of my own bender and had a tool at the end of all this. Anyway, I got it figured out eventually, and got all the pieces notched up. I think it looks pretty good:


    I tacked the slider up and got it into position under the body of the truck. Lots of hand wringing at this point, trying to decide how close to get it up under the body, what angle to use, etc... The issue being the lower you go you are trading ground clearance for future proofing - plus I needed to consider how much will they flex when jacking. (?!!?) I settled on 1". When in doubt, use a whole number.


    Next step was to then cut and tack tack together the mounting tubes and plates:


    And then figure out a way to re-locate them in the same spot when all welded and painted up. I center punched the "reference" spot to line up with a little mark on the weld on the body:


    Here they are ready for final welding:


    I'm still figuring out how to make pretty MIG welds. They're strong, anyway:


    Paint:


    Prepping to weld them on. I took them to bare metal, then hit it all with weld-thru primer.


    They do flex about 1/4" when jacking the truck up... Glad i didn't mount them any closer.


    And... finally, treated myself to get the 255/85-16's on too!


    Next up, bumper...
     
    Last edited: Jun 10, 2017
    Impoy47, PintSize, Crom and 2 others like this.
  3. Dec 11, 2016 at 6:28 PM
    #3
    Taylor@KC HiLiTES

    Taylor@KC HiLiTES Well-Known Member Vendor

    Joined:
    Nov 11, 2016
    Member:
    #202104
    Messages:
    1,056
    Gender:
    Male
    First Name:
    Taylor
    Arizona
    Vehicle:
    2010 DCSB TRD OR 4x4
    See build thread
    Wow, those sliders look great! You said that next up is a bumper; are you building a new one yourself and selling the DO one?
     
    ChadsPride likes this.
  4. Dec 11, 2016 at 7:07 PM
    #4
    Zebinator

    Zebinator [OP] Well-Known Member

    Joined:
    Nov 30, 2014
    Member:
    #143381
    Messages:
    783
    Gender:
    Male
    Norcal
    Vehicle:
    06 Tacoma TRD Offroad
    Not building myself - i took the easy way out and got a Demello. But yes, i have the original bumper and don't need it... ;)
     
  5. Dec 11, 2016 at 7:41 PM
    #5
    Zebinator

    Zebinator [OP] Well-Known Member

    Joined:
    Nov 30, 2014
    Member:
    #143381
    Messages:
    783
    Gender:
    Male
    Norcal
    Vehicle:
    06 Tacoma TRD Offroad
    Bumper Install

    I had a really hard time picking a bumper - looking at Demello, Pelfrey Built, Shrockworks, and LCI, but finally decided on the Demello based primarily on this gent's build: @Tacovendor's My Overland Taco. But also based my decision on the fact that they're located in CA, and weren't quoting a 12-16 week wait. The engineering is pretty solid, and installation was straightforward. My only wish is that they provided a little more room/pre-drilled holes to mount the control box for the winch, but I got it in there.

    It was definitely well packaged - took a while just to cut all the plastic and cardboard off!
     
  6. Dec 11, 2016 at 7:45 PM
    #6
    Zebinator

    Zebinator [OP] Well-Known Member

    Joined:
    Nov 30, 2014
    Member:
    #143381
    Messages:
    783
    Gender:
    Male
    Norcal
    Vehicle:
    06 Tacoma TRD Offroad
    Dual Battery Tray

    Here's the original post, copied here, from when I finished installing the Armor Tech Offroad (ATO) Dual Battery Tray for two Optima Group 34 Batteries and thought I'd share some notes from the experience...


    First of all, the pieces from ATO are beautifully cut (water jet?) and precision bent - fit and finish was great (well, small problem with fit, but more on that in a moment) and I had a couple questions and the guys there were super friendly. Would heartily recommend this product, and ATO as a business from that interaction.

    One minor issue out of the box is that (as with seemingly all aftermarket stuff) all the fasteners are imperial. Needless to say, i've given up on trying to keep the truck metric, but this will continue to bother me. The hardware kit also came with these long self-drilling/tapping sheetmetal screws, but the battery stands on a little shelf welded to the fender and it's not long enough to take that whole screw body... and i own a drill... so I replaced them:


    I am not the most patient guy so I planned ahead and painted up the parts well in advance of when I was going to have time to do the install so i wouldn't be tempted to jam them in there still tacky. There is a bottom plate that goes in with standoffs that attach the actual battery tray. You kind of have to eye-ball the fitment and I didn't do a great job with this the first time... There's a single bolt that locates the center forward corner of the tray down low against the fender. But then you have to eyeball the tray to make sure it's parallel to the fuse box, but i found that dead parallel caused interference with between the battery and the headlight. Sadly, i found this out *after* drilling the first set of holes. I also found that the rear out-board tab that holds the battery was a little too tall to not hit the fuse box, so it had to be slightly trimmed, and the plate interfered with the original battery hold-down tab. So that also meant a little grinding.


    So much for nice hard paint...


    If you look closely in the image you can now see the rear-most tab is a little shorter and tucks in line with the face of the fuse box. ATO's instructions say to remove the little tab on the lid of the fuse box directly above the plate's tab, but i found that to be unnecessary. Also, you might be able to see already how incredibly tight it is going to be up against the headlight, and the main wiring harness entering the lower corner of the fuse box. Last thing, I also had to do a very gentle bend of the aluminum pipe coming off the radiator (or heater core?). Eek. Everything tightened down with Loctite, time for batteries and wires.

    The battery install is part of a larger plan for this truck that will involve radios, lights, and the like, and I'd been looking for a good installer to do the wiring for me. A friend in the emergency services world suggested some "tips" for figuring out if the installer is good. Do they use thin-wall insulation wire, wrapped in a loom? water proof connectors? heat shrink? solder or crimp? Etc etc. This is one of those areas where i definitely would err towards buying the best, cry once. I was pointed to Santa Rosa Cartronics (for those of you in the north bay area) and was really impressed with the quote - expensive, but doing all the right things. I got my two Optimas from them, and they whipped up some temporary interconnect cables - pretty nice work:


    When i get the lights, radios and power distribution ideas all sorted, I'll be back to have them do the "grand wiring."

    Here it is all installed.


    You'll notice the outboard battery is basically touching the back of the headlight. Hopefully that doesn't cause problems in the future. I'll have to remove a battery to change the bulb, but I think that's the only practical downside to locating the batteries here.

    The positive terminal is now a janky mess, but hopefully i'll have this in at SR Cartronics soon to have that all cleaned up. Planning on a BlueSea ML-ACR, solar charger, house/main battery selectors for various systems... Gonna be fun. Here's a little teaser of where i plan to put some of this stuff:


    Time to go bend some sheetmetal!
     
    ChadsPride and Pirhett like this.
  7. Dec 11, 2016 at 7:47 PM
    #7
    NicNac

    NicNac Well-Known Member

    Joined:
    Jan 4, 2015
    Member:
    #145617
    Messages:
    74
    Gender:
    Male
    Southern Dakota Territoy
    Vehicle:
    11 DCLB TRD Sport
    Great start, :popcorn:
     
    Zebinator[OP] likes this.
  8. Dec 11, 2016 at 7:54 PM
    #8
    Timbo's Customs

    Timbo's Customs Well-Known Member

    Joined:
    Aug 8, 2013
    Member:
    #110078
    Messages:
    7,229
    Gender:
    Male
    First Name:
    Timothy
    Lakeland FL
    Vehicle:
    2019 f250 6”lift 37s deleted 1997 T4r, tons and 4ds
    1997 t4r has super duty axles, 5.13s locked front and rear. 3 link front with 14" kings. Rear 63s.
    Looks good man keep it up
     
    ChadsPride and Zebinator[OP] like this.
  9. Dec 11, 2016 at 8:06 PM
    #9
    Zebinator

    Zebinator [OP] Well-Known Member

    Joined:
    Nov 30, 2014
    Member:
    #143381
    Messages:
    783
    Gender:
    Male
    Norcal
    Vehicle:
    06 Tacoma TRD Offroad
    Hauling Gear in the Bed...

    Another thing I don't understand is the total lack of loops in the bed - I seem to remember my Gen 1 had four. Anyway, the gear loops at the top of the bed don't do much for securing things low in the bed, so I decided to add some footman loops to secure a cooler and gear bin, and a mount for the hi-lift.

    The footman loops were super easy in these locations as you have clear access to the bottom of the bed from under the truck. HOWEVER, when drilling through this stuff, i'd wear long sleeves and gloves. The high glass content of the bed made for super irritating dust! Worse than sanding fiberglass body parts. My hands were burning that night.


    I also needed to get in above the wheel well for the hi-lift mount and thought i needed to take off the fender flare to get the wheel well arch off. These little things are a pain in the ass to pull out:


    Turns out you just have to pull all those little square things out -- pulling the flare off was unnecessary, but I didn't figure that out before breaking off two of the little clip mounting features on the flare. Epoxy to the rescue.


    I still need to make some tool mounts, but this was a good start...

     
  10. Dec 11, 2016 at 8:40 PM
    #10
    Zebinator

    Zebinator [OP] Well-Known Member

    Joined:
    Nov 30, 2014
    Member:
    #143381
    Messages:
    783
    Gender:
    Male
    Norcal
    Vehicle:
    06 Tacoma TRD Offroad
    Thx guys - I had a backlog of stuff to post!
     
  11. Dec 11, 2016 at 8:59 PM
    #11
    Pirhett

    Pirhett Instagram @pirhett_ship

    Joined:
    Jan 29, 2015
    Member:
    #147498
    Messages:
    5,219
    Gender:
    Male
    First Name:
    Rhett
    San Diego
    Vehicle:
    2014 TRD Sport 4x4 DCLB MGM
    Stock...
    Nice and clean thread so far! I def need to do this to mine since its just a mess of pics
     
  12. Dec 12, 2016 at 9:28 AM
    #12
    JDEMELLO

    JDEMELLO Well-Known Member Vendor

    Joined:
    Feb 10, 2009
    Member:
    #13480
    Messages:
    1,356
    Gender:
    Male
    Corona Ca
    Vehicle:
    99
    none
    Thanks for the review. We use to offer mounting for the winch control boxes but grew frustrated with the fact that there's little to no consistency with winch manufactures. We would sell a mounting kit but then would hear it didn't fit. We chased the problem for a while and finally decided that custom mounting each time was the best.

    But that being said, we were talking about it last week during and install and we are now working on a universal mounting kit for winches.
     
    Pirhett likes this.
  13. Dec 12, 2016 at 9:30 AM
    #13
    Pirhett

    Pirhett Instagram @pirhett_ship

    Joined:
    Jan 29, 2015
    Member:
    #147498
    Messages:
    5,219
    Gender:
    Male
    First Name:
    Rhett
    San Diego
    Vehicle:
    2014 TRD Sport 4x4 DCLB MGM
    Stock...
    Couldnt you guys pair up with warn or someone and design a mount for it specifically? Then offer a deal with buy the bumper and winch combo? Or did you guys try that and it not work out? Just an idea :notsure:
     
    sfcacique and Zebinator[OP] like this.
  14. Dec 12, 2016 at 10:33 AM
    #14
    Zebinator

    Zebinator [OP] Well-Known Member

    Joined:
    Nov 30, 2014
    Member:
    #143381
    Messages:
    783
    Gender:
    Male
    Norcal
    Vehicle:
    06 Tacoma TRD Offroad
    I think that would be awesome. I totally get that you can't make it fit for all... And Warn and the other winch manufacturers could definitely make it easier on us all by standardizing, or making a couple mounting options that they supply - (like something that puts the controller right next to the winch!?!) My problem was I couldn't actually get a drill down in there to drill new holes. I ended up using the large existing access holes and a short piece of plate to clamp the control box to the bumper.

    But just to be clear - Big Thumbs Up on the Demello product! :) When's that rear bumper coming out!!??!!
     
  15. Dec 12, 2016 at 10:33 AM
    #15
    Zebinator

    Zebinator [OP] Well-Known Member

    Joined:
    Nov 30, 2014
    Member:
    #143381
    Messages:
    783
    Gender:
    Male
    Norcal
    Vehicle:
    06 Tacoma TRD Offroad
    thx! i'm going to keep at it...
     
    Pirhett[QUOTED] likes this.
  16. Dec 12, 2016 at 10:41 AM
    #16
    ChadsPride

    ChadsPride Tacoma Owner & Enthusiast

    Joined:
    Nov 26, 2014
    Member:
    #143119
    Messages:
    127,315
    Vehicle:
    Sponsored by TacomaWorld.com
    subd
     
    Zebinator[OP] likes this.
  17. Dec 14, 2016 at 6:42 PM
    #17
    Zebinator

    Zebinator [OP] Well-Known Member

    Joined:
    Nov 30, 2014
    Member:
    #143381
    Messages:
    783
    Gender:
    Male
    Norcal
    Vehicle:
    06 Tacoma TRD Offroad
    This little project is taking F O R E V E R but it's finally starting to take shape...


    Steel stereo/contura switch thingie-ma-bobber. :D
     
    Pirhett and ChadsPride like this.
  18. Dec 15, 2016 at 12:02 PM
    #18
    Zebinator

    Zebinator [OP] Well-Known Member

    Joined:
    Nov 30, 2014
    Member:
    #143381
    Messages:
    783
    Gender:
    Male
    Norcal
    Vehicle:
    06 Tacoma TRD Offroad
    Just copying an old post into my build thread...

    255/85-16 Mounting/Experience:

    Truck:
    • 2006 Tacoma Access Cab w/ v6, Automatic Transmission
    • No diff-drop (yet)

    Suspension:
    • Front: Bilstein 5100 at lowest lift position, ARB Light Load coil springs. (before new tires this was 33.5" ground-to-weelarch)
    • Rear: Bilstein 5100, stock leafs.
    • Truck is level as set up.

    Wheels:
    Mickey Thompson Classic III 16 x 8 0 offset, 4.5" backspacing.

    Results:
    • Both sides in the front rub the front little bump in at the base of the wheel well shroud at about 90% of full lock. When I get a bumper, they'll be gone, so no big deal.
    • Left side is just kissing the inner-most rear edge of the fender flare, down at the bottom, and i think at some amount of compression - maybe 50%. This isn't happening on the right side.
    • Going straight a big compression causes something to hit that's loud. Looking around I can't see any contact marks on anything metal, so I'm guessing it's the left side.
    • No contact with the frame or chassis that i can tell under normal driving.
    • Did some mild off-roading this weekend but got the truck pretty flexed out and nothing else rubbed.
    • I plan to take the coil-over out and run the suspension through it's travel and see if i notice any other contact.
    • no contact on the rear, at all - and i've had it flexed to the bump-stop. (only about .75" clearance though!)
    I think the 1.5" or so extra wheel (wider than stock by .5 plus the +30 to offset from stock) is probably contributing to the front rubbing both front wheel shrouds, but the left front rubbing the rear of the wheel arch i'm guessing is from some difference in the camber adjustment since it's only happening on one side.

    I sure like the way these look!


    A little update: turns out the left side rubbing is occurring because the left wheel is sitting 1.5" further back in the wheel well than the right side! Going to see if the caster is way off, or if the frame is jacked... As the adjusters are quite different underneath so... something is amiss.
     
    ChadsPride likes this.
  19. Jan 19, 2017 at 4:33 PM
    #19
    jon_beer

    jon_beer Active Member

    Joined:
    Dec 28, 2016
    Member:
    #205910
    Messages:
    29
    Gender:
    Male
    First Name:
    Jon
    Newburgh, NY
    Vehicle:
    2012 Mag. Gray Tacoma AC
    Pelfreybilt Front Bumpber, RAD Industries Grille, Ladder rack with custom toolboxes, GMRS Radio, Pyle PLDN63BT Head Unit, Blacked out headlights
    sub'd, love the attention to detail
     
    Zebinator[OP] and ChadsPride like this.
  20. Jan 19, 2017 at 10:48 PM
    #20
    Zebinator

    Zebinator [OP] Well-Known Member

    Joined:
    Nov 30, 2014
    Member:
    #143381
    Messages:
    783
    Gender:
    Male
    Norcal
    Vehicle:
    06 Tacoma TRD Offroad
    Thanks! Hoping to get some shop time this weekend. Update to follow.
     
    ChadsPride likes this.

Products Discussed in

To Top