1. Welcome to Tacoma World!

    You are currently viewing as a guest! To get full-access, you need to register for a FREE account.

    As a registered member, you’ll be able to:
    • Participate in all Tacoma discussion topics
    • Communicate privately with other Tacoma owners from around the world
    • Post your own photos in our Members Gallery
    • Access all special features of the site

mk5 adventures

Discussion in '2nd Gen. Builds (2005-2015)' started by mk5, Sep 6, 2018.

  1. Sep 6, 2018 at 3:56 PM
    #1
    mk5

    mk5 [OP] Probably wrong about this

    Joined:
    Mar 15, 2018
    Member:
    #247373
    Messages:
    1,293
    Gender:
    Male
    SoCal
    Vehicle:
    '05 access cab 4x4
    MK5 Build Log
    Now with trip reports and incoherent rambling!!!

    t2.jpg

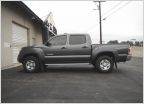
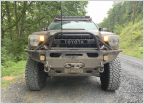
    This is a 2005 4x4 access cab previously owned by TW member adriancast. I picked it up in early 2018.

    I primarily use this truck to drive to shopping malls, and my top priorities are good gas mileage and keeping everything factory-original.


    Recent photos and videos:


    Recent trips:
    IMG_20201012_201203_105.jpg

    ballarat.jpg

    national_parks2.jpg

    dc4.jpg

    vw2.jpg

    cd10s.jpg

    Adventures

    Adventures posted on other threads


    Noteworthy contributions, events, and/or shitposts (mostly on other threads):


    Mods & repairs (the ones in bold are ones I've done since buying the truck):

    Interior
      • T̶R̶D̶ ̶S̶e̶a̶t̶ ̶C̶o̶v̶e̶r̶s̶.̶ Now replaced with shitty Coverking neoprene which started tearing in less than a year, but at least don't give us swamp ass all summer like the TRDs.
      • Center Console Lock
      • Weathertech Floor Mats
      • AC Outlet in Cab Mod / 400 Watt Anytime Mod (upgraded to back-seat 12V / Dual USB / 120V AC panel)
      • Fridge w/ always-on DC power jack in the back seat
      • rcbs204 Illuminated 4x4 Switch (Jerez w/ installation)
      • LED lighting including under-dash, back-seat, underbody, and tailgate courtesy lighting, all triggered by cabin light and/or key fob.
      • Red LED map lights and night ambient lighting
      • 1.5" Lifted seats to accommodate electronics/sub/etc.
      • Magnetic mount cellphone holder with wireless charging
      • Sound deadened / insulated interior
      • Analog inclinometers and barometer/altimeter tastelessly adhered to various dash surfaces.
      • Seat warmers!
    Electronics
    • Android head unit (ATOTO) with 7" display, SD/USB storage, OBD2 scanner, TV tuner, and integrated dashcam. UPDATE 2022: I've upgraded to a larger Joying unit, and am pretty happy with it!
    • Alpine KTP445U amplifier driving factory speakers. UPDATE 2022: It crapped out!
    • Custom under-seat subwoofer with 10" JBL driver, 500W amplifier, and active crossover circuit.
    • TYT 9800 quad-band ham radio (currently only tuned for VHF/UHF)
    • Browning dual-band whip antenna @ rear bedside
    • CB radio (Midland hardwire/handheld combo)
    • Firestik 4' CB whip with spring base @ rear bedside
    • GSM radio WiFi Hotspot
    • Satellite tracker / emergency beacon
    • PicoAPRS transceiver (connected to head unit via APRSDroid)
    • 4-channel video camera spotter system for solo adventuring (views from front bumper, passenger mirror, rear axle, rear bumper)
    • 2-channel dashcam integrated into rearview mirror
    Lighting/misc

    Electrical

    • Northstar 27F AGM battery in factory location
    • T̶r̶i̶c̶k̶l̶e̶-̶c̶h̶a̶r̶g̶e̶ ̶s̶o̶l̶a̶r̶ ̶s̶y̶s̶t̶e̶m̶ Now 2A deployable solar panel for stationary camping... enough to run the fridge for days on end any season (at least in SoCal!)
    • Backup 18AH lithium-ion jump starter
    • A̶f̶t̶e̶r̶m̶a̶r̶k̶e̶t̶ ̶6̶-̶c̶i̶r̶c̶u̶i̶t̶ ̶f̶u̶s̶e̶ ̶b̶o̶x New auxiliary electrical panel with 10-circuit / 5-relay Bussman RTMR fuse box + 3x 50A marine breakers for air compressor, sub amp, and rear bed subpanel.
    Wheels/Tires
      • American Racing Wheels
      • 285/75/16 BFGs A/T KO2 Load Range E (Dec 2019)
      • I managed to destroy (4) of these tires in 2021 alone and am starting to wonder if there are better AT tires out there... or maybe I'm just at terrible driver?
    Suspension/Drivetrain/Frame
      • Cab Mount Chop
      • All-Pro U Bolt Flip Kit (replaced u-bolts for longer galvanized hardware with spring upgrade)
      • Front/r̶e̶a̶r̶ Wheeler Super Bumps
      • Icon rear bump stops
      • All-Pro Expo Leaf Pack
      • Icon U̶n̶i̶b̶a̶l̶l̶ Upper Control Arms
        • Refitted to Delta Joints in 2021 seeking in vain to solve front-end noise issues.
      • All-Pro Rear Extended Brake Lines
      • All-Pro Front Extended Brake Lines
      • Icon Rear Shocks w Reservoirs
      • 2.5 Donahoe Racing Coilovers w 700# Springs (rebuilt 2021) (re-rebuilt the one that started leaking)
      • ABS Kill Switch
      • Rear Diff Breather Mod (extended to upper bedside 2020)
      • ECGS needle bearing replacement (2020)
      • Hawk HD front pads (2020) /w slotted rotors
      • 4.56 regear w/ front e-locker
      • DMZ motor mount gussets
      • TC gusseted spindles (glorifiedwelder)
      • TC alignment tabs (glorifiedwelder)
    Engine / under the hood
      • Toyota Hilux Snorkel (STH167RA)
      • Replaced defective '05 head gasket
      • Redline hood struts
      • LED lighting with magnetic reed switch
      • Flowmaster 40 Series low-profile muffler (to make room for water tank under the bed)
    Recovery/Tools/Misc
      • Super Z Snow Cables
      • 2.5lb Purple K fire extinguisher at driver's seat base
      • 5 lb ABC dry chem extinguisher in bed
      • Smittybilt 10k synthetic winch
      • Hi-lift jack & shovel on front bed rail
      • Set of shackles, snatch blocks, tow straps, etc.
      • Overly complicated on-board air system [Part 2]
      • Tire patch kit including spare valve hardware, sealants, tire plugs, and tools to de- and re-bead tires as well as to perform interior patches.
      • Universal jack base
      • Survival stuff:
        • Emergency rations
        • First aid kit
        • A change of clothes (w/ extra brown pants)
        • A towel
        • Emergency shelter, sleeping bag, and rain gear
        • Hatchet/axe/saw
        • Lockout kit
        • Sewing kit
        • A witty sense of humor
        • An 18' flag pole with a standard fuck-yeah American Flag
    Armor
      • All-Pro IFS Skid (powder coated 2020)
      • All-Pro E-Locker Guard (repaired to clear gas tank skid 2021)
      • All-Pro Transmission Skid
      • All-pro T-case skid
      • BruteForce Hybrid Front Bumper
      • 4xinnovation DOM Sliders at 15 degrees (POR15 painted 2020)
      • RCI fuel tank skid (2020)
      • Ordered: SOS Concepts Rear HC bumper, thanks Santa!
        • Now sitting in my garage while I keep breaking taillights on the trail!
    Bed / camping
      • Soft topper with overhead LED lights
      • DECKED in-bed storage system
      • 2x2.5 gal fuel cans + 2.5 gal water + 5lb propane can between drawers and tailgate
      • Relentless tailgate reinforcement (aluminum)
      • EZ down tailgate damper with mod to prevent destruction of tailgate cables.
      • Bed lights (LED strips under rails)
      • Light switches, circuit breakers, 12V cigar outlet plug, and 2x USB plugs in bedside subpanel + relocated 120V outlet
      • Onboard hot water shower system with 13-gal under-bed water tank, engine coolant heat exchanger, thermostatic valve, and retractable shower handle in bedside (perhaps my most ridiculous mod ever!)
    Mods I've done, am doing, or plan to do:
    • Even more lights
    • Parking heater for the bed
    • Tailgate step, like on the F150s, somehow...
    • Ejection seat?


    About me:
    • I am a male adult human -- too old to be cool, but too young to be wise.
    • I work in a technical field, unrelated to automotive technology.
    • I am spending my own time and money on this hobby, and am expressing my own opinions on this forum.
    • I think social media is cancer to society, so remember to like and subscribe.
    • My current photography setup comprises the following:
      • A cellphone (a GS6, then more recently, a GS9)
      • A DJI Mavic Air flying camera. Update 2022: I sent the drone to Ukraine. Update later 2022: Wound up getting my drone back, sent a new one to Ukraine instead.
      • A tripod from Goodwill
      • A cellphone holder gimbal thing
      • Photoshop for pictures, and Premiere for videos
      • New: A Sony A7C mirrorless camera with a 24-240mm zoom lens and some old manual lenses.
     
    Last edited: Jul 6, 2023
  2. Sep 6, 2018 at 3:57 PM
    #2
    mk5

    mk5 [OP] Probably wrong about this

    Joined:
    Mar 15, 2018
    Member:
    #247373
    Messages:
    1,293
    Gender:
    Male
    SoCal
    Vehicle:
    '05 access cab 4x4
    Rodriguez Canyon and Anza Borrego State Park

    OK, I just bought the truck Yesterday. Let's go for a ride!

    After a busy morning of activities, I headed up to Julian, stopping at the pie store to pick one up for my wife. She thinks I'll be home in time for dinner, which I won't be, so it's kind of a strategic purchase.

    Then, I hit my first trail: Rodriguez Canyon:
    20080311.jpg

    This is a fitting first trail, because it's the same trail I first drove my prior (and first) 4x4 pickup on, many years ago:
    old_truck.jpg
    I guess I didn't quite get the camera angles the same...

    Reaching the other end of the trail, I headed south on the S2 until around the 43 mile marker, and crossed over into Anza Borrego via Vallecito Creek Road. I had spent too much time enjoying BLM land activities atop Rodriguez Trail, so the sun was already setting at this point!

    20180311_184941.jpg
    Uh-oh, looks like I only have one headlight And it is DIM :(

    Luckily, the LED bar is brighter than the light of a thousand suns!

    20180311_192327.jpg
    I turned north into Arroyo Seco Del Diablo, which quickly became a breathtaking slot canyon with one particularly narrow squeeze. I kept the truck level as the tires climbed up both sides of the canyon, and had no trouble getting through.

    20180311_194650.jpg
    Soon I emerged from the slot canyon and caught this final glimpse of the day's light.

    I hadn't seen another human soul since Banner. I was driving an unfamiliar truck across limitless, unknown desolation in the darkness of night. It was perfect. God, I love the desert.

    20180311_194245.jpg
    Soon I came upon a helpful sign confirming I was on track for my intended thru-route to Ocotillo Wells: Diablo Drop Off.

    The drop offs were steep but not too bad. I definitely walked them first, since I've never been here before! I soon found myself in Fish Creek Canyon.

    20180311_204508.jpg
    Behold, the wind caves! At least, I think they're the wind caves. I'll have to come back in daylight.

    Finally I found pavement, emerging from the trails near Ocotillo Wells. I headed east to catch the 86 north, stopping at every gas station on the way looking for new headlight bulbs. I must have stopped half a dozen times. It gave me plenty of time to air up the tires and peoplewatch. My favorite was the guy circling the block in a purple Hummer with outward-facing speakers blasting Kid Rock.


    Finally I reached the Indo Walmart, certain I'd find my bulb there:
    Snapchat-1139862071.jpg
    Defeated, I approached the check-out with only a bottle of Gatorade in hand. But even that wasn't meant to be, as a tattoo-covered gentleman in the line before me became frustrated with the cashier over something involving cigarettes. I quietly left the lukewarm beverage on the counter and backed away when he started assaulting a manager and shouting that he would murder everyone in the store. By the time I watched the first police car screech to a halt at the door, I had already ordered my headlight bulbs online from the comfort of my truck. I'm used to the frustration of the constantly barren shelves of every Walmart in California, but at least this trip was entertaining!

    I made it home about 6 hours late for dinner, but my wife wasn't too mad because I had that pie from Julian. Overall, it was a fun first trip for my new truck.
     
    Last edited: Dec 30, 2019
    Taco-Obsessed, SIZZLE and loginfailed like this.
  3. Sep 6, 2018 at 3:58 PM
    #3
    mk5

    mk5 [OP] Probably wrong about this

    Joined:
    Mar 15, 2018
    Member:
    #247373
    Messages:
    1,293
    Gender:
    Male
    SoCal
    Vehicle:
    '05 access cab 4x4
    New fuse/relay box for all the aftermarket stuff

    OK... I never actually wrote this up back in 2018, so this post was an empty placeholder for 4 years.

    New for 2022, here's at least a photo of my current electrical setup under the hood:

    20221201_191404_resized.jpg

    Here's my electrical setup:

    • Northstar 27F AGM battery. No, I don't do a dual-battery setup. The 27F AGM is more than enough to meet all my electrical demands at camp for the night. If I'm camping in place for multiple days, I have a solar panel I can deploy on the roof during the day. It charges at around 1A in full sunlight. That's not quite enough to keep the battery charged indefinitely, but it at least keeps up with the fridge and radios during the day.
    • Towards the bottom is a disconnect switch for the winch
    • Above is an aftermarket fusebox assembly I made, based on a modified surplus aluminum plate I bought from BAMF. (I think it was originally made by a notorious company that went out of business.) It features:
      • A 140A primary fuse from the battery
      • A 10-circuit / 5 relay Eaton fuse box, which at this point is nearly fully populated with stuff!
      • (3) 50A circuit breakers for higher-power circuits, including:
        • Subwoofer amplifier
        • Rear bedside subpanel (see post on my camp shower setup)
        • Air compressor
      • A couple 3D printed spare fuse holders I made, which carry every type of fuse this truck uses.
      • A 60A relay for all my ignition-switched aftermarket accessories. I also have a switch in the cab so I can turn these on without leaving a key in the ignition, too. It has a 4-hour timeout so I don't inadvertently kill the battery.
    • Finally I have a permanently installed battery maintainer, a Noco Genius 2D, which I plug in when I'm parked at home.

    Here's where I store the solar panel:

    solar2.jpg

    It fits perfectly beneath the larger drawer. I tie it with a short piece of string to the rail, so it doesn't slip out of reach. Surprisingly it hasn't gotten damaged down there, although I do usually have to rinse it off before use.

    solar1.jpg

    It buckles somewhat securely to my topper. I can drive around with it installed, but I don't do so on the highway. It just plugs in to the bedside subpanel and charges at around ~1A in full sunlight. My fridge consumes on average 1.2A throughout the day, so the panel isn't a complete off-grid solution, but it ensures I'll never return from a hike to a dead battery.
     
    Last edited: Dec 4, 2022
  4. Sep 6, 2018 at 3:59 PM
    #4
    mk5

    mk5 [OP] Probably wrong about this

    Joined:
    Mar 15, 2018
    Member:
    #247373
    Messages:
    1,293
    Gender:
    Male
    SoCal
    Vehicle:
    '05 access cab 4x4
    Radios


    In addition to the usual suite of cellphones, tablets, and other radio-enabled tech we take for granted these days, I currently have two nerd radios installed in this truck.


    Ham radio: Prior to this, my ham experience has been limited to handheld VHF. Now peering into the world of mobile radios, there are an overwhelming range of products to consider.


    For my first foray into this rabbit hole, I decided to buy a relatively cheap import radio with solid specs for analog FM comms, and maybe some other bells and whistles to play with. I went with the TYT 9800 which is basically a 50W-class FM transceiver for VHF and UHF, with broader RX capabilities, and two additional-yet-useless TX bands. Some of the selling points included the remote display (since the radio itself would be installed beneath my seat), the ability to monitor air-band AM, the cross-band repeat functionality, and that it’s orange backlighting matches the rest of my dash at night. The shortcomings include a total lack of digital/packet radio support, even via TNC, and the inability to transmit AM, which would enable emergency communications on the CB band and obviate my desire to have a separate CB radio in this truck.

    The radio has worked perfectly for over a year, but now I’m longing for a way to get into APRS. Here is the gear list for the install:

    • TYT 9800 quad-band radio, installed beneath seat, wired on a 20A / 12AWG auxiliary circuit.
    • Remote speaker installed in center console, Visaton FRS7-8 2.5” speaker from Parts Express.
    • Mic hanger and faceplate mount on center console (Tech Deck)
    • RG223 coax line to rear of bed, with MPD Digital crimp UHF connectors
    • Firestik MK-204 antenna mount with Tram NMO base.
    • Browning BR-180-B dual-band antenna (38” w/ NMO base)
    • MFJ 874 SWR / power meter used to tune the antenna


    Here is a close-up of the antenna mount. As you can see, I had to file a little bit out of the taillights to fit the cables through. On my good taillight, I re-sealed the filed areas with silicone.


    My other taillight is already cracked, so who cares.


    I was curious if having the soft topper up would affect the SWR, so I tested it both ways. After tuning the antenna, here are the SWRs and power levels I recorded:

    ham tune.jpg

    The topper has little to no effect on SWR, which is good news. And the radio definitely lived up to its power specs!


    With the radio itself installed beneath my seat, it’s built-in speaker is practically inaudible. Here is how I modified my dash to fit the remote speaker. It is located just above the cup holders. First, I had to mill away the ribs behind that trim panel:

    cut down ribs.jpg

    Then, I cut the hole for the speaker:

    hole saw.jpg

    Here it is installed:


    I honestly haven’t used this radio very much, other than for occasional radio checks and keying up local repeaters before hitting the back country alone. I have since moved into a canyon where VHF and UHF can't get in or out, so my only chance to tinker with it is when I'm bored at camp in the middle of nowhere.


    CB radio: The peak of CB radio occurred around the time I was born. Even in its decline, I remember many road trips from my college days, before we had smart phones and GPS, where a CB helped me pass the miles and stay out of trouble with the law. But that was decades ago, and after finally adding a CB to my new truck, it’s really sad how silent the airwaves have become today.


    And on that positive note, here are the details of my CB install. I chose the Midland 75-822 model because of its versatility and portability. It basically functions like an oversized CB mic that plugs directly into your antenna cable, but it also comes with a battery pack and whip antenna so you can convert it to a handheld radio. The thought of grabbing the battery pack and hopping out of the cab to help spot another driver, or to explore a side spur on foot, appeals to my delusions of someday having friends to go off-roading with.


    This radio hasn’t seen a lot of use, but seems to work well. My only gripe was with the backlighting, which I later fixed. The setup comprises:

    • Midland 75-822 CB radio
    • A 12V cigar socket added to my center console
    • A mic hanger added to my console, by the A/C controls.
    • A run of RG223 coax cable to the rear bedside, chosen for its silver plating, double braid, and abundance in the scrap pile in my garage.
    • A Firestik FireStik MK-204A “door jamb” antenna mount, secured to bedside with (3) #8-32 screws.
    • A Firestik SS-3H spring base
    • A 4’ Firestik Firefly whip antenna
    • UHF crimp/solder UHF connectors as needed (MPD Digital)


    Here are the final SWR and power readings. “Down” and “Up” refer to the state of the soft topper.

    CB tune.jpg

    Here is a shot of the cabling and connectors I used for both radios. A selling point for these MPD Digital connectors is – and I quote – they’re “NOT made in Communist China.”

    connector crimp.jpg

    I can confirm that these connectors are top quality, and didn’t taste even slightly of communism.


    One-year update: Both radios continue to work well. The antenna mounts are holding strong too. I have to remove both antennas before going into parking ramps, but other than that, they see a lot of abuse on the trail. The Firestik CB whip is indestructible thanks to its spring base, but I’ve twice broken the Browning VHF/UHF antenna just above its base. I can’t find a better VHF/UHF antenna to replace it, so for now, I’m okay with buying a new one once or twice a year. I just wish they sold replacement whips!
     
    Last edited: Apr 23, 2020
  5. Sep 6, 2018 at 3:59 PM
    #5
    mk5

    mk5 [OP] Probably wrong about this

    Joined:
    Mar 15, 2018
    Member:
    #247373
    Messages:
    1,293
    Gender:
    Male
    SoCal
    Vehicle:
    '05 access cab 4x4
    New Android head unit: ATOTO A6

    atoto1.jpg

    More to come...
     
    Last edited: Sep 6, 2018
  6. Sep 6, 2018 at 4:00 PM
    #6
    mk5

    mk5 [OP] Probably wrong about this

    Joined:
    Mar 15, 2018
    Member:
    #247373
    Messages:
    1,293
    Gender:
    Male
    SoCal
    Vehicle:
    '05 access cab 4x4
    Raising the seats

    So, I decided that I need more space for activities under the seats. Also, I'm short and these trucks don't have a height adjustment on the seat. Here is what I did to raise both seats by about 1.5 inches. Do this at your own risk. Seats are critical safety equipment.

    In short, I made these spacers that go under the seat rail attachment points:

    spacers.jpg

    The rear spacers are simple bushings made from 1.5" diameter aluminum rod. Luckily, I had just picked up a band saw, which made this easier.

    saw.jpg

    I did the drivers side first, and made them ~1" long. After confirming that the design worked, I made the passenger side even taller, ~1.5", to give a little more space for my subwoofer.

    lathe.jpg

    I drilled the center hole for a tight clearance fit, and I used 50mm long (60mm pass. side), M10x1.25 alloy steel screws to hold the seats down (adding washers under the screw heads as appropriate). I left the aluminum bare, since it had shined up nicely in the lathe. The spacers are mostly covered by the floor mats, which don't sit totally flat any more... but if you're sitting in the back seat of an access cab, then uneven floor mats aren't going to be your biggest source of discomfort.

    The front spacer is a bit more complicated. I made it from 1" square steel tubing. The strongest piece I could find was 0.12" wall thickness from 46,000 psi steel. Here's the basic design:

    spacer_drawings.jpg

    These raise the front of the seat rails by ~1.5". The 45 degree cut is so that you can screw the spacer into the original threaded hole under the seat, through the 10mm clearance hole. (As you can see above, I had to extend this cut on the gray pair of the spacers, so that the bolt would fit... but I think I messed up the angle of the cut on those?) The tapped hole on the top side (M10x1.25) is the new mounting point for the seat rail, and the slot on the back side is for the pin sticking out from the bottom of the seat rail. That pin is just a bit too long to fit in the tube without this relief cut.

    milling.jpg

    Here is the front spacer installed in the truck -- you can see the pin I'm talking about:

    spacer.jpg

    The front spacers got cleaned and primed, then bolted in place with 16 mm long M10x1.25 alloy steel screws. All the screws here are 170,000 PSI high-strength steel, and I trust the design to hold as well as the original with respect to front or rear collisions. I ever get more time, I plan to weld in a reinforcement between the spacers, with flush clearance holes for the seat pins, to restore more of the side-impact strength of the original seat configuration.


    Edit 7/2019: I saw someone is selling machined aluminum seat spacers here. I don't know for sure, but it looks like that's a better design, since it engages the seat pins as well as the mounting screws.
     
    Last edited: Jul 8, 2019
    TacomArizona and loginfailed like this.
  7. Sep 6, 2018 at 4:00 PM
    #7
    mk5

    mk5 [OP] Probably wrong about this

    Joined:
    Mar 15, 2018
    Member:
    #247373
    Messages:
    1,293
    Gender:
    Male
    SoCal
    Vehicle:
    '05 access cab 4x4
    Subwoofer!

    I fit a 10" subwoofer under my passenger seat. Here are some highlights from that project.

    Goal: Get clean, deep bass, without giving up any seat or storage space.

    Step 1: Select driver with largest swept volume I could afford (diameter^2 * xmax), that still had a chance of fitting under the seat. Went with JBL WS1000.

    Step 2: Fabricate an enclosure as large as possible for the space available. Went with 1/2" MDF. There are no parallel faces to this enclosure.

    Step 3: Design an active crossover to correct for the fact that this enclosure is still way too small for the speaker. Conveniently I had a PCB leftover from using this approach for a HT sub back in college. I think it's the first PCB I ever made.

    To make it fit, I had to raise the seat by about 1.5" (see post above), then modify the seat by twisting the cross brace bar out of the way, relocating the SRS wiring, and some other stuff. It finally fit, but I did lose a few inches of forward seat travel.

    The sub is powered by a 500W RMS amp under the other seat.

    box.jpg

    sub2.jpg

    sub_fit.jpg

    seat.jpg

    sub_brackets.jpg

    sub.jpg

    LT_calc.jpg
    lt1.jpg

    lt2.jpg

    It is not particularly loud, does not rattle windows, and definitely won't win any idiot deafness contests. But it makes disturbingly low sounds at reasonable listening levels, which is exactly what I had hoped for.
     
    Last edited: Apr 23, 2020
    dpanibratets and DetroitDarin like this.
  8. Sep 6, 2018 at 4:01 PM
    #8
    mk5

    mk5 [OP] Probably wrong about this

    Joined:
    Mar 15, 2018
    Member:
    #247373
    Messages:
    1,293
    Gender:
    Male
    SoCal
    Vehicle:
    '05 access cab 4x4
    Winch!

    I've never had a winch before. I decided that the $300, 9500lb one from Smittybilt should meet all my needs, since I'll probably never need a winch, because I only ever drive to shopping malls on paved roads anyway.

    But then, I read about synthetic rope, and how it is lighter and easier to work with. And I knew that if I didn't buy the synthetic version now, that I'd be buying synthetic rope in a few months, and then I'd have 100 feet of steel rope in my garage for the rest of my life.

    So, like I said, I had decided on the $480, 9500 lbs synthetic-rope winch.

    And then I saw they had a wireless version with supposedly improved water resistance and slightly increased weight capacity. And I knew that if I didn't get a wireless controller, that I'd soon spend 20 hours hard-wiring an in-cab winch controller for my truck.

    So, like I said, I had decided on the $550, 10,000 lbs, wireless synthetic-rope winch.

    winch_box.jpg
    So then it was time to remove the front bumper. Which, it turns out, is heavy as my favorite four-letter word. An improvised system of rope, pulleys and jacks did the trick:
    winch_install_1.jpg

    Luckily, it seems that the form factors of winches and bumpers have been well-standardized. Or at least, the mounting holes lined up in my case. But unluckily, my LED bar sticks well into the space that I now need for the winch:
    winch_install_2.jpg
    What should I do? Should I be a reasonable person and realize that I can't have both a winch and a super-huge light bar in my bumper at the same time?

    Of course not! I want both the winch AND the LED bar! WHY CAN"T I HAVE THEM BOTH?!!1!!?

    iwantitall.jpg
    Um, I stole that picture by the way. Sorry, internet people.

    Anyway....

    So logically, I decided to hack away a majority of the heatsink on the LED bar and hope for the best. More specifically, I'll hope that it doesn't overheat and self-destruct, or melt the synthetic rope spooled only millimeters away. But the good news is, I'm good at both destroying things, and yet somehow still hoping for the best.

    this_was_loud.jpg
    With a hacksaw and a milling machine, I carefully cut away the LED heatsink. What I can tell you is that this was the most terrible noise I've ever generated in my life. And I say this knowing that in the past, I have tried playing both the accordion and the banjo. Yet today's noise was somehow even worse.

    Now I've eliminated much of the LED heatsink, as well as any remaining shred of patience or goodwill my neighbors might have once harbored for me. But at long last, the LED and the winch both fit within my bumper:
    winch_fit.jpg

    After another quick 20 hours of pointlessly fabricating brackets before realizing the the factory-provided solenoid mounts would work best, I had completed the rough install of the winch:
    winch_first_done.jpg

    After the initial install, I revisited the winch a couple weeks later to:
    1. Replace the original fairlead with a $20 black-anodized one from Amazon.
    2. Properly spool the rope
    3. Install a battery cutoff switch so that the winch isn't powered at all times.

    Here is a final picture of the install:
    trail.jpg
    I've wrapped the last foot of the rope in electrical tape for now, to protect it from sunlight damage. But I'm hoping to find something better in the long run.

    Quick edit: Prior to install, I weighed all the winch components with my luggage scale (winch, solenoid, rope, fairlead, wire, and hardware bag). It totaled ~55 lbs.

    2020 update: It turns out I don't need a winch as much as I thought I would. When I used to live in Colorado, it seems I was always getting stuck at the bottom of obstacles with nice winch points at the top, but my old truck didn't have a winch. Now, I live in SoCal, and so far, my adventures haven't taken me anywhere where having a winch is relevant.

    2021 update: Still haven't ever used the winch! I got damn close the other week, but while I was digging out the controller, a Jeep showed up and offered to tug me out from a better direction. I guess I'm just a poser tool. But fuck, it looks overland af at the shopping mall!

    jeep pull.jpg
     
    Last edited: Jul 18, 2021
    dpanibratets, SIZZLE and loginfailed like this.
  9. Sep 6, 2018 at 4:01 PM
    #9
    mk5

    mk5 [OP] Probably wrong about this

    Joined:
    Mar 15, 2018
    Member:
    #247373
    Messages:
    1,293
    Gender:
    Male
    SoCal
    Vehicle:
    '05 access cab 4x4
    Something to replace the fog lights...

    Because this truck had an aftermarket bumper, there were no longer any fog lights. I decided to re-purpose the foglight circuit to add some side-facing offroad lights.

    I tried 4 different brands of "cheap" LED off-road lights from Amazon. Of course, none of them performed even close to their rated specs, and some of them were total crap. Here is a summary:
    Selecting the linear trough style lights, I proceeded to waterproof them by disassembling and reassembling with RTV silicone, then I applied yellow tint film to match the front LED bar. Then I spliced them to the appropriate connectors, and mounted them to the front corners of my truck, right below the wheel flares:

    side_light.jpg

    I had to use the mounting hardware from one of the other lights to get the angle right -- the included hardware wouldn't pivot far enough. I also replaced all the screws and nuts with stainless steel ones. Most of the "stainless" hardware in cheap Chinese stuff is fake, or at least of an inferior grade for automotive exterior.

    Here are the connectors I had to buy to match the original fog light wiring: PartsSquare Extension Wiring Plug Socket Connectors Female Male Adapter For HB3 9005 H10PartsSquare Extension Wiring Plug Socket Connectors Female Male Adapter For HB3 9005 H10

    Here is the yellow film: LinkedGo 12 by 48 Inches Self Adhesive Headlights or Fog Taillight Tint Vinyl Film (Golden Yellow)

    Overall I like these lights. They shine bright to about 90 degrees to either side of my truck. Sometimes I wish they went even further back, so maybe I'll try different ones someday. One downside is that they're not true foglights -- so they can't be used on the road. I have to be careful to turn them off during the day -- since they turn off with the ignition power, it's easy to inadvertently leave them turned on from the night before.

    Per usual, I spent a lot more time and money evaluating my options here. But this is a mod you can do for ~$35 and less than 1 hour of time if you have an unused factory fog light circuit from an aftermarket bumper installation.


    Here is a view in action -- including both the front and the side LEDs:
    led_lights.jpg
     
    Last edited: Nov 12, 2018
  10. Sep 6, 2018 at 4:02 PM
    #10
    mk5

    mk5 [OP] Probably wrong about this

    Joined:
    Mar 15, 2018
    Member:
    #247373
    Messages:
    1,293
    Gender:
    Male
    SoCal
    Vehicle:
    '05 access cab 4x4
    Let there be light!

    side.jpg

    I can't believe that, in the 21st century, vehicles are still being sold with weak-ass dome lights as the sole source of cabin/proximity lighting
    .

    I grew up being whisked around in six-thousand-pound 1970's cars, by people who had watched the moon landings on live TV. When you opened the door on those cars, every square inch of their plush velvety interior, plus several square feet of curbside proximity, were basked in the warm glow of incandescent light. And glorious American Freedom. And second-hand cigarette smoke. It was a different time.

    Anyway, this type of illumination was called courtesy lighting, and although my attention at the time was likely consumed by roaming the back seat unconstrained and trying to get truckers to blow their air horns, I foolishly took for granted this standard of lighting technology as a basic and permanent achievement of humankind -- like voting or vaccinations or whatever.

    Also, we all expected people to be walking on Mars by the end of the century.

    But flash forward like 35 years. My hair is gray and thinning. I've never once gotten to watch people walk on the moon on live TV, and the notion of a Mars landing is more laughable than ever. Just within this century, not only have we we retired our only manned space launch vehicle, but we've spent more effort bickering over its replacement than actually replacing it. And thanks to social media, our premiere private- and public-sector spaceflight organizations both answer to self-centered billionaire ass-clowns instead of, you know, the kind of competent leadership that once put people on the moon using slide rules, coffee, and cigarettes.

    And as if the big picture isn't bad enough... I'm two months into owning a 14-year-old pickup truck--the best I could afford--and I'm searching in pitch-ass-darkness for the chapstick I think I dropped on the floor, wondering what the hell ever happened to the American Dream.

    I don't know exactly where our culture strayed from its righteous path to the fusion-powered flying-car utopia promised to my childhood, but if nothing else, I can sure-as-hell add enough lights to this truck to rival cold-war-era courtesy lighting standards.

    So here's that project...


    Under hood lighting. Toyota clearly designs these trucks for their primary customer base: cash-strapped jihadists that rarely have the know-how or life span to poke around under the hood. Between the holy wars, the non-stop raping of the innocent, and the inbound Hellfire missiles, who can spare four bucks for a light that'll never get used, right?

    Meanwhile, here in America, our real trucks have always had light bulbs under the hood that light up when you raise it, so you can see the part of the truck that goes "vroom," even at night. How else y'all think Paul Revere jumped his Chevy over the redcoats in '76?

    hood_lts.jpg

    Anyway, every non-jihadist truck should have lights under the hood. My approach uses about 3' of self-adhesive silicone-encapsulated LED strip lighting, secured on both ends with a screw clamp (because adhesive can't be trusted in the long run... just like the redcoats). It's controlled directly by a magnetic reed switch on the driver's side hinge. You can buy these on eBay (more details below). The magnets they come with are mostly useless, unless you can ensure perfect alignment of the switch and its magnet on a planar surface. I sourced more powerful magnets from McMaster Carr, which actuate these switches more reliably, and from greater distances. I also added a 4-hour timeout circuit so I don't drain the battery if I leave the hood up for days on end (more on that in a future post).

    Here is a photo showing the LED strip and one of the screw clamps. I drilled into the hood support and tapped for #8-32 here. I used silicone and heat shrink tubing on the wire splices, and expandable wire sleeve to protect the wire:

    hood_lts2.jpg

    Below is a photo of the reed switch setup. I have an adhesive magnet installed on the bottom of the upper hinge, and a normally closed reed switch screwed to the sheet metal directly below it. For convenience, I also have a loose magnet on top of the hinge tab, so if I want the hood light to stay off, I can grab this magnet and set it somewhere near to the reed switch to temporarily disable the light.

    reed.jpg

    This switch is wired in series with the LED lights, which is the normal way for wiring light switches. For the lights to come on, the switch needs to be "closed," so that current can flow from the battery, through the switch, through the LEDs, and back to the other side of the battery. When the hood is closed, or in other words, the magnet is near the reed switch, we need the switch to become "open," to stop the current flow and turn off the lights.

    This leads to a counteractive terminology for the kind of switch you need to buy for this application. It is tempting to think, because your hood is normally closed, and you want the lights to be off (switch open) when the hood is closed, that you would want a "normally open" style of switch.

    But this is wrong. The folks that make these switches define "normal" as "the magnet is far away from the switch." Which means for our hood lights (or glovebox, console box, etc.), our situation is normally abnormal, and you need to buy a normally closed switch.


    One further word of caution: Don't go overboard with the permanent magnet(s). If you subject your reed switch to extreme magnetic fields, it might become self-magnetized (or de-magnetized?), and remain either always-on or always-off forever. You will probably need stronger magnets than those supplied with the reed switches, but if you go straight to the largest, most powerful magnets you can fit on your actuator surface, you might quickly destroy the reed switches. Learn from my mistakes, and use the weakest magnet that reliably triggers the switch.

    2022 Update: Don't buy reed switches on Amazon or eBay. They all fucking suck. And half of them are sold under the wrong polarity. I kept replacing failed switches and adjusting magnets, until I finally ordered non-shitty switches from Digi-Key. They work perfectly now.

    Under body LED courtesy lighting.

    A lot of folks add a handful of individual LED "rock lights" for under-body light sources, but I wanted to try something different. I went again with LED strip lighting, encased in an aluminum / plastic housing, running from wheel-well to wheel-well above the sliders on either side of the truck. I also added some lights below the rear bumper to illuminate the tailgate area:

    under_lights.jpg

    An advantage of strip lighting vs. using a few brighter LEDs is you don't have much shadowing to deal with, and there is a lot less glare. Also, I was able to source strip lights in "warm white" coloring, which is pleasant for human vision in low-light situations, as compared to "cool white" LED lights, which appeal only to drug addicts and communists.

    LED-strips.jpg

    I started with non-encapsulated warm-white LED strip tape. I tried a few different brands to find the right combination of brightness, current consumption, and color -- ultimately going with one of the dimmer options because having almost 80" of strip length on each side of the truck still gives me plenty of light, and I don't want to overload the dome light circuitry. I also bought the 90-degree aluminum enclosure strips (with plastic lenses) commonly sold for this style of lighting. Those come in 1-meter lengths. I attached two of these together with a scrap of aluminum angle with screws and tapped holes, then sealed it all with RTV:

    bars_join.jpg

    Next, I stuck down the LED strip lighting at the bottom of each channel, drilled wring holes in the plastic end caps for each rail, and soldered pigtails of 2-conductor 18-gauge wire to each. Finally, I filled each channel with polydimethylsiloxane (PDMS), a two-part silicone encapsulant:

    led bars 4.jpg

    In this particular case, I used Dow Corning 93-500 space-grade silicone encapsulant, of which I happened to have a few pounds sitting in my garage as a result of having worked at a startup company that abruptly went out of business. By now it was expired and worthless, but to buy it new would cost a few thousand dollars! This isn't an attempt to brag about using the world's most ridiculously expensive silicone for this old pickup truck -- what I really wish is that my company hadn't folded up and left me jobless. But it is what it is, and I got some degree of pleasure imagining this was probably the only time someone had ever mixed up a batch of 93-500 in an empty Coors Light can:

    led bars 3.jpg

    Normally, next, you would put the parts in a vacuum oven to eliminate all the little air bubbles from the PDMS, and heat at 80 degrees C for a rapid cure. But my garage is fresh out of two-meter-long vacuum ovens, so I just left them on my workbench for a few days to cure, during which time about 1/3 of the material oozed out onto the floor, even though I had already RTVed and taped the heck out of everything. But the LEDs are fully encapsulated, and once it finally hardened, I'm left with some pretty rugged LED light bars that will stand up to road spray and dust for many years to come. And I'll never have to worry about this silicone yellowing over time.

    clips.jpg

    I wanted to mount these just above the rock slider supports, to illuminate as large an area as possible, while remaining generally protected from trail damage. But with welded-on sliders, I couldn't exactly drill and tap holes on the top side of each support arm, and I wasn't quite sure where the LED bars should go to give the best illumination anyway. So instead, I came up with a clamp-on solution using tool holder clamps that perfectly fit the slider arms, sourced from McMaster Carr.

    clips2.jpg

    There are three of these clamps supporting each LED bar along the length of the sliders. Even if rocks or trail debris were to poke the LEDs between the sliders and frame, they can pop up and out of the way before they break. And in 18 months of intermittent off-roading, none of these have ever come loose. I did add zip ties to keep the bars in their clips, though.

    smaller_bars.jpg

    Finally, I made a 3-segment set of LED bars to mount under the rear bumper and hitch, to illuminate the spare tire and tailgate areas. Those at least fit in my toaster oven for a faster cure!

    rear.jpg

    These tailgate lights run through some special circuitry, so that they turn on with any of the following:
    • Dome lights / key fob
    • Bed lights
    • Reverse lights
    • PIR motion sensor in back bumper (although this has since stopped working)
    Since the tailgate light controller circuit lives in a rather exposed area above the rear wheel well, I put it in a spare plastic bottle and filled that with the leftover PDMS, so now it is totally weatherproof. However, and especially because I put a blinking red light on the circuit board, it looks like something you definitely wouldn't want to try bringing through airport security...

    combiner2.jpg


    Dome light. I have seen a number of LED dome light products promoted on this forum. My approach was to add several rows of LED strip lights to the dome light fixture, and remove the incandescent bulb. This is also where I spliced into the dome light circuit, for lighting up the rest of the lights I'm describing here.

    dome.jpg

    Map lights. At the rear edge of each map light, I added a row of LED lights that operate in unison with the dome lights. They are glued right inside the lenses. This gives me much better forward-cab illumination. Perhaps too much. But I like it. Behind the LED strips, the incandescent map lights still operate independently, and are less obnoxious while driving since the LED tape blocks the portion that shines straight at your eyes.

    map.jpg


    Courtesy lights should be mandated by law to be installed in the footwells on both sides of all cars, since that's where we are constantly dropping our phones between text messages. I chose to use short lengths of the same LED strip lights for this role, again mounted in aluminum housing. Both operate in unison with the dome lights:

    drivers.jpg

    pass.jpg

    I also wanted to get some lighting on the rear seat floorboards, so I opted to install a LED strip across the rear base of the console:

    bs2.jpg

    This one hasn't been as successful. Even with a layer of frosted plastic over the LEDs, it doesn't cast much light into either footwell. It also tends to get blocked by items placed between the back seats. Finally, even though I tried to put it on the down-facing surface of the uppermost air vent, it still tends to create a lot of glare. I should have located these on the sides of the console, below seat level, where they would get more light onto the floorboards without shining directly at your eyes.


    Glove box: Here, I used a momentary pushbutton rather than a magnetic reed switch, and a 30-minute timeout circuit. You can see the pushbutton to the left of the door. Like the reed switches, it is "normally closed," and I got it on eBay.

    glove.jpg


    Console: To actuate this one, I hid a reed switch beneath the front lip of the console box, then glued a thin rare-earth magnet to the base of the door just above it. You can see the magnet on the front edge of the door in the photo below. Once again I used a length of LED strip tape along the whole outboard edge of the console door. It is super bright, but never shines directly in your eyes. And, by moving the door slightly, there is no corner of this cubby you can't light up clear as day.

    console.jpg


    Bed lights: I'll fill in this section someday!

    But basically, rinse and repeat.

    I love lamp.

    bed_lts_1.jpg
    (Here's where I put the switch)


    bed_lts_2.jpg


    Conclusion: I really like having a well-lit truck, both around town and on the trail. Using warm-white LED strips yields illumination that is pleasant, bright, and uniform, and it definitely minimizes shadowing and glare.

    My favorite part of this project is the warm glow cast upon the ground whenever I unlock the truck with the key fob. It is as comforting as the sound of Reagan's voice and the smell of grandma's cigarettes.

    Perhaps the biggest drawbacks are that it's somewhat conspicuous, and too bright for certain situations. For example, if I'm setting up my telescope at camp, I need to remember to turn off the dome light before my eyes adapt to darkness, otherwise I'll have to start over as soon as I open one of the doors. Also, I can't reasonably operate the dome light while driving at night -- not only would it compromise my view through the windshield, but it would also turn on all the external under-body lighting, which might confuse other motorists. This isn't a huge loss for me, because the map lights remain operational, and are just the right brightness to safely wrangle the next heard of McNuggets down Sweet'n'Sour Trail, through to the Valley of Regrettable Decisions, to my stupid fat face at 3AM.
     
    Last edited: Apr 8, 2022
    This site contains affiliate links for which the site may be compensated.
    #10
  11. Sep 6, 2018 at 4:03 PM
    #11
    mk5

    mk5 [OP] Probably wrong about this

    Joined:
    Mar 15, 2018
    Member:
    #247373
    Messages:
    1,293
    Gender:
    Male
    SoCal
    Vehicle:
    '05 access cab 4x4
    Fixing up the bed for camping...

    As mentioned up top, I still need a functional pickup truck on weekdays, so I have to rule out roof top tents, camper shells, or pop up campers. My current camp setup comprises:

    • DECKED drawer platform for storage and a level sleeping surface
    • A soft topper for shelter
    • Regular sleeping pads and sleeping bags
    • Reinforced tailgate (@RelentlessFabrication aluminum)
    Pros:
    • WAY more comfortable than tent camping.
      • Can sleep through some pretty serious winds.
      • Enables sleeping in... I have to set an alarm to wake up!
    • Can fold back topper on perfect nights for open-air camping.
    • I have electric lights, usb outlets, 110V AC, and other creature comforts in the bed
    • Does not compromise vehicle mobility, height/clearance, or center of mass.
    • The DECKED drawers are rain proof and secure, and hold all my tools and recovery/survival gear, plus the gap at the tailgate gives me the perfect space for (3) 2.5 gallon jerry cans, a fire extinguisher, and a 5lb propane tank.
    • Lots of rain/mud proof storage under the topper.

    Cons:
    • Can't even sit upright.
    • DECKED drawers waste a lot of storage volume beneath the platform, and in my case, offer zero additional space for camp supplies since they're already filled with tools/recovery/survival gear.
    • Not a viable approach for taller people
    • Pain in the ass to convert the bed from storage mode to sleeping quarters every night at camp... and reverse in the morning. Not much time savings vs. tent camping.
    • Dust accumulates in bed in the desert (note: so far I've done nothing to fix this, may be resolved with future efforts)
    • Not photogenic or expensive enough to qualify as overlanding


    bed.jpg

    img1.jpg

    img3.jpg

    camping.jpg

    camping2.jpg
     
    Last edited: Jan 8, 2020
    dpanibratets likes this.
  12. Sep 6, 2018 at 4:24 PM
    #12
    mk5

    mk5 [OP] Probably wrong about this

    Joined:
    Mar 15, 2018
    Member:
    #247373
    Messages:
    1,293
    Gender:
    Male
    SoCal
    Vehicle:
    '05 access cab 4x4
    Revisiting the front: Strengthening the headlight mounts, brightening the headlights, and MORE HORNS!
     
  13. Sep 6, 2018 at 10:35 PM
    #13
    mk5

    mk5 [OP] Probably wrong about this

    Joined:
    Mar 15, 2018
    Member:
    #247373
    Messages:
    1,293
    Gender:
    Male
    SoCal
    Vehicle:
    '05 access cab 4x4
    Product review: ATOTO A6 Android Head Unit

    Overall rating: 4/5. Works pretty well, with several bugs. ATOTO support was lackluster when requested.

    Pros: Inexpensive and runs Android! It does almost everything I had hoped it would.

    Cons: It doesn't do anything particularly well, and is full of frustrating quirks, bugs, or omitted features. Also, it is SLOW compared to a modern smartphone.

    Prices paid (w/o tax or shipping):
    • $244 - ATOTO A6Y2721PB Andriod head unit. Includes GPS and WiFi antennas, and external microphone.
    • $20 - ATOTO OBDII Bluetooth thing
    • $35 - ATOTO AC-44P1 USB dashcam
    Other non-ATOTO items purchased or used with this install:
    I installed everything per instructions with proper technique. I have a strong background in electronics.

    Feature-by-feature review:
    • Radio: Works, reasonable but not great FM/AM reception. Seeking is SLOW and tuning modes are confusing.
    • Media player: I hated the built-in mp3 player, which wouldn't let me find music by folder and filename (which is how I organize it). I used a popular mp3 player from the Play Store instead, and it works great! HOWEVER, if I turn off the car while playing mp3s, it will boot back up to radio mode EVERY TIME. In other words, I get loud static every startup :(
    • Other apps: All my favorite apps seem to work well. I frequently use GPS navigation (Google maps, Waze), offline maps (Backcountry Navigator, PDFMaps, Maps.me), APRSDroid, Pandora, Spotify, Torque, and a GPS dashboard (speed, altitude, etc.) app. The only app that does NOT work on this version of Android is Netflix. But I have an SD card full of classic movies for when I really want to drive distracted.
    • Web, email, and file browsing: Because I have to crank the font size up to HUGE to reliably interact with the UI while driving, the screen size is a bit too small for web browsing and reading. However, voice control works pretty well for getting urgent trivia questions answered, and I found a good email app that can do voice to text and text to voice. A great feature is that I have a ton of PDFs on the SD card, including the complete service manual for the truck, topo maps of the whole US, and a number of references for survival, first aid, radio communications, etc.
    • Voice command: Surprisingly useful. I have it set up so that pressing the "mode" button on my steering wheel brings up the Google voice assistant. It is great for getting directions or making calls 100% distraction free.
    • GPS: Works great, reports better accuracy than my GS9 phone does. Also faster to acquire its position from a cold-start. Plus, now, "find my phone" is actually "find my truck."
    • WiFi: Works great. But I hate having to activate mobile hotspot mode on my phone each time I drive. I have tried several GSM modems and hotspots for this device (all on my AT&T plan) and haven't found anything that works for hands-free, automatic mobile internet. But this is 100% AT&Ts fault for no longer offering a hands-free mobile hotspot option for cars, and I plan on switching carriers when I get the time to research my options.
    • Update: I got a mobile access point from T-Mobile, it costs me only $10/month. Meanwhile, I discovered that AT&T had been charging me $40/month for a whole year for a device that never worked, even though I told them to cancel it when they said it couldn't be activated. Then, they refused to refund me any more than two months of service, leaving me with $400 worth of charges for a device that never transmitted a byte of data on their network. Fuck AT&T.
    • Bluetooth: Works great. No in-motion feature lock-out like OEM infotainment units.* Dual bluetooth is nice -- I can do audio streaming from my phone and read OBDII at the same time. However, you can't hook up two phones at the same time. Most crucially, call audio quality is mediocre even with the ATOTO microphone mounted at the top of my A pillar. It works, but people often have trouble understanding me.
    • Dashcam: Only works at "low" resolution, which offers image quality on par with a cheap dashcam of 5+ years ago. It provides clear views of vehicles, but not license plates. It has poor night vision due to apparently poor thermal management: It has a nice crisp image at start-up, but after several minutes, the image washes out due to rising dark noise on the sensor.
    • Backup camera: The unit takes a single backup camera signal and trigger input. I have tried two cameras on my truck, and both work but not perfectly. Sometimes, the image freezes or cuts out, then the screen displays "No Siganl" (sic). I checked the signals on a scope during these events and found them to be within NTSC spec. So it appears the ATOTO unit is either buggy or needs an abnormally strong camera signal. I have both cameras wired now with an external selector switch/relay. They both work a majority of the time, but sometimes the backup camera just won't work right when I really need it!
    • TV tuner: There are no ATSC tuners available for this product line via it's tuner interface. Only DVB, which will not work in the U.S. I will agree that having a TV in your car is stupid, but I've wanted one ever since I saw the movie "Wayne's World," which features a limousine with a TV which was pretty mind blowing by 90s standards. So, I took one of my old "set top box" ATSC tuners and plumbed it to the "AUX IN" ports on the back of this unit. I also installed a UHF antenna along the top of my windshield, threw together a 5V power supply, and ran a fiberoptic cable from the front of the dash to the tuner hidden behind it, so that the remote would work. Believe it or not, it works, I can watch TV in my truck. And now that I've accomplished that, I'll probably never ever use it again -- broadcast TV is unbearable to watch!
    • OBDII: Works well with Torque. I can get realtime ECU data as I drive, plus I can read and clear codes. I don't necessarily trust Chinese-made consumer electronics with full-time access to my truck's CAN bus, so I keep this part unplugged except when I'm using it.
    • Steering wheel controls: Works great using the Metra 70-8114 harness only. I didn't need the other METRA "universal" thing for my 2005 truck. I was pleased to find that all 5 buttons work, even though I know my clockspring isn't working for cruise control.
    • Headlight dimmer: Works, display automatically dims when the headlights come on. You can also manually dim it from the front panel. Buttons don't appear to dim, though, but are at a reasonable brightness for night driving.
    • Display: Pretty low-resolution by modern smartphone standards (i.e., difficult for web browsing), but it is good enough for an in-dash display. It is bright enough to be seen except in direct sunlight, and dims enough so as not to blind you at night. Touch screens are really difficult to use while driving, but we already knew that. Update: A bluetooth keyboard is a great add-on for this setup.
    • Audio: OK, but not great. I notice a lot of distortion at higher volumes. There's also no high-pass option for the speaker outputs, meaning it's wasting a lot of its output power delivering bass to the full-range speakers, which are very inefficient at these frequencies. Since I have a separate powered subwoofer, I wish I could filter out the lowest bass from the main speakers. Also, the equalizer is nice but there doesn't seem to be a way to save your custom equalizer settings. For these reasons, I bought an Alpine amplifier and will be re-wiring the system so that I'm not relying on the power amplifiers in the ATOTO unit.
    Other frustrations that could be easily fixed through software improvements (hint, hint, ATOTO):
    • You can't adjust the volume of the subwoofer relative to the speakers. You can only turn it on or off, or adjust it's absolute volume (which means that it no longer tracks the system volume at all). So most installations will require an external sub volume control, or at least access to the level knob on the amp.
    • Sometimes, the subwoofer output will stop working for some audio sources (e.g., mp3). It appears that there are multiple audio output streams, and only one of them goes through the EQ and the subwoofer out. Toggling between sources seems to fix this.
    • It ALWAYS returns to playing the radio when I start the car, even if I was listening to mp3s or bluetooth before turning it off.
    • Volume controls are locked out during backup camera mode. So if I start the truck and throw it into reverse in a hurry, I can't mute the deafening static that comes on 2 seconds later unless I shift out of reverse. Annoying.
    • You can choose the color of the buttons, but only between a handful of values. So you can make them red, but not orange. They also don't dim.
    • You can't change the volume quickly because there's no knob. OK, I get it, there's not space for a knob. But even if you press and hold the buttons, the volume still changes very slowly. Or, if you press the buttons repeatedly as fast as you can, it starts skipping some of the presses.
      • Why not offer an add-on knob accessory for this product line? A volume knob is, has been, and will always be, the best way for humans to adjust the volume of our music. Not buttons. Not touchscreens.
      • I tried to make my own volume knob for this using a rotary encoder and a microcontroller, via the resistive interface for steering wheel controls. (Yes, I am a very stubborn person). It didn't work because the ATOTO unit only processes resistive inputs at a rate of about 2 Hz -- that is, it only allows two volume 'clicks' per second. Any faster and it will ignore the inputs. So, my microcontroller had to buffer the volume commands for up to several seconds, making the knob useless and infuriating to use.

    *Note that I didn't connect the "parking brake" signal line, which is designed to lock out some features while in motion. I will never buy a car that blocks certain features while in motion, or if I do, its infotainment will go straight in the garbage. If I want to pair my phone while eating a cheeseburger and watching movies at 75 miles an hour, that's my god damned right as a Free American.


    Christmas 2020 update: I replaced this with a 10" Joying unit which is generally better in all regards, but still not perfect.
     
    Last edited: Dec 4, 2022
  14. Sep 7, 2018 at 4:57 AM
    #14
    mk5

    mk5 [OP] Probably wrong about this

    Joined:
    Mar 15, 2018
    Member:
    #247373
    Messages:
    1,293
    Gender:
    Male
    SoCal
    Vehicle:
    '05 access cab 4x4
    A rant about aluminum wire and why nobody should use it.

    More to come!
     
    Last edited: Sep 8, 2018
  15. Sep 15, 2018 at 3:59 AM
    #15
    mk5

    mk5 [OP] Probably wrong about this

    Joined:
    Mar 15, 2018
    Member:
    #247373
    Messages:
    1,293
    Gender:
    Male
    SoCal
    Vehicle:
    '05 access cab 4x4
    Hacking the Midland 75-822 CB radio so the stupid backlight stays on.

    As we previously established, I am usually alone on the trail and have no use for a CB radio. And, it seems that the truckers no longer use CB any more. So naturally, I decided to mod my unused CB radio so that the damn backlight stays on all the time.
    start.jpg

    This mod will cause the LED backlights on the Midland 75-822 to turn on at all times whenever the radio is on.
    For a hybrid handheld/mobile CB radio, the Midland 75-822 got a lot of things right, including price point and form factor. But one thing they screwed up is the display lighting. It has a backlight, but you have to press a button to turn it on, and even then, it only stays on for a few seconds. How am I supposed to know what channel I'm tuned to while driving alone in silence at night? I mean, what if I was inadvertently on the wrong channel, and I missed out on the only contact I might ever make on CB in the 21st century?

    So I drank a few beers and took the stupid thing apart.

    1.jpg

    Like most of the things I've taken apart after drinking, this radio was full of parts. Lots and lots of parts.

    2.jpg
    Having removed the shell, I next desoldered the antenna BNC center conductor and unscrewed the BNC/dial nuts, so that I could remove the upper cover. Then I had another beer.

    3.jpg
    Now I could pull apart the two circuit boards, to reveal... yep, more parts. At some point the coax broke away from one of the boards, saving me the trouble of desoldering it. And I think some of the speaker wires also came off, and then my cat ran off with some of the screws. I'm just really good at taking stuff apart--ask my wife.

    Ok, so, if you want the lights in your Midland 75-822 to stay on, this is all the further you need to disassemble your radio. Do NOT remove the LCD like I did:
    4.jpgRepeat: Do NOT remove the LCD. It is a pain to re-attach correctly. (Ask me how I know.) Only remove the LCD if you want to replace the LEDs with different colored ones. (Note: The LEDs are the two white rectangles in the white area of the PCB above.) I might have preferred orange LEDs, but by this point I was pretty sure I had permanently destroyed the radio, so I decided not to mess with the LED color. Simply having access to the LED terminals was enough to help me find the transistor responsible for their operation.

    Wait, where'd I put my beer?

    OK, *hiccup* this is the thing we're going to, uh, solder the stuff for:
    5.jpg

    The LED turn-on transistor is a standard N-channel FET. I found a picture from the internet, it says "SOT-23," whatever that means. By shorting the source to the drain (in this case, with a bent piece of wire soldered to each pin), you can turn on the LEDs at all times. Think of the source as your bank account, and the drain as your Tacoma. By connecting one to the other, you can maintain an uninterrupted flow of... wait, what was I saying? I'm going to grab another beer--want one?

    diagram.jpg

    While I was in there, I also decided to make the LEDs brighter. Because I'm a Free American, that's why. You got a problem with that?

    So... it looks like I slapped a 1.2 kOhm resistor atop one of the 2.4ks on each side, to (approximately) double the LED current. Doing this produces an increase in brightness that is nearly indistinguishable to the human eye, while also wasting time and somehow causing me to get blood all over my resistor kit.

    6.jpg
    I'm not exactly sure how I put the damn thing back together, but based on my injuries, I think it took several tries.

    After I finished putting the radio back together, I ran out to my truck to try it out. Sure enough, nobody uses CB at 4AM (or ever?), and I pretty quickly lost interest. But I'll be damned if the thing didn't light up the whole time.
     
    Skada and loginfailed like this.
  16. Sep 15, 2018 at 7:07 AM
    #16
    loginfailed

    loginfailed Well-Known Member

    Joined:
    Aug 29, 2016
    Member:
    #195923
    Messages:
    5,156
    Gender:
    Male
    First Name:
    Dwayne
    Houston, TX
    Vehicle:
    2014 DCSB 4WD
    I also do little mods to electrical stuff. Manufacturers sometimes hit home runs overall and then completely drop the ball on some small detail.

    :thumbsup:
     
    mk5[QUOTED][OP] likes this.
  17. Oct 9, 2018 at 3:51 PM
    #17
    mk5

    mk5 [OP] Probably wrong about this

    Joined:
    Mar 15, 2018
    Member:
    #247373
    Messages:
    1,293
    Gender:
    Male
    SoCal
    Vehicle:
    '05 access cab 4x4
    Camping out by Old Dale... on a clear moonless night. The stars were amazing.

    camping.jpg

    mine.jpg

    Saturn.jpg
     
    Last edited: Nov 27, 2019
  18. Oct 9, 2018 at 6:18 PM
    #18
    mk5

    mk5 [OP] Probably wrong about this

    Joined:
    Mar 15, 2018
    Member:
    #247373
    Messages:
    1,293
    Gender:
    Male
    SoCal
    Vehicle:
    '05 access cab 4x4
    Crap!!!

    P0333.jpg

    What kind of ass-clown idiot makes car wiring out of rodent food?

    Answer:
    Toyota, apparently.


    Update: I would eventually deal with this problem during the head gasket job.
     
    Last edited: Dec 30, 2019
  19. Jan 18, 2019 at 3:39 PM
    #19
    TacomArizona

    TacomArizona Well-Known Member

    Joined:
    Feb 16, 2016
    Member:
    #178389
    Messages:
    88
    Gender:
    Male
    Vehicle:
    15' ACOR 2wd 4.0
    How has the seat raising MOD been?
     
    Last edited: Jan 20, 2019
  20. Mar 16, 2019 at 11:53 PM
    #20
    mk5

    mk5 [OP] Probably wrong about this

    Joined:
    Mar 15, 2018
    Member:
    #247373
    Messages:
    1,293
    Gender:
    Male
    SoCal
    Vehicle:
    '05 access cab 4x4
    Light timer circuit.

    So last year I spent all this time adding lights all over my truck.

    For example, the glove box and the console:
    glove.jpg console.jpg

    And also under the hood and the bed rails.

    It turns out that, even though I used LEDs for all of these, this still presents a risk to drain your battery by leaving the lights on all the time. For example...

    I used cheapo Chinese reed switches for several of these lights in my truck. These are essentially magnet-controlled switches, and I put them on one side of the door/hood/lid with a magnet glued to the opposing surface to automatically turn on the lights on and off in these various places. Long story short, two of these switches failed, leaving the lights stuck on all the time.

    Also, in an unrelated third case, I accidentally switched on the bed lights during the day and didn't notice, then went out of town for a week, and that also killed my battery.


    I replaced the failed reed switches, but clearly I needed something to prevent a “light switch left on” situation from becoming a “dead battery” situation.


    So I made a little circuit that uses an LTC6995-1 timer with a relay to function as an auto-off timer for all the extra lights I’ve added to my truck. I just wire it in line with the light, like this:
    diagram.jpg

    Here it is in testing:
    timer1.jpg

    It’s not the cheapest circuit I’ve ever designed, but it was easy, and I had most of the parts on hand as surplus. The things I really like about this design include:

    1. Using an SSR (pictured), it can switch up to 2A current, and it only adds about 5mA to the load current when it’s on.

    2. Using a mechanical relay, it can switch up to 10A current, and only adds about 20mA to the load current when it’s on.

    3. After it turns off, it draws less than 1 mA, which is negligible for a car battery. And if I removed the diagnostic LEDs on the board, it would draw <0.02 mA.

    4. It doesn’t need constant 12V or constant ground to work. It just gets wired in line with the light, so it works whether the light is switched on the high side or the low side. (But it won’t work with PWM… at least not without modification.)

    5. To reset the timer, just close the door for a moment.

    The hood and bed lights have a 4-hour timeout, whereas the glove box and console lights have a 30-minute timeout. Even if the reed switches fail again, I won’t have a dead battery!

    Here’s one of the circuits ready for installation in the hood. I potted the circuit in RTV silicone with heatshrink, then wrapped it in split loom.
    timer2.jpg

    After half a year in service, and they seem to work great!
     
    Last edited: Nov 27, 2019

Products Discussed in

To Top