1. Welcome to Tacoma World!

    You are currently viewing as a guest! To get full-access, you need to register for a FREE account.

    As a registered member, you’ll be able to:
    • Participate in all Tacoma discussion topics
    • Communicate privately with other Tacoma owners from around the world
    • Post your own photos in our Members Gallery
    • Access all special features of the site

$$$Baller On A Budget$$$ -- under 30k build

Discussion in '3rd Gen. Builds (2016-2023)' started by 2k2, Aug 21, 2022.

  1. Aug 21, 2022 at 8:33 PM
    #1
    2k2

    2k2 [OP] Flareless

    Joined:
    Jan 30, 2020
    Member:
    #317785
    Messages:
    1,421
    Gender:
    Male
    First Name:
    Zak
    Vehicle:
    Gen 3 SR 4x4 4cyl AC
    See Build Thread
    PURPOSE:
    To lightly modify a brand new entry level Tacoma to look the part of an offroad 4x4, maintain descent fuel efficiency, have a low center of gravity stance, maintain reliability, maximize efficiency of the stock/OEM components, and still have the capability to go just about anywhere (at least anywhere I'm going to go).

    BUILD THEME:
    My plan is to utilize as many stock/OEM components as possible and replace/repair as needed throughout the lifespan of the truck.
    In most cases OEM parts should serve my needs just fine.
    Aesthetics are important, but not at the cost of function/reliability. I will be doing some things simply for aesthetics, but not much.

    SO WHAT'S IT GONNA COST ME???:
    I'll do my best to provide prices on everything I upgraded/modified.
    DISCLAIMER:
    Some of these are 2020 prices and the inflation over the past 2 years has become outrageous. I am a sale shopper and I also rarely buy anything without finding a coupon. When I decide to make modifications I search for a good price and sometimes wait a month or more before finally pulling the trigger. I know a lot of people who are impulsive... so my bed mat cost me $90 shipped... but someone else may pay $130 because they want it now. I don't shop like that.

    HOW DO I USE MY TRUCK:
    I want my truck to be able to go off the beaten path, but 95% of the time this is my road vehicle, ice hockey bus, grocery getter, bmx bike hauler, beach-mobile, daily transportation. Every once in a while I'll be doing off pavement stuff, but I need this thing to be reliable and reasonable on gas.

    I'm a little late to the game here, but I'm going to start my build thread. I'm going to backfill my build with some links to posts I made when I performed modifications. I plan on uploading plenty of pictures.

    Read on if your interested in your basic, bare bones pickup truck slightly modified utilizing mainly stock/OEM components.
     
    Last edited: Aug 23, 2022
    Polythemus, MR E30, FeeleyMan and 3 others like this.
  2. Aug 21, 2022 at 8:54 PM
    #2
    2k2

    2k2 [OP] Flareless

    Joined:
    Jan 30, 2020
    Member:
    #317785
    Messages:
    1,421
    Gender:
    Male
    First Name:
    Zak
    Vehicle:
    Gen 3 SR 4x4 4cyl AC
    See Build Thread
    Let's get started..... so this is going to be the most expensive part.. purchasing the actual truck.... I looked around and hounded dealers for about 7 months before finally getting the out the door price I wanted (or close enough at least):

    How do you stay under 30K with 4WD????
    2020 4Cyl 4x4 Access Cab SR
    Options: Convenience Package
    Port installed options:
    All Weather Mats
    Door edge Guards
    Door sill protectors
    5" Oval Step Tubes
    upload_2022-8-21_23-44-25.jpg
    upload_2022-8-21_23-45-46.jpg
    I got this Midnight Black Metallic pickup brand new (9 miles) for $27,595 out the door and on the road at Ardmore Toyota outside of Philadelphia in March of 2020... I got a good price mainly because this was the START of the COVID19 pandemic. There was a lot of uncertainty and things in the Philadelphia area were shutting down. Initially I REALLY did NOT want black. I was set on white, silver, or MGM. Black and red were my last 2 choices, but they had the truck and they met my out the door price, so I compromised on color at the sake of saving $$$$.
    https://www.tacomaworld.com/threads/the-sr-thread-lets-see-them.411453/page-222#post-22940266

    As you can see in the pictures I am an OG SR owner... the Barcelona Red Metallic 2002 in the background was basically the build inspiration. That truck was an SR 4x4 and was mainly stock... I wanted something similar but brand new... the rust was eating the poor first gen away (frame replacement--everything else was rusty)... you will also see the Green 96 in one of the pictures. That was my sons and the frame rusted and busted at the shock mount on the passenger side while I was driving it...... that's when I finally decided to pull the trigger on a brand new one. Not pictured is the 2003 silver SR5. I gave that to my son....he rolled it several times. Thank god he survived..... the truck did not.
     
    Last edited: Aug 23, 2022
    TnShooter likes this.
  3. Aug 21, 2022 at 9:06 PM
    #3
    2k2

    2k2 [OP] Flareless

    Joined:
    Jan 30, 2020
    Member:
    #317785
    Messages:
    1,421
    Gender:
    Male
    First Name:
    Zak
    Vehicle:
    Gen 3 SR 4x4 4cyl AC
    See Build Thread
    Mod1: Remove Front Airdam
    Purpose: Purely Aesthetics
    Cost: 1 MPG
    Although this did not cost a dime to do, throughout the life of my truck this could actually wind up being the most expensive modification I make (especially if gas keeps going up). It didn't last a week. It was just too ugly.

    I didn't really take any pictures of my truck with the airdam or the oval steptubes installed, but everyone here knows that airdam is really ugly. It sucks because it saves you about 1MPG and we all know that every MPG counts when gas is $5/gal.

    Unfortunately MOD #1 is one of those form over function mods I promised I wouldn't do too many of......but the front end of these things is enormous compared to the 1st Gen. It was an attempt to slim it down a little.
     
    Last edited: Aug 23, 2022
  4. Aug 21, 2022 at 9:15 PM
    #4
    2k2

    2k2 [OP] Flareless

    Joined:
    Jan 30, 2020
    Member:
    #317785
    Messages:
    1,421
    Gender:
    Male
    First Name:
    Zak
    Vehicle:
    Gen 3 SR 4x4 4cyl AC
    See Build Thread
    Mod2: Seat Jackers (Drivers side only)
    Purpose: Comfort
    Cost: ~$15
    Stainless Steel 3/4" standoffs, 4 plastic bushings, and 2 extended bolts were purchased at the local HW store to raise the rear of the drivers seat 3/4". It sure doesn't sound like much of a rise, but it felt like I was driving a sports coupe. Coming from a Gen1, I felt like I sat way too low and far back in this truck and I was pretty disappointed. Jacking up the rear 3/4" did the trick.. I instantly felt like I was back in a Taco. I did this one pretty quick and it was definitely an unexpected mod.. I was actually super unhappy with the way this truck felt when I was driving in that position.

    Not the greatest picture, but this is what I did.
    20220822_120639.jpg
    I followed this thread:
    https://www.tacomaworld.com/threads/get-out-of-that-hole-diy-seat-risers.417680/
     
    Last edited: Aug 22, 2022
    RedDemolisher likes this.
  5. Aug 21, 2022 at 9:52 PM
    #5
    2k2

    2k2 [OP] Flareless

    Joined:
    Jan 30, 2020
    Member:
    #317785
    Messages:
    1,421
    Gender:
    Male
    First Name:
    Zak
    Vehicle:
    Gen 3 SR 4x4 4cyl AC
    See Build Thread
    Mod3: Grille
    Purpose: Aesthetics/Functional Lighting
    Cost: $45
    I wanted to ditch the SR Grille immediately and get an Xtrek with the mesh. The problem was that I was looking at close to $300 for an unnecessary modification (other than aesthetics).
    I didn't want to spend a lot and I definitely didn't want TSS issues. I decided that a roll of smoke tint over the sombrero to "be-badge" the front was a good idea as long as it didn't interfere with the function:
    [​IMG]
    https://www.tacomaworld.com/threads/the-sr-thread-lets-see-them.411453/page-256#post-23966686
    So far I have over 3 years of daily use of my adaptive cruise control and no issues with the tinted TSS sombrebo.

    4 iJDMtoy amber grille lights, an add a fuse, corrugated tubing, and some zip ties were a better starting point to give the grille a little detail that was unique...then I would eventually pony up and get a grille I liked and ditch my SR Grille. It wound up growing on me and now I can honestly say I'm happy with the stock SR grille. Plus its OEM. I know the 3 raptor lights are necessary for vehicles over 8' wide by law, so technically my version of 2x2 raptor lights are really for looks, but you could argue it is another running light that aids to help others see you.
    upload_2022-8-22_0-48-38.jpg
    upload_2022-8-22_0-49-51.jpg

    You also get a good look at my red 02 SR and the green 96 in these pics...


    Heres my write up:
    https://www.tacomaworld.com/threads/the-sr-thread-lets-see-them.411453/page-228#post-23293666

    https://www.tacomaworld.com/threads/the-sr-thread-lets-see-them.411453/page-229#post-23297367
     
    Last edited: Jul 25, 2023
  6. Aug 21, 2022 at 10:02 PM
    #6
    2k2

    2k2 [OP] Flareless

    Joined:
    Jan 30, 2020
    Member:
    #317785
    Messages:
    1,421
    Gender:
    Male
    First Name:
    Zak
    Vehicle:
    Gen 3 SR 4x4 4cyl AC
    See Build Thread
    Mod4: AC Drain relocation
    Purpose: Rust Prevention
    Cost: ~$15
    After 20+ years of the Tacoma,Toyota still hasn't fixed this.. I did this to every first gen I had, I'd imagine the 2nd gen has the same annoying problem, and yet another generation without engineering a better place to dump the air conditioning condensation.

    For those who know... well you know...
    For those who don't, take a look and correct this ASAP.

    https://www.tacomaworld.com/threads/rust-on-frame-with-a-c-drain-mod-fix.444138/
     
    TRDSport10 likes this.
  7. Aug 21, 2022 at 10:46 PM
    #7
    2k2

    2k2 [OP] Flareless

    Joined:
    Jan 30, 2020
    Member:
    #317785
    Messages:
    1,421
    Gender:
    Male
    First Name:
    Zak
    Vehicle:
    Gen 3 SR 4x4 4cyl AC
    See Build Thread
    Mod5: Wheels/Tires/ET lugnuts
    Purpose: Aesthetics/MPG/Function
    Cost: $1455
    Ok.. so I already knew going in that this was going to be my biggest purchase. I never had a plan to mess with suspension or bumpers and I did my research on keeping rotational weight low. Larger tires and some negative offset wheels to me is purely aesthetic. However tires can technically be functional.. I'm not offroad a bunch and when I am its nothing that the 245s couldn't handle. It is nice to have in the event you do need it. Falken wildpeak 116t 265/75/16 AT3W $525, -25mm16x8 SCS F5 wheels $880, new ET lug nuts $50, rotated sensors 180 degrees, mounting and balancing was free since they scratched 3 of my wheels (rustoleum burnished amber touches up good enough).
    upload_2022-8-22_1-44-12.jpg
    upload_2022-8-22_1-45-33.jpg
    upload_2022-8-22_1-46-11.jpg
    Check these out for pics, info, and adjustments I had to make:

    https://www.tacomaworld.com/threads/the-sr-thread-lets-see-them.411453/page-225#post-23168417

    https://www.tacomaworld.com/threads/the-sr-thread-lets-see-them.411453/page-238#post-23660416

    This mod instantly took my truck from grandpa mobile to legit. The stance was aggressive and the truck just sat nice. The low rotating weight of the setup also serves to help out in the MPG department. I still lost about 1 - 1.5 mpg going from the 245s, but it realistically could have been up to 3. I didn't need E Load tires for my day to day so the SL saved me 10lbs per corner. The SCS wheels were chosen due to their light weight as well...18lbs. They were also direct bolt on hub centric wheels that required no additional parts or rings. I wasn't willing to live with wobbles, vibrations, humming or any other BS that can come with wheels that do not have the proper center bore.

    I initially did not care for the bronze. I wanted silver or gunmetal but getting a set of 4 of these at the time was hard, so I took what I could get and bronze was it. The only color I would not have bought is black. This was the second color compromise I made on this truck, but I think it still looks pretty good. It goes with the dark theme, but not murdered out.
     
    Last edited: Sep 8, 2022
    N64_Wallmaster likes this.
  8. Aug 21, 2022 at 11:06 PM
    #8
    2k2

    2k2 [OP] Flareless

    Joined:
    Jan 30, 2020
    Member:
    #317785
    Messages:
    1,421
    Gender:
    Male
    First Name:
    Zak
    Vehicle:
    Gen 3 SR 4x4 4cyl AC
    See Build Thread
    Last edited: Jul 25, 2023
  9. Aug 21, 2022 at 11:27 PM
    #9
    2k2

    2k2 [OP] Flareless

    Joined:
    Jan 30, 2020
    Member:
    #317785
    Messages:
    1,421
    Gender:
    Male
    First Name:
    Zak
    Vehicle:
    Gen 3 SR 4x4 4cyl AC
    See Build Thread
    Last edited: Jul 25, 2023
    auskip07 likes this.
  10. Aug 22, 2022 at 12:02 AM
    #10
    2k2

    2k2 [OP] Flareless

    Joined:
    Jan 30, 2020
    Member:
    #317785
    Messages:
    1,421
    Gender:
    Male
    First Name:
    Zak
    Vehicle:
    Gen 3 SR 4x4 4cyl AC
    See Build Thread
    Mod6: OEM Fog lights / Bed Lights
    Purpose: Functional Vision / Lighting
    Cost: ~$335
    OEM everything. Took my time collecting the OEM harness $65, SR5 Bezels $25/each, mounting screws $5, stalk $52, relay $10 (which I didnt need), and bulbs $20 all purchased brand new. Gently used set of OEM Offroad wide angle halogen light housings $40 from a TW member, stained glass krylon paint to tint them yellow.

    upload_2022-8-22_2-59-18.jpg
    100% OEM parts and operation.
    https://www.tacomaworld.com/threads/the-sr-thread-lets-see-them.411453/page-245#post-23843229


    Loading a kayak at night proved that the bed needed a light source so I purchased the OEM bed light kit $50, and the OEM 3 way switch $62.
    upload_2022-8-22_3-1-56.jpg
    upload_2022-8-22_3-2-14.jpg

    Check these out for more info:

    https://www.tacomaworld.com/threads/the-sr-thread-lets-see-them.411453/page-245#post-23843221

    https://www.tacomaworld.com/threads/oem-led-bed-lighting-kit-2020.644777/
     
    Last edited: Aug 22, 2022
  11. Aug 22, 2022 at 12:13 AM
    #11
    2k2

    2k2 [OP] Flareless

    Joined:
    Jan 30, 2020
    Member:
    #317785
    Messages:
    1,421
    Gender:
    Male
    First Name:
    Zak
    Vehicle:
    Gen 3 SR 4x4 4cyl AC
    See Build Thread
    Mod7: Paint Exhaust (high heat paint)
    Purpose: Rust Prevention / Aesthetics
    Cost: ~$8 per year
    This is really a yearly maintenance item for me. I understand that the SR exhaust is zinc dipped or coated to prevent corrosion, but it still gets rusty. I want just about everything under the truck to be black so I can prevent rust in the first place and easily touch up and identify rust before it becomes an issue.[​IMG]

    Look at this post to see the frame I broke. Rust prevention is important folks ..
    https://www.tacomaworld.com/threads/the-sr-thread-lets-see-them.411453/page-247#post-23862432
     
    Last edited: Jul 25, 2023
    Scotfree likes this.
  12. Aug 22, 2022 at 12:28 AM
    #12
    2k2

    2k2 [OP] Flareless

    Joined:
    Jan 30, 2020
    Member:
    #317785
    Messages:
    1,421
    Gender:
    Male
    First Name:
    Zak
    Vehicle:
    Gen 3 SR 4x4 4cyl AC
    See Build Thread
    Mod8: Tint
    Purpose: Aesthetics/Keeping the truck cool
    Cost: $75
    As soon as I brought my truck home my neighbor said I needed to tint it.. he has been tinting vehicles for 30 years and he's a big car guy - he owns at least 4 black vehicles. I've never had tint on anything, but since the back of this truck had dyed glass from the factory it looked awkward not having the front windows tinted... my neighbor hooked it up and it matches just fine.
    I will say I don't like it at night, but I really appreciate it during the day in the sun. After getting my wheels it became pretty clear that tinting everything to match and blacking this thing out was the way to go for aesthetics.

    https://www.tacomaworld.com/threads/is-it-20-or-25-for-tint.658637/page-4#post-23982491
     
    Last edited: Jul 25, 2023
  13. Aug 22, 2022 at 9:45 AM
    #13
    2k2

    2k2 [OP] Flareless

    Joined:
    Jan 30, 2020
    Member:
    #317785
    Messages:
    1,421
    Gender:
    Male
    First Name:
    Zak
    Vehicle:
    Gen 3 SR 4x4 4cyl AC
    See Build Thread
    Mod9: Mud Flaps
    Purpose: Paint Protection/Motorist Courtesy
    Cost: ~$60
    After a week or 2 of driving around with -25mm offset, no fender flares, and aggressive tires it was obvious my truck was going to need a form of protection. To me, mud flaps are ugly, but so is rust and paint chips.

    Unfortunately I couldn't use OEM flaps because the negative offset causes scrub radius rubbing. There were plenty of aftermarket selections, but $100 for a set of mudflaps was ridiculous, especially knowing I was going to have to cut these up to prevent rubbing. I was going to need 6 mudflaps in total because I wanted to protect the front of the bed as well. My experience with my red taco was this area got chewed up by road debris.

    So, I purchased 3 sets of Plasticolor 9x15 mud flaps... they are thin, flexible, easy to trim, and inexpensive at $less than $20 for a set.
    https://www.tacomaworld.com/threads/the-sr-thread-lets-see-them.411453/page-251#post-23909541

    I made some cardboard templates, trimmed the fronts quite a bit, mounted everything high and wide.
    20200805_084137.jpg
    https://www.tacomaworld.com/threads/the-sr-thread-lets-see-them.411453/page-252#post-23921052

    The backs needed no modifications, just make another cardboard template and mount .
    20200808_164120.jpg
    https://www.tacomaworld.com/threads/the-sr-thread-lets-see-them.411453/page-253#post-23942400

    I eventually made a set of small splitters for the front of the bed. I plan on keeping this truck for the long haul so I needed to protect the paint from all the debris thrown around from the negative offset... I dont care for the looks, but compared to other mud flaps these are cheap and customizable.
    20200818_183230.jpg
    https://www.tacomaworld.com/threads/the-sr-thread-lets-see-them.411453/page-259#post-24006502
     
    Last edited: Sep 9, 2022
  14. Aug 22, 2022 at 10:02 AM
    #14
    2k2

    2k2 [OP] Flareless

    Joined:
    Jan 30, 2020
    Member:
    #317785
    Messages:
    1,421
    Gender:
    Male
    First Name:
    Zak
    Vehicle:
    Gen 3 SR 4x4 4cyl AC
    See Build Thread
    Mod10: Mavcoat Steel Shield
    Purpose: Rust Prevention / Aesthetics
    Cost: ~$60 per year
    This is really a yearly maintenance item, but after 3 first gens and 2 frame replacements/1 broken frame, you realize rust sucks ass and it's just horrible looking.. so, I also did this for aesthetics to keep my undercarriage looking sleek and clean. I used my bad experiences to my advantage on this truck and applied the ounce of prevention method vs the pound of cure.... stop rust before it even starts... get under there 2x per year and address any signs of rust promptly.

    Check this out -- rust belt undercarriage and Mavcoat after several winters:
    https://www.tacomaworld.com/threads...otice-from-toyota.666883/page-2#post-23389500

    If you have fought rust then you will appreciate this. Mavcoat goes on blue and dries to a semi tacky transparent wax.

    Heres what it looks like:

    [​IMG]

    You can still see some wet spots on the frame... this stuff dries to a nice durable satin finish... no mess to deal with.
    [​IMG]

    Even the hub rust has a hard time resurfacing when you apply this stuff.
    [​IMG]

    I made this post back 2020 and I can report back that this stuff works great. My truck has very little rust underneath (meaning almost zero) after a couple salty winters and several trips to the beach:
    https://www.tacomaworld.com/threads/the-sr-thread-lets-see-them.411453/page-263#post-24024428

    Heres another post:
    https://www.tacomaworld.com/threads/the-sr-thread-lets-see-them.411453/page-315#post-25743205
     
    Last edited: Aug 22, 2022
    thomasburk likes this.
  15. Aug 22, 2022 at 10:50 AM
    #15
    2k2

    2k2 [OP] Flareless

    Joined:
    Jan 30, 2020
    Member:
    #317785
    Messages:
    1,421
    Gender:
    Male
    First Name:
    Zak
    Vehicle:
    Gen 3 SR 4x4 4cyl AC
    See Build Thread
    Mod11: Aim headlights
    Purpose: Functional Vision / Lighting
    Cost: FREE
    You'd think that the lights are aimed from the factory. The stock headlights just left me feeling like driving at night was a chore
    https://www.tacomaworld.com/threads/the-sr-thread-lets-see-them.411453/page-266#post-24055125.

    It turns out even after putting on larger tires and following the procedure, they were still aimed fairly low. Following this process gave me much better down road vision with the stock halogens:

    https://www.tacomaworld.com/threads...ector-headlights.589465/page-93#post-21977215
     
    Last edited: Jul 25, 2023
  16. Aug 22, 2022 at 12:22 PM
    #16
    2k2

    2k2 [OP] Flareless

    Joined:
    Jan 30, 2020
    Member:
    #317785
    Messages:
    1,421
    Gender:
    Male
    First Name:
    Zak
    Vehicle:
    Gen 3 SR 4x4 4cyl AC
    See Build Thread
    Mod12: Interior Nick Nacks
    Purpose: Organize/Convenience/Protect
    Cost: ~$200
    Protecting the light grey seats (why would you put such a light colored fabric in a utility grade pickup truck?) became a priority after my wife spilled some chocolate. Luckily I scotch guarded my interior shortly after purchasing so no stains set, but I needed better peace of mind. Problem is where to draw the line? Clazzio and Wet Okole fit well but run quite a bit more than I wanted to spend. I wanted a pretty descent fit and wanted to spend $100 or less.
    Rough Country fronts for $110 ....fit really snug, look almost factory, protect seats.
    [​IMG]
    Check out these links:
    https://www.tacomaworld.com/threads...eat-covers-review.678922/page-3#post-25539297

    https://www.tacomaworld.com/threads/rough-country-neoprene-seat-covers-review.678922/#post-23902730

    Cupholder hero Access Cab set $20
    These little pieces of rubber basically go in all the various nooks and crannies of the interior. They help deaden sound, protect the plastic, and prevent rattling.
    20220822_151055.jpg

    Visor mirrors (SR has no mirrors on the visors) these were cheap and easy.
    $3 each from autozone
    20220822_151141.jpg

    Glovebox shelf/organizer
    DIY project from stuff I had in my garage -- FREE... the glovebox needed a shelf for organization. The OEM one was $50..... I like OEM whenever possible, but $50 NO WAY..
    20220822_152512.jpg

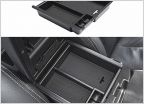
    OCD Center console organizer
    $15/Coin holder(taken from my first gen) FREE
    20220822_152548.jpg

    Smart Elf universal booster seat covers (for rear jump seats) $25 -- these were way more cost effective than any custom fit option
    20220822_152835.jpg

    Door clean up kit
    $15 -- Little details...nice touch on trimming out the door hardware.
    20220822_152424.jpg
    20220822_152413.jpg
    20220822_152359.jpg

    Shift Knob (FREE)
    My son also bought me the TRD BRO shift knob as a Christmas gift, I'm sure it wasn't cheap, and I'm not including it in the overall cost. He installed it as well because he knows I would have probably never put it in.... It was an nice thought and I'll leave it in there.
    IMG_20240316_083032964.jpg

    The interior is utilitarian, functional, and easy to keep clean now. Everything is black except the roof, visors, and pillars. Compressed air, 303 Aerospace wipe down, and vacuum every month or 2 depending on how my family treats it.
     
    Last edited: Mar 16, 2024
    DiscoYaker likes this.
  17. Aug 22, 2022 at 2:53 PM
    #17
    2k2

    2k2 [OP] Flareless

    Joined:
    Jan 30, 2020
    Member:
    #317785
    Messages:
    1,421
    Gender:
    Male
    First Name:
    Zak
    Vehicle:
    Gen 3 SR 4x4 4cyl AC
    See Build Thread
    Mod13: The Bed
    Purpose: Purely Functional
    Cost: $200
    I bought my truck to use as a truck. I already mentioned that I grabbed a bed light kit and installed it.

    The rail system was new to me and there were endless possibilities...I could literally spend thousands of dollars back here....

    Easy now..... keep it simple.... accumulate things you NEED... the bed has become an ever evolving mod that I'm still really not finished with. I research and grab things as needed.

    It became apparent pretty quick that the composite bed was way too slippery. Shortly after purchasing my truck I sold a rear axle assembly off a first gen and met the guy I was selling it to at the police station.. the axle slid all over in the composite bed. It was a brutal 4 miles and I drive like an old man. I eventually grabbed an OEM long bed mat for $90. The bed mat is literally the best mod I made as far as functionality goes... I hated things sliding around back there and put up with it for about a year.
    20220822_151242.jpg

    I needed a way to mount a tarp to the head of the bed, so I purchased a 2nd gen OEM header rail $60 and the OEM end caps $25.
    https://www.tacomaworld.com/threads/front-bed-rail-it-fits.394416/

    Multiple bed rail tiedowns, straps, assortment of bungees , milk crate, etc. This made my bed so much better and so much more flexible and functional. Most of this stuff was repurposed from my old truck. I spent roughly $35 on some more adjustable tiedown points for the bed rail system

    20220822_151257.jpg
    20220822_151232.jpg

    https://www.tacomaworld.com/threads/the-sr-thread-lets-see-them.411453/page-245#post-23843221

    I had a custom coated canvas tarp made to serve as a makeshift tonneau cover for $40. Although it does the job and is easy to roll up/out, I still am working out a better way mount/unmount it efficently before I take pics. I need some corner braces for the front.... like I said... my bed is a work in progress
     
    Last edited: Sep 8, 2022
  18. Aug 22, 2022 at 3:18 PM
    #18
    2k2

    2k2 [OP] Flareless

    Joined:
    Jan 30, 2020
    Member:
    #317785
    Messages:
    1,421
    Gender:
    Male
    First Name:
    Zak
    Vehicle:
    Gen 3 SR 4x4 4cyl AC
    See Build Thread
    Mod14: Upgraded Halogen low beam bulbs
    Purpose: Functional Vision / Lighting
    Cost: $30
    Phillips Vision Plus +60 halogen H11 bulbs. I was never impressed with the horrible light output of the stock lights. Aiming them helped, but it still left me wanting more light down the road. I started reading about what the best bulbs are without having to make major mods. This is a wealth of information:
    https://www.tacomaworld.com/threads/3rd-gen-hid-vs-led-vs-halogen-h11-projector-headlights.589465/

    When I was collecting fog light parts I purchased LED bulbs, and at the time, little did I know putting an LED bulb in a halogen housing is detrimental to light output and oncoming motorists. The fog light LED bulbs I put on failed in about a year. At that point I decided to move my stock halogen H11 into the fog light housings and purchase a new set of higher intensity H11 bulbs for my headlights. This was a noticeable improvement although there are still better options out there.

    https://www.tacomaworld.com/threads/the-sr-thread-lets-see-them.411453/page-354#post-27242526

    EDIT.... I moved these to my fog light housings and upgraded my low beams to H9 (see Mod19)
     
    Last edited: Jul 25, 2023
  19. Aug 22, 2022 at 3:25 PM
    #19
    2k2

    2k2 [OP] Flareless

    Joined:
    Jan 30, 2020
    Member:
    #317785
    Messages:
    1,421
    Gender:
    Male
    First Name:
    Zak
    Vehicle:
    Gen 3 SR 4x4 4cyl AC
    See Build Thread
    Mod15: Draw Tite Hitch Receiver
    Purpose: Functional/Towing
    Cost: ~$40
    So I wanted a basic hitch receiver to mount a bike rack to. I found a Draw Tite Class III hitch receiver on Amazon for cheap... too cheap to pass up...I grabbed it, sat on it, painted all the hardware black, and finally installed it when the weather got warm. I'll used this to haul bikes on a hitch mount bike rack and eventually I'll get a utility trailer and use it to grab landscaping materials rather than loading them in the bed. In the future I'll probably be towing a lightweight pop up camper with this truck. I'll have to add the wiring harness at some point.
    20220514_170531.jpg
    https://www.tacomaworld.com/threads/the-sr-thread-lets-see-them.411453/page-355#post-27327878
     
    jwctaco likes this.
  20. Aug 22, 2022 at 4:19 PM
    #20
    2k2

    2k2 [OP] Flareless

    Joined:
    Jan 30, 2020
    Member:
    #317785
    Messages:
    1,421
    Gender:
    Male
    First Name:
    Zak
    Vehicle:
    Gen 3 SR 4x4 4cyl AC
    See Build Thread
    Rear ended 6/10/2022
    20220610_073803.jpg
    Truck is only 27 months old.. some idiot rams into the back of me pretty hard while I'm stopped at a red light...tailgate is dented, bumper is marred and bent, step pad is messed up too. The hitch receiver took the brunt of the collision. It saved me from a buckled bed and quite possibly a totaled truck.
    https://www.tacomaworld.com/threads/the-sr-thread-lets-see-them.411453/page-360#post-27435850

    The anger level was a steady 12 out of 10 for the first couple days. At first I just wanted to sell it and get something new. I started looking for a brand new 2022 SR and wanted to just start over. Problem is, everything is so damn expensive and my $30k budget would look more like $40k.
    20220822_183036.jpg
    20220822_182956.jpg
    20220822_183059.jpg
    20220822_183404.jpg 20220822_183417.jpg
    Beep Breath. Waiting for the at fault drivers insurance was like watching paint dry, however it also made me realize that whatever damage was there wasn't all that bad. What can I live with? Basically if I get a check I could technically not fix anything and it would not be all that noticeable. I'm really not missing any paint.The plan is to come out ahead and have only minor cosmetic annoyances.

    My decision is to fix:
    1. Get the OEM bumper stamp and replace the bent unit on my truck.
    2. Have a PDR guy get the tailgate straightened out as good as possible
    3. Loosen,Adjust, and re-torque the receiver/bumper support and all mounting hardware.
    All this should run about $600-700.

    I'll just deal with the missing paint and creases on the drivers side bumper cap.. it wont rust... and it is just a bumper.
    I'll also just live with the marred up step pad. Its plastic and all clips and mounting points seem intact.
     
    Last edited: Jul 25, 2023

Products Discussed in

To Top