1. Welcome to Tacoma World!

    You are currently viewing as a guest! To get full-access, you need to register for a FREE account.

    As a registered member, you’ll be able to:
    • Participate in all Tacoma discussion topics
    • Communicate privately with other Tacoma owners from around the world
    • Post your own photos in our Members Gallery
    • Access all special features of the site

Chipskip's Taco & Treehouse (We got HAM and Bikes too)!

Discussion in '1st Gen. Builds (1995-2004)' started by Chipskip, Nov 16, 2015.

  1. Nov 16, 2015 at 9:26 AM
    #1
    Chipskip

    Chipskip [OP] N7MCS

    Joined:
    Aug 31, 2010
    Member:
    #42519
    Messages:
    11,605
    Gender:
    Male
    First Name:
    Chip
    Green Ridge, MO
    Vehicle:
    07 Tundra
    Taco & a Tree House.... what could be more fun.
    [​IMG]

    June 1st, 2016.

    Taco:
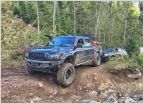
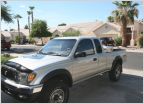
    Finally decided to get around to making a build thread. In 2010 I bought my third Toyota pickup. My first was the family’s 1980 Toyota Pickup SR5. Then in 2004, I bought a1985 Toyota Pickup 4×4. Finally, I have a Tacoma, a 1998 Toyota Tacoma Limited with 190k miles from the original owner (We are way past that now!). This truck was kept in perfect condition, I plan to maintain and even upgrade the truck while keeping and enjoying it until one of my kids inherits it. Stay tuned for updates on trip and mods.

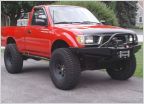
    When I bought it in 2010:

    [​IMG]


    Lights:
    2001- 2004 rear tail lights
    LED Red Map lights
    LED 12 Lamp dome light
    7” off-road lights from auto central
    Strobing lights in the front blinker, head lights, and tail lights
    Blinker relocation mod
    Anti-Dark Underhood lighting
    Rampage 2" Flush mount bumper lights


    Suspension/Brakes/Tires:
    Tundra Front Brake Mod
    Braided brake lines front/rear
    Blistein 5100s rear
    All-Pro Expo Leaf Pack W/Wheeler's Super Bump Stops
    ToyTech Coilovers
    17" 2nd Gen Sport rims
    Cooper STT MAXX 265/75/17
    ToyTec 2" Shackle Lift


    Interior:
    2001-2004 center console
    850 watt inverter
    Pioneer Stereo and speakers
    Switch panel under stereo
    Custom rocker switches
    Upgraded 12v plugs w/USB
    Panavise Trim Mount
    Para Cord Steering Wheel Wrap
    UltraGauge


    Ham radio:

    -Yaesu FT-8800R
    -Kenwood TH-v71a
    -Kenwood TH-D72a (for APRS)
    -AvMap G6 APRS
    -BAMF Tailgate antenna mount
    -CBI Driver side hood antenna mount
    -Diamond Antennas
    --Slim Gainer AZ507RSP
    --NR770HAB


    Exterior:
    2nd Gen Track System rails
    Bed Bar
    Debadged
    Custom Celtic badges (SockMonkey)
    Relentless Wrap Around Rear Plate Bumper with Tire Swing out
    OEM Headlight replacement


    Engine/Transmission:
    Blue Sea Fuse Block
    100 amp Breaker

    Cadillac Alternator Upgrade
    200 Amp Alternator (BamaToy1997)
    Diff Drop
    Deck Plate Mod
    PVC washer fluid reservoir
    Redline Hood Struts
    Clutch Replacement 2015
    Starter Rebuild
    Timing Belt replaced
    URD Short Shift Kit


    Misc:

    CBI dual can holder
    Co2 15 lbs Tank and mount
    7-pin trail plug-in relocated to license plate light in bumper
    ARB Shell
    Rear diff breather mod
    RubberMaid storage box w/orange lid
    Trasharoo
    Ham N' a Can

    Shell: (Removed and sold February 2018)
    Carpeted interior
    Yakima Tracks
    1" webbing
    Flannel Window Covers


    Future Plans:
    Relentless Front Bumper
    Aux fuel tank
    New bucket seats (maybe mini cooper seats)
    Relentless Sliders
    Under bed rail lights
    rock lights (I have these, need to install)
    UCA
    Super Charger
    Marlin Crawler 1200 lbs clutch
    Camping shower
    Solid Engine mounts
    Prinsu Design Studio Roof Rack for truck and shell
    "The Ultimate Headlight Upgrade"
    Dual Batteries
    -Columbia Overland Dual Battery Mount
    -Piranha or CTEK
    New Skid plates

    Sequoia:
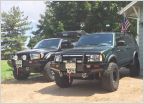
    With three kids and a dog, the 4runner just wasn't cutting it. When a chance came up to grab a 2002 Sequoia with 202k miles on it, for a good price. I jumped on it. The wife is extremely happy. It's the 4Runner on steroids. Besides size, this gave us 4wd, Cruise Control, and entertainment system for the back rows. You don't realize how much you miss CC until you don't have it. Especially on the family travel vehicle.
    This one starts here.

    [​IMG]

    Mods/Repairs Completed:

    Rear hatch replaced
    Radio Antenna
    New Shocks
    New Radio

    Mods/Repairs to Come:

    Replace TV screen for entertainment center
    Seat Covers
    Ham Radio


    4Runner: SOLD! (June 2018)
    June 2016 brought Amy (me wife) into the Toyota family. We dumped her Ford for a 1997 4Runner SR5 V6 2WD.
    The Adventure starts here (page 5).

    [​IMG]

    Mods/Repairs Completed:
    LED Dome/Map lights
    Rear Hatch struts replaced
    Frt Wiper Blades
    Viper Alarm w/ Remote start
    Frt Turn Light house replaced
    Panavise & Ram mount for phone
    Wet Okoles
    WeatherTech Floormats and Window visors
    Clock replaced
    Replace automatic antenna with manual
    De/Rebadge rear Hatch

    Headlight switch replaced
    Full Suspension:
    -Bilstien adjustable Coil Overs
    -Bilstien Rear SHocks
    -3" lift rear coils
    -JBA UCAs
    Oil Cap
    Brake Booster


    Trips:
    4th of July 2018 - Flag Mine Trail
    Labor Day 2016
    Mogollom Monster 2014
    Gas Pipeline Trail 2014
    Harper's First Wheelin Trip
    Gas Pipeline - Night Run 2013
    Bonneville - Speed Week 2011
    AZ Meet & Greet Trail Run 2010


    Camping Gear:
    Bunk Cots & Pressurized Water can for showers
    Large Pelican cases for Camping
    Jumper cables
    Scepter gas cans
    Scepter water cans


    My other garage toys includes a few motorcycles:
    -1997 BMW R100RT (SOLD)
    -1999 Triumph Daytona (it identifies as a Speed Triple)(SOLD)
    -2009 BMW F650GS

    -2013 Triumph Bonneville T100 (My wife's daily)

    IMG_0556.jpg


    I originally was doing a build thread on my personal website, but that sort of thing has gone the way of the Dodo. So some of the post are just copied and pasted from it.
     

    Attached Files:

    Last edited: Feb 28, 2020
    tymeson, Dalandser and Crom like this.
  2. Nov 16, 2015 at 9:27 AM
    #2
    Chipskip

    Chipskip [OP] N7MCS

    Joined:
    Aug 31, 2010
    Member:
    #42519
    Messages:
    11,605
    Gender:
    Male
    First Name:
    Chip
    Green Ridge, MO
    Vehicle:
    07 Tundra
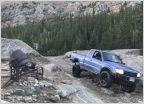
    Arizona Meet, Greet and Trail Day
    [​IMG]

    Who: Arizona TacomaWorld members and friends (Out of staters are welcome!!)

    What: Meet, Greet, Convoy and Trail Run

    When: Saturday, September 18, 2010

    Time: 9:30 AM at the Happy Valley & I-17 main meeting location. We will leave promptly at 10am and will NOT wait for anyone. Tucson guys… please see here;http://www.tacomaworld.com/forum/ari…trail-day.html

    Where: Bradshaw Mountain in the North-central, Arizona area. The convoy will meet up and fill up at the Lowe’s parking lot just south of the Shell gas station on 23rd Avenue and Happy Valley Road, just east of I-17.

    Why did we choose this trail?

    Senator highway is a beautiful, easy going trail which runs from Crown King to Prescott. Here, Crown King was reached via the Bumblebee Road. It may also be reached via the “Back Road,” which itself warrants a trail review. The entire trip is very scenic and features diverse landscape. During the winter time, a trip after some rainfall might reveal mud and/or snow!

    How difficult is the trail?

    This trail is about getting outside, taking it easy, enjoying the scenery, and having a good time with people. Any reasonable vehicle will be fine… The trail has been rated a 2.0/5.0 for it’s general smoothness and lack of major obstacles. There is no real danger of pin-striping. Weather conditions may make the trail a 2.5 or above as mud can cause some trouble.

    So, how long is it?

    The full run as outlined below is over 60 miles. At a comfortable pace, it was run in about 4 hours. Leave in the morning, and have lunch in Prescott!

    Where does the trail start?

    Take I-17 north to Exit 248 Bumblebee Road. It will turn to dirt, and that’s about it. There are a few turns along the first part of Bumblebee, but signs will point you to Crown King. There are also turns in Crown King itself. Check out the attached GPS file for clarification.

    Why: …because it’s been too damn long since I’ve seen everyone!

    [​IMG]
    Lunch: I’m split on whether everyone should bring their own food or if we should make a pit-stop at a diner. Depending on the size of our group, it could make collective restaurant dining a difficult. Any thoughts?

    Weather forecast: To be updated as the event day gets closer.

    Bradshaw Mountain has several trails for us to run around the Bumble Bee, Crown King and Cleator areas. This decision is based on the theory that it will provide our group with as much flexibility as possible for all those who attend. Most trails in the Bradshaw Mountains provide “alternate” routes; ie… a challenging and a easy option to the same destination.

    The actual trail was awesome and the group couldn’t have been better. 47 Tacomas, a Tundra and a Jeep, people were in awe when they watched us drive past. The bad part of the trip was a Tacoma went over the side… no one was hurt… except the Tacoma.

    Amy was my shotgun and we had a great time. Took all day but got to break in my truck and enjoy beautiful countryside. Amy is great and finding things and making sandwiches on the side of the road.

    I look forward to the next trip. Maybe by then I will have gotten a few things done. I did just get a deckplate, just need time to do it.
     
    Last edited: Nov 16, 2015
    Crom and himmie like this.
  3. Nov 16, 2015 at 9:27 AM
    #3
    Chipskip

    Chipskip [OP] N7MCS

    Joined:
    Aug 31, 2010
    Member:
    #42519
    Messages:
    11,605
    Gender:
    Male
    First Name:
    Chip
    Green Ridge, MO
    Vehicle:
    07 Tundra
    Bonneville 2011
    The Drive to and from Bonneville as told by Don Kuhl.
    Aug 2011

    After our trip to the Bonneville Salt Flats this weekend, we’ve got a lot of good stories to tell. I’m going to add what I remember into the comments as I remember them. The details might be off a bit here and there, but I was mostly dehydrated, always exhausted, and usually managing a buzz.

    I’m no writer, so bear with. Also, keep in mind that none of this is meant to be whining or complaining. We had a lot of fun and made some good memories.


    The Winnie Exhaust
    When we picked up the 1970 Winnebago on loan from Brian and Leala, we noticed it was a bit loud as it idled in their driveway. Brian told us one of the mufflers had blown out, but she ran ok. Alright, no problem.
    After we we’re on the road for an hour or so, yelling at each other the whole time over the noise, we realize the sound isn’t the only problem. The fumes. The cabin is smelling a lot like exhaust gas and everyone has a headache. So we fire up the generator and get the a/c unit on the ceiling pumping in fresh air into the cabin. That helps, but you don’t want to be anywhere in the back of the RV and no matter how cold the mountain roads get or how much gas we’re using, the windows stay open and the generator stays on.

    The day after we setup camp on the salt we grabbed some tarps and crawled under the Winnie to check out the exhaust situation. One muffler is completely split from end to end and the other is sheared off of the pipe. Both exhausts are dumping out right under the cabin. That’s bad.

    My brother Bill and I head to town to see about getting replacement parts. There’s only one auto parts store. They don’t sell mufflers, but they do have pipe. And a parrot. They have a HUGE parrot that squawks so loud you’ll duck for cover. We figure we’ll skip putting on mufflers, since we can’t get any, and splice in pipe replacements. It’ll still be loud, but we’ll get the fumes out from under her. The tail pipe they sell only comes in 10 ft lengths, costs $4.50 a foot, and they won’t cut it for you. Thanks, but no thanks. Also, we’re told this town doesn’t have a muffler shop. So we leave.

    On the way out into the parking lot of the parts store, Bill notices a couple of guys chatting next to a big work truck with a welder in the back. “Hey, is that your truck?” asked Bill, “Do you weld a lot of pipe with that?” Larry, the guy standing next to the truck, replied, “Yep.” He said he had some stainless pipe that would work, but we didn’t need anything that fancy. Bill asked, “Isn’t there an old fence that fell down or something? We just need to get the exhaust out from under the RV.”

    Nice Guy Larry, hopped in his truck and told us to follow him. He led us up an old dirt road to the Casino Graveyard. It turns out that casinos don’t throw anything out. They just throw it into a scrap yard. It was filled with broken black jack tables, smashed roulette wheels, plenty of gaudy chairs that smelled of nickel slot gamblers and pipe. Lots and lots of pipe. After a short excursion over the scrap we found the right diameter pipes and threw them into our truck. Larry refused any payment and sent us on our way.

    We headed back to camp with our treasures and started working on removing the mufflers. The driver side muffler that had exploded came off without much trouble at all. The passenger side was much more stubborn. After pulling, banging, wrenching and cussing at it for 20 minutes or so, our campsite neighbor, Dan, came over to see what we were up to. It turned out that he had a 5 lb sledge hammer in his gear. Who takes a sledge hammer camping? Really. Dan is now known as Thor.
    With Thor’s mighty hammer we got the other muffler off and spliced in the pipes. Of course the pipes needed adapters because the tail pipe hanging under the Winnie wasn’t all one diameter. Of course the one parts store in town didn’t have the pieces we needed, so we bought a pipe stretcher and forced those damn things on. Brian and Leala will want to replace that hap-hazard mess under their RV, and we’ll be happy to kick in for the trip to the muffler shop.

    Once they were in, we started her up to bask in our manly, auto repairing, glory. Oh, my God it’s loud. No, not loud. LOUD. Damn.

    One of the great past times at the Salt Flats is to take your hot rod, be it a ’32 coupe, a ’29 bucket, or what have you, and cruise around the campsite and romp your engine as you idle by at 5 miles per hour. So we did what we had to do. We hopped in the Winnie and got in line behind the other rods and romped on our bad-ass Chrysler 318 with her bitchin’ straight pipes. We were the loudest, got the most attention and had the most laughs.


    The Storm
    Sunday evening we headed back to camp after a great day of Speed Week fun. As we were heading down the road to our favorite Mexican restaurant, we could see a rather impressive storm building up on the far side of the western mountain range. Thunderbolts and lightning, very, very frightening…

    When we were done with dinner we headed back to camp, gathered all our chairs in a circle, and did our nightly beer drinking, storytelling ritual. Then the wind started. We’d had wind before, and dealt with it by moving behind the Winnie to block the wind, but that didn’t work this time. The rain started coming in, so we moved into the RV. No problem…. until the rain started coming down in buckets.
    It’s important to understand what our campsite is built on. It’s not pure salt, like out on the track, and it’s not dirt. It’s a salty-clay substance that is hard as a rock. You don’t hammer in tent stakes here, you drill in lag bolts to secure your tent.
    We had two tents and the Winnie making up our camp. Everyone but Dad had holed up in the RV. Dad seemed like he was over full of beans and burritos, and was lying down in his tent as the rain came in. As the rest of us sat in the RV we were getting tired and cramped, so we started to wind down for the night. Chip went to his tent and got his bag so he could get a quick rinse in the RV shower. Tom decided to turn in and squeezed past everyone to head to his tent.

    As he looked out the door he said, “Damn, that wind is blowing! It looks like it could take the tent.”

    Wait for it…

    “AAAAUUUGH!!! It took the tent!! Our tent blew away!!!”

    Another interesting thing about our campsite: Every year we park right next to a canal. The canal goes down about 8 to 10 feet before you get to the opaque baby-blue water packed full of whatever minerals and bright green sludge. There’s no way to know how deep the water is, because it’s opaque. We like to be right next to the canal because then you only get traffic on one side of your camp and it’s more peaceful. Tom and Chip’s tent flew 10 feet up into the air and landed directly in the middle of the canal.

    We ran out of the RV to the canal to save the tent, but quickly realized there would be no running. The salt-clay surface had turned into the thickest, stickiest substance we’d ever seen. So we trudged over to the canal side and saw the tent had drifted to the far side. At this point Tom is losing his cool. ALL of his stuff is in that tent. His cot, his car keys, his camera and all the clothes he’s not wearing. Everyone is fine with Tom losing his cool.

    Tom and I hop in the Polaris and drive around the end of the canal and to the other side to try and fish the tent out with cargo straps we brought to tie down the motorcycles. At this point the rain is coming in buckets and the wind is gusting so hard it’s picking me (6’4″, 275lbs) up off my feet. It feels like being shot at with salt rock. We managed to hook the tent and then realize it had filled with water. Now it’s a big bucket that weighs hundreds of pounds, so our hook promptly rips out and the tent falls back into the water. We give it another few shots, hook the tent again, and the hook slips off the strap, leaving us with just a strap. Damn.
    We can’t see, we can’t stand, and we have no way of fishing the tent out of the water, so we head back around to our camp. Tom’s cool is long gone and replaced with rage against all things camping and nature.

    Chip, Bill and Thor were at the other side of the canal giving us light while we fished. Once they saw our defeat, they started fishing on their own. It turns out that Chip has this sort of thing happen regularly so he’s really good at using cargo straps to fish things out of holes. What the hell? Anyway, they manage to drag it across the canal to the bank on our side. It’s still eight feet down a wall of sludgy, salty, clay, but they’ve got hold of it.

    Bill lays on his belly and reaches the door zipper and opens it so he can get some of the weight out of the tent. He starts slipping head first down the ditch, so I jump down and grab his legs. It’s still raining and blowing like hell, we’re out in the dark, there’s three guys pulling with all their might on cargo straps, and two guys on their bellies in the crud, on the side of a cesspooled canal. Good times. We managed to drag out the cot, some water logged pillows, and Tom’s duffel bag. That’s enough weight lost that we could drag the tent the rest of the way up and VIOLA! we saved the tent.

    Well sort of. The tent is ruined, Tom’s camera is ruined, and he’s covered in clay, completely soaked and all of his clothes are completely water logged. Ugh. We headed back to the RV, took turns trying to clean up as much as possible and figured out how we were going to sleep. Brian worked out the logistics to get sleeping room for five big guys and two 12 year olds. I’ll bet he’s awesome at Tetris.

    During all of this, Dad’s tent collapsed, with him in it. He wriggled out of it, gathered it up as it tried to fly away, and hid out in his truck. He and Brian decided to let the Mike and Owen sleep in the Winnie and then he squeezed into his truck and slept across the seats.

    Four hours after the tent took flight, we went to bed. Tomorrow was going to be rough, and we were supposed to head home early in the morning, but we would deal with that later.


    The Voyage Home
    Monday morning, the day after the storm, it’s time to head home. Most of us have to be at work the next day and we had planned on packing the camp the night before and leaving bright and early.

    Um… no.

    As we all look out the windows, we can see the whole camp area is soaked and the clay-of-doom is not letting anyone go. Big 4×4 trucks are just spinning their tires. Normal cars are filling their wheel wells with clay until it locks the tires into place. People are trudging around and can barely move. It’s a sight.

    Thor trudges over from his camp and offers us bacon and eggs to eat if we’ll cook it on our stove. Thor is a righteous dude. So he hands us the supplies through the window and we make a morning feast.

    After some food in our bellies, and some time to think, we decided to let the sun come up and bake the clay a while before we try to get out of camp. There’s no way the Winnie is going to drive through this stuff. So we sit back, drink coffee and talk about all the adventures we’ve had.

    By 11:00 it looks dry-ish enough to venture out and work on packing things up. Pretty much everything that will fit in the bed of Chip’s truck is just packed in and covered with a tarp. There’s no sense in trying to clean anything right now. All the gear got packed up despite the clay. This stuff is amazing. We all had to clean our feet with a stick to get the stuff off. Rags and water do nothing.

    Now it was time to get the Winnie out. The sun dried the stretch of clay behind her, up to the canal bank, but it was still gooey in front of her. We backed her up onto the dry part and let the sun work on the goo for another half hour. Watching the other vehicles try to get out we decided to get as much weight out of the Winnie as we could and just take a run at it. Drop her in 1st and don’t let up until you hit pavement.

    I drove, Bill rode shotgun, and everyone else stood by and shot video. Heroic or tragic, this would be a spectacle. One foot on the gas and one foot on the brake, I revved her up and launched her into the clay. We went straight as an arrow at first, but then she started to slide. The front tires weren’t really doing anything and the back tires we’re spinning away. Driver’s Ed taught me to turn into the skid and slowly let off the throttle. Ken Block and Jeremy Clarkson taught me to steer full counter lock and give it the beans. I wish I wasn’t trying to get my only ride home out of the clay and to safety, because I’m sure power sliding that huge RV across the campground and up to the pavement would have been hilarious fun. Bill was sure enjoying himself.

    Safe and secure, we packed up the rest of our gear and started to head home. Other than stopping for construction and making fun of the workers holding the slow/stop signs, we were cruising along well enough.

    About three or four hours into the trip south we were in the middle of nowhere, otherwise known as fifty miles north of Caliente Nevada. It’s a long straight road through a huge brush filled valley. No real trees to speak of, but wind gusts that will grab your attention. A few hundred yards ahead of us one of these gusts grabbed a truck pulling a trailer and pushed the trailer around, causing the truck to spin around 180° and roll onto its side and then back upright off into the brush.
    We stop both vehicles and everyone springs to action. Tom and Chip start flagging down traffic so no more accidents happen, Brian calls 911 as he looks for a mile marker, and Bill and I head into the brush to help. On the far side of the truck there’s a lone woman standing there and bending over to hold her knees, moaning in pain. We quickly found out that she was the only one in the truck or trailer, so good news there. I’d had emergency first aid training while in the Air Force and did what I could to help her while we waited on the paramedics. She could walk and move around but her right arm and shoulder really hurt. We sat her down and I distracted her from the pain by asking her questions. Turns out her name is Susan, and she was driving her daughter’s stuff to Boise State where she’ll be starting school.

    The rescue guys showed up and took over. We asked if we could help in anyway and surprisingly, they took us up on our offer. They kept Bill and I close to help lift Susan onto a back board and gave Tom and Chip stop/slow signs to help them direct traffic. Brian noticed the near instant karma from us making fun of the road workers earlier. Good stuff.

    With Susan packed up in the ambulance and professionals handling traffic, we headed out again. On through Nevada everything was going smooth as night fell. By 10:00 PM we reached North Las Vegas. Here we had to stop at the break in HWY 93 and turn on to I-15. That’s where the Winnie died. We made it 50 yards or so past the on ramp and that was it. No engine, no lights, no flashers, nothing.
    Both of the Winnie’s batteries were dead, and we didn’t know why. Bill and Chip took the truck to get a battery and the rest of us stayed behind. We pulled the coolers out of the RV and sat on them away from the road in the dark while sipping on beer, wondering if this “vacation” would ever end. About an hour later the boys returned with a battery and we drove into town to the 24 hour AutoZone they had found.

    The tester at AutoZone said the Winnie’s voltage regulator was gone. Of course AutoZone doesn’t have any data on a 1970 Winnebago so we had to find it. Two hours later it was found under the dash. With the part in hand, we found a new one at an AutoZone an hour away. Neat. Another excursion out and we had a new voltage regulator. Of course that didn’t fix our problem. Why would it? It was now 4:00 AM. We decided that only hooking up one battery at a time and not using the headlights might give us enough juice to get home. Daylight was only an hour and a half away so we went to sleep in the Winnie behind a gas station in China Town, Las Vegas.

    At 5:45 AM we hit the road again to drive through Vegas before the morning rush hour really got going. Besides discharging the batteries, our electrical problem also kept the generator from running. You know, the generator that’s needed to run the air conditioning.

    When we hit Kingman Arizona at noon, we were a sight. Covered in clay from the camp, grease and oil from working on the RV, scratched and bloody from the road side brush, and drenched in sweat from being in a tin stove through the Arizona summer, it was not pretty. Tom went into the gas station store to buy a water and the cashier said, “HEY! You have to buy something if you want to use the bathroom! …damn bums…” We looked that bad.

    Another few hours and we were back at Bill’s house where we had met up five days ago. We quickly grabbed what we needed, got in our cars, and went home. We’ll be doing all the clean-up tonight after work.
    Bonneville Speed Week is awesome, and having skipped all the stories from the track with all the amazing stuff we saw out there, it might seem like we’d never go back again. We will go back, but we may just fly there and stay in a hotel next time.

    [​IMG] [​IMG]

    [​IMG] [​IMG]

    [​IMG] [​IMG]
     
    Last edited: Nov 16, 2015
    Crom likes this.
  4. Nov 16, 2015 at 9:27 AM
    #4
    Chipskip

    Chipskip [OP] N7MCS

    Joined:
    Aug 31, 2010
    Member:
    #42519
    Messages:
    11,605
    Gender:
    Male
    First Name:
    Chip
    Green Ridge, MO
    Vehicle:
    07 Tundra
    LED Lights – Interior
    November 23rd, 2011

    Ordered an LED interior light kit from a guy on TW. Dome light and the two map lights. I got the dome in white and the maps in red. Easy install, although the map lights keep falling down and I shorted out half of one. My fault, I’ll wait until I older some more before I replace it.

    The only pics I have are of white map lights, they weren’t what I ordered, but the guy took care of me, so in the end I got my red.

    Ordered super bright reverse lamps as well, but they didn’t work out. The bulb’s shaft wasn’t long enought to “lock” the bulb into place. It’s a shame, because those things we BRIGHT. I need to order some new ones from superbrightled.com, but I have to remember to do that.
     
    Last edited: Nov 16, 2015
  5. Nov 16, 2015 at 9:27 AM
    #5
    Chipskip

    Chipskip [OP] N7MCS

    Joined:
    Aug 31, 2010
    Member:
    #42519
    Messages:
    11,605
    Gender:
    Male
    First Name:
    Chip
    Green Ridge, MO
    Vehicle:
    07 Tundra
    Deck Plate Mod
    December 9th, 2011

    My dad picked up a boat deck plate for me, just dropped it off today. It was easy to get that thing in. The air box comes right off, cut a hole, seal hole and insert deck plate.

    I can hear the difference between it being open and closed. Doubt I will need to close it very often.

    I forgot to take pictures of this, sorry.
     
    Last edited: Nov 16, 2015
  6. Nov 16, 2015 at 9:27 AM
    #6
    Chipskip

    Chipskip [OP] N7MCS

    Joined:
    Aug 31, 2010
    Member:
    #42519
    Messages:
    11,605
    Gender:
    Male
    First Name:
    Chip
    Green Ridge, MO
    Vehicle:
    07 Tundra
    Lights
    February 10th, 2012

    I won free lights from autocentral on TW. 7” off-road lights. I can upgrade these to HIDs down the road. I got lucky and found a stock style switch, new in package, that looks awesome. Only took a few minutes to install them on the bumper.

    I love Free!!!

    [​IMG]
     
    Last edited: Nov 16, 2015
    ramonortiz55 likes this.
  7. Nov 16, 2015 at 9:27 AM
    #7
    Chipskip

    Chipskip [OP] N7MCS

    Joined:
    Aug 31, 2010
    Member:
    #42519
    Messages:
    11,605
    Gender:
    Male
    First Name:
    Chip
    Green Ridge, MO
    Vehicle:
    07 Tundra
    New Tires & Rims
    April 13th, 2012

    My truck was in desperate need of some new tires. Seeing that I cannot do anything simple… I bought some used 17” 2011 TRD wheels and Copper Discovery S/T 265/75/17 tires. The backstay was different on the new wheels, so I needed 1” spacers, but decided to go with All-Pro 2” spacers to give it a little more aggressive stance. The ride is much nicer and the truck instantly sat about 2.5” higher. I did have to do a little trimming of the plastic liner close to the cab, however I plan on adding a 3” lift soon, so that should solve any and all “rubbing” issues.

    Sorry this isn’t as detailed as it I would like, but I will do better next time.


    [​IMG]
     
    Last edited: Nov 16, 2015
    Crom likes this.
  8. Nov 16, 2015 at 9:49 AM
    #8
    Chipskip

    Chipskip [OP] N7MCS

    Joined:
    Aug 31, 2010
    Member:
    #42519
    Messages:
    11,605
    Gender:
    Male
    First Name:
    Chip
    Green Ridge, MO
    Vehicle:
    07 Tundra
    New Radiator
    June 2nd, 2012

    Stopped at the QT on my way to work, as I walked away from the truck something in my head said that strange noise is coming from my truck. I turned around and sure enough, she was pissing all over the place. The top plastic pice of the radiator and a 2 inch split.

    @%#$! <-- You can quote me! So, after grabbing my soda and stuff, I limped into the last 4 miles to work. At 6 am, was searching around Internet found 1-800-radiator. Those guys were awesome, best price on line, plus they coordinated with a local shop to deliver it directly to me. One of my coworkers is also a Tacoma guy, so he ran home grabbed some tools and coolant for me. At 1400 102° out, but got to work on it during my lunch break. Only took an hour and a half, not bad using someone else’s tools in my work's parking lot. Hopefully wont have do that again anytime soon.

    [​IMG]
     
    Last edited: Nov 16, 2015
  9. Nov 16, 2015 at 9:51 AM
    #9
    Chipskip

    Chipskip [OP] N7MCS

    Joined:
    Aug 31, 2010
    Member:
    #42519
    Messages:
    11,605
    Gender:
    Male
    First Name:
    Chip
    Green Ridge, MO
    Vehicle:
    07 Tundra
    Front shocks!
    June 9th, 2012

    Finally, new shocks! The ones on the truck look factory, and were is desperate need of being replaced. So I ordered some Toytech Coil Overs with Bilstien shocks. Man they look sexy.

    After Harper got done playing with them, I headed over to Bill’s house and he helped me install them. Kind of a PITA to get the lower control arm down far enough to bolt them on. But after a few beers we were able to get them in.

    The ride is much nicer and they sit at the perfect height, I am sure a little more adjusting to get everything level is in order.

    Now to save up and get the rear done. Shackles or AAL, that is the question. Also need to get steel braided lines for the front, maybe when I do the Tundra Front Brake mod.

    [​IMG]
     
    Last edited: Nov 16, 2015
    Crom likes this.
  10. Nov 16, 2015 at 9:52 AM
    #10
    Chipskip

    Chipskip [OP] N7MCS

    Joined:
    Aug 31, 2010
    Member:
    #42519
    Messages:
    11,605
    Gender:
    Male
    First Name:
    Chip
    Green Ridge, MO
    Vehicle:
    07 Tundra
    Ultragauge
    November 9th, 2012

    [​IMG]

    I am upgrading this place holder with pics and a little bit of information. I jumped on a group buy on TW (surprise, surprise, surprise) and got a smoking deal on an Utlragague (UG).

    Why? What does it do?

    Well, let me tell you. It gives me a total of 44 gages/displays/outputs for my truck. My truck has only a Tach, Speedo, water temp, and fuel (yes there are a few lights, but they only tell you that there IS a problem, not WHAT the problem is. Now I can setup 8 display pages with up to 6 outputs per page. I honestly don’t need or don’t know what to do with that much information. However, I do want some of the information on a daily bases and need the others on occasion. I was able to calibrate the speedo on the UG, with the tire and wheel upgrade mine dash display was no longer accurate. This helps me manage fuel economy and distance travel better. The Instant MPG calculation is pretty cool and has helped me increase them.

    Volt Meter, engine torque, water temp, air intake temp… plus 38 more gages aren’t needed on a daily bases, but they sure nice to have.

    The UG also reads and clears engine codes. Giving me the ability to start troubleshooting a problem immediately. Also lets me know how severe the issue is, pull over and call a tow truck or get to it when ever I can. Oil temp is the only thing it is really lacking, but that is an issue with the Tacoma and not the UG. Haven’t decided if that mod is forthcoming or not.
     
    Last edited: Nov 16, 2015
    Arctic Taco likes this.
  11. Nov 16, 2015 at 9:53 AM
    #11
    Chipskip

    Chipskip [OP] N7MCS

    Joined:
    Aug 31, 2010
    Member:
    #42519
    Messages:
    11,605
    Gender:
    Male
    First Name:
    Chip
    Green Ridge, MO
    Vehicle:
    07 Tundra
    Christmas Came Early
    December 7th, 2012

    Santa, also known as the UPS guy, delivered a few gifts for my truck this week. First up, B.A.M.F.’s BPV relocation bracket. This thing is meaty. Second was from Wheeler’s Toy Shop, New Blistien 5100 rear shocks, Toytech 2” Shackles, Extended rear brake line, OEM exhaust relocation bracket, and differential drop kit.

    All to be installed soon, gonna coordinate with Mr. Bill for use of his flat garage and air tools.

    Finally, for a completely different project, I received S13WE 2001 Tundra front brake calipers. These things are going to take a little work to clean up and paint. However, the savings is worth it. But more on this project later.

    [​IMG]
     
    Last edited: Nov 16, 2015
  12. Nov 16, 2015 at 10:07 AM
    #12
    Chipskip

    Chipskip [OP] N7MCS

    Joined:
    Aug 31, 2010
    Member:
    #42519
    Messages:
    11,605
    Gender:
    Male
    First Name:
    Chip
    Green Ridge, MO
    Vehicle:
    07 Tundra
    Rear Lift Install
    December 22nd, 2012

    [​IMG]

    Finally got around to order and installing my rear lift. I installed the Toytec Coilovers in the front a few months ago. I set them close to level, but I still had a little bit of a of “Bro Lean”.

    Special thanks to Mr. Bill for use of his garage and air tools.

    Nothing goes as planned, but all and all the install was easy. Pulled the wheels and removed the old shocks, factory shocks with 260k + miles. Unfortunately I broke ONE of the bolts. Of course these aren’t just any ordinary bolts, these are one of those few Toyota Special bolts. I tried a few places and finally ordered it from the dealership, should be in on Tuesday.

    After installing the new shocks, I went ahead and tackled the shackles. This required just a little tapping here and there to get it into position on the passenger’s side. However the bolt sleeve on the driver’s side was larger and required a decent amount of grinding to get it into place. Once that was all done, bolted it all back together and bleed the brakes.

    Everything appears to be working fine, except for that lower shock mount bolt missing. So it true professional manor, we zip tied it into place. Yes, 3 medium sized zip ties and I was rolling down the street. It was only 9 miles to the house and all normal streets. Made it home with no issues, they held just fine. I think I will switch out all 4 bolts when the new ones come in, then just bag and tag the 3 spare bolts… you never know when you will need something like that.

    [​IMG] [​IMG]
    [​IMG] [​IMG]
     
    Last edited: Nov 16, 2015
  13. Nov 16, 2015 at 10:08 AM
    #13
    Chipskip

    Chipskip [OP] N7MCS

    Joined:
    Aug 31, 2010
    Member:
    #42519
    Messages:
    11,605
    Gender:
    Male
    First Name:
    Chip
    Green Ridge, MO
    Vehicle:
    07 Tundra
    Parts, parts and more parts!
    January 21st, 2013

    Well, I went to the local dealership and bought a few things. Plus, a few users on TW caused me to spend money. OUCH!

    What did I get?

    From TW:

    -Tundra Calipers for my big break upgrade

    -Track System from a 2nd Gen.


    From Dealership:

    -Tundra brake pads

    -Tundra rotors

    -New hardware kit for Tundra Calipers

    -Air filter

    -Valve Cover Gaskets

    -Spark Plug tower gaskets


    Still need brake lines and to sand down the calipers. Need to find time to install the track system and I have 3 gals of Amsoil sitting in the garage to change the Tacoma and the Flex’s oil.


    Need: Time!!!!


    I do have an alignment / tire rotation planned for this week. We will see if that gets to happen.
     
    Last edited: Nov 16, 2015
  14. Nov 16, 2015 at 10:09 AM
    #14
    Chipskip

    Chipskip [OP] N7MCS

    Joined:
    Aug 31, 2010
    Member:
    #42519
    Messages:
    11,605
    Gender:
    Male
    First Name:
    Chip
    Green Ridge, MO
    Vehicle:
    07 Tundra
    Track System
    January 25th, 2013

    I finally found a good enough deal and bought a used Track System off a 2nd Gen Tacoma. I think these things are pretty cool and will help with securing a load. As usual I found them on TW.

    These things bolt right up to the 2nd gen bed’s. I don’t know if the bed rails are tapped or have a nut “attached” to them, but I had to go buy washers and nuts (M6 – 1.0). I was able to get two of the bolts secured on the front of the bed, but my gloves for hands just couldn’t squeeze into between the bed and cab anymore. So I called on my lovely wife to help. It took her a while to get it figured out, trying to slip the washer, locking washer, and nut onto the screw in the tight space without being able to see. However, once she figured it out, she got the last two in 30 secs flat!

    The sides were easy and only took one beer to complete. I still need to get one more screw from Toyota, but I put a bolt in as a place holder until I get around to picking one up.

    I think the system looks nice and hope it will really help when the time comes.

    [​IMG]
     
    Last edited: Nov 16, 2015
    DustStorm4x4 likes this.
  15. Nov 16, 2015 at 10:12 AM
    #15
    Chipskip

    Chipskip [OP] N7MCS

    Joined:
    Aug 31, 2010
    Member:
    #42519
    Messages:
    11,605
    Gender:
    Male
    First Name:
    Chip
    Green Ridge, MO
    Vehicle:
    07 Tundra
    Alignment = Fail!
    January 25th, 2013
    [​IMG]

    I have been feeling some vibrations when driving and a lot when stopping. Now, when driving, a little is normal. There is the toyota shake and I just lifted my truck, so I knew I needed an alignment. The vibrations from stopping is presumed to be warped rotors from not moving the BPV when lifting the front. Hence the big brake mod.

    So, I got off work early and headed down to Jack’s in Phoenix. They hadn’t even gotten my truck fully on the platform when they called me into the pit.


    The Verdict:
    I need new bushing for the Rack and Pinion (r&p) and new lower ball joints for the Lower Control Arms (lca).

    So, I leave there and swing by Toyota to get quotes and pick up some parts I had to order. First, Toyota only sales one of the r&p bushings, the other two are only sold with the whole unit…dumb! Second, Toyota makes some great lca bushings, super, wonderful, bushings and they are very “proud” of them. So, I grabbed the one bushing and headed off to contemplate my next move.

    “NO…NO….No… I don’t want to go into the pit, just align it and let me go on my way!!!!”

    Well, being as good as they are, they were not about to do an alignment, that would waste their’s and my time.


    The plan:
    After much back and forth, reading forums, talking to Mr. Bill, looking at money, all the normals… I have a plan. I am going to order new bushing for the lcas from Toyota. I have already ordered the remaining r&p bushings from RackAuto (MOOG brand). Finally, I am going to need air and air tools to do this job.

    This could be big enough that I don’t want to take up someones garage space for two days or longer if things go wrong. Now, I have a 2 car garage, not a 2.5 car garage. So fitting our a good enough air compressor into it, would be very tough. So, for about the same price as an air compressor I have decided to get a CO2 tank, thinking 15 lb. This will allow me to have all the benefits of a portable air tank without the downsides of an air compressor. Now, there are some downsides to the air tank, especially when it comes to large jobs and air quantity. But the pros out way the cons. Next I need to figure out which air tools I am going to get.

    Oh yeah, I still need jack stands and wheel chalks.

    I will try to take plenty of pics when the time comes.
     
  16. Nov 16, 2015 at 10:13 AM
    #16
    Chipskip

    Chipskip [OP] N7MCS

    Joined:
    Aug 31, 2010
    Member:
    #42519
    Messages:
    11,605
    Gender:
    Male
    First Name:
    Chip
    Green Ridge, MO
    Vehicle:
    07 Tundra
    Score! “Center Console mod”
    February 15th, 2013

    [​IMG]

    One of the complaints of the 95.5 to 2000 Tacoma owners is the center console. It’s not bad, but its not good. Its short and the cup holders are designed for new age deco square cups, or something like that. Now some one at Toyota earned their paycheck for the 2001 model, a much nicer center console. First, it’s taller! Second, it has cup holders designed to hold your coffee mug (yes with a handle)… GENIUS! Seriously, the guy that designed this center console better have won some award, like Best reengineered non mechanical part, or something like that. The best part about the center console for the 2001 Tacomas, they didn’t mess with the shifter (manual or auto) section, so the center console from a 2001 – 2004 Tacoma will fit in a 95.5 – 2000 tacoma with only slight modification, I mean, drill two holes to mount the new bracket, thats it, it’s that easy.

    So, I have been looking for one of these holly grails for a few months. I started a WTB thread on TW after watching a few other people get lucky with them. Surprisingly, I had a bite within the first 24 hours. Sadly, the person was asking a little more than I wanted to spend, especially for a different color console. So the mod would have continued with painting it. Only two weeks later and a few friendly free bumps, I got another bump. This time the price was right, although I didn’t think the color would be. Thats OK, I knew I could make it work.

    So when I went to meet Alan to pickup the center console, he apologizes for it being dirty and takes a few more dollars off. Alan you are a classy guy. However, the few extra dollars staying in my pocket wasn’t the best part, IT WAS GREY!!! Yes, it was almost the same color as my interior, so no painting required.

    Now, it isn’t the very same Blue-Grey that is in my truck (hopefully someone got fired over that color), but it was a better match than I could create.

    So, I get it center console home and immediately rip out the old one.. Oh, did I mention that I already had someone asking to buy my old console, SCORE… and install the new one. I would normally do a right up at this point, or from the beginning instead of this long story, but this is so simple.

    1. 1.Remove old console (two bolts inside & two screws connecting to the shifter piece)
    2. 2.Remove bracket.
    3. 3.Dry fit console and mark hole for new bracket (Toyota already has the holes there, but instead of the welded nuts, they covered with blanks. Pick the center of them and pre dill a whole.
    4. 4.Using 3/4 or 1/2 #8 or 10 screws, attach the new bracket
    5. 5.Screw in the new center console (two bolts in the back, two bolts inside, & two screws to the shifter piece.
    OK, so I went ahead and did a write-up, but I didn’t include any pics. Super easy. There is a mod to upgrade the foam cup holder thingies with 1/8 think rubber, but luckily for me, that was already done on this one too. SCORE!

    One of the best things about this new center console, it’s taller, yes it is exactly the height for my arm to rest and reach the shifter! My dad was in town this week, so he helped me with this mod.

    [​IMG] [​IMG]
     
  17. Nov 16, 2015 at 10:15 AM
    #17
    Chipskip

    Chipskip [OP] N7MCS

    Joined:
    Aug 31, 2010
    Member:
    #42519
    Messages:
    11,605
    Gender:
    Male
    First Name:
    Chip
    Green Ridge, MO
    Vehicle:
    07 Tundra
    QUICK UPDATE:
    February 16th, 2013

    [​IMG]

    So, I am in the process of rebuilding the calipers. Right now I am still at the cleaning stage, but I got my rebuild kit from Toyota, and will start on that soon. I would like to get those installed very soon.

    Ordered a 15 lb. CO2 tank from Wheeler’s, it’s an OutSource (I think) with the adjustable regulator. It’s on back order, but should only be a week or two.

    Applying PB Blaster to the rack & pinion bolts as well as the LCA bolts. I already have the r&p’s bushings, just haven’t had a chance to see if they are ready to be loosened. Waiting on taxes to get the LCA’s bushings.

    Just bought a 6” LED light from Jasper’s Offroad (GB on TW). plan on mounting that as a rear facing bumper light.

    [​IMG]
    But I am going to wait until I can order up a fuse box and mount the relayes properly. I think I am going to install a switch panel right below the radio. right now it only will have the front and this rear light, but I have plans to add more. Trying to win a Blitzpro light in there giveaway going on this month.

    Other that that, most of my time is spent with family and house stuff. I live a good life!
     
  18. Nov 16, 2015 at 10:24 AM
    #18
    Chipskip

    Chipskip [OP] N7MCS

    Joined:
    Aug 31, 2010
    Member:
    #42519
    Messages:
    11,605
    Gender:
    Male
    First Name:
    Chip
    Green Ridge, MO
    Vehicle:
    07 Tundra
    Tools!
    February 22nd, 2013

    In preperation for some serious work needed on my truck, I needed to get new tools.

    [​IMG]

    First, a C02 air tank. I ordered it from Wheeler’s Offroad, they are great people to work with. I decided to get the 15 lbs tank, the 20 is just to big and I wasn’t sure if the 10 would have really been big enough for my needs (I now think it would have been). Offroad pit crews use these all the time for major repairs. The Source offered a nice package including the tank, tank mount, adjustable regulator, coiled house, and a air chuck. The adjustable regulator is huge, most regulators release CO2 at 200 psi, that is great to fill a tire in 15 secs flat, but air tools prefer a much smoother 90 psi to operate.

    [​IMG]

    I am a Craftsman kind of guy, although I think I own at least one tool from every major manufacture. When my CO2 tank came in, I went to SEARS and bought a nice 1/2 in, twin hammer, impact wrench with 500 ft-lbs of torque, a 3/4 air ratchet, metric impact socket set, air blower set, and one more big thing…

    …A NEW CAR! No, sorry that was a Price is Right moment, but it was cooler to me than a new car. I bought a two piece tool box. I had four tool boxes and a few boxes with tools in them all over the garage.

    [​IMG]

    Adding the air tools and need to quickly access everything was my justification for it. I didn’t buy a new top, just the middle and bottom pieces, I put my three drawer tool boxes that I have had since I was 12(ish) on top. Looks good to me. Since I got this, I have been able to get rid of two of the tool boxes and am working on the third now. Also, I am going through all of my tools, I have almost a complete second set of ratchets and screw drivers. Those are going to help build my truck’s trail tool box. On that note, I got an ammo can from my brother and have been using it for the truck’s tools. I plan to mount it to the track system soon. At least a quick mount so I can keep it in the garage most of the time and mount it for runs.

    Finally, I won a Saw Max from Dremel! Just entered in the monthly contest and BAMM, I won. So thank you Dremel, awesome products, great customer service, and free stuff!
     
    Last edited: Nov 16, 2015
  19. Nov 16, 2015 at 10:31 AM
    #19
    Chipskip

    Chipskip [OP] N7MCS

    Joined:
    Aug 31, 2010
    Member:
    #42519
    Messages:
    11,605
    Gender:
    Male
    First Name:
    Chip
    Green Ridge, MO
    Vehicle:
    07 Tundra
    Ham Radio FT-8800R
    April 5th, 2013

    [​IMG]

    Well, last year for my birthday, my parents got me a Wuoxun HT radio with extra mic and a mag mount antenna. Do to operator error, I was not hit the local repeaters. I have since figured out THAT issue and have been able to make contacts. However, 5w just wasn’t doing it for me. Plus, the battery life on the thing wasn’t very good and the DC charger I have for it was for the base, not to operate the radio. I may fix that issue in the future.

    [​IMG]

    So, after much back and forth, I broke down and bought a Yaesu FT-880r! The install was super easy, no write up coming. I pulled the drivers seat, ran the antenna cable, power cables, and face place cable under the carpet to their respected locations.

    [​IMG]

    For now, the mag mount antenna is going to work. I want to add something else, mounted to the bed (sunroof gets in the way of a roof mounted one), but a good 4’ antenna is not cheap. So that will have to wait.

    Power, I decided to just straight wire it to the battery. I don’t have a whole bunch of things wired this way yet. Also, I do plan to do a fuse block, but at last, that’s not in the budget (not that the radio was, but…).

    I had a nice mounting arm laying around the garage from some past project on a past vehicle. So right now the radio’s face is mounted to that on the right side of my shifter. I am only using an existing screw, when I decide that I am happy with the location than I will mount it permanently.

    I have made several contacts, and even joined the 4x4ham.com weekly net. This radio gives me the ability to quickly communicate where the HT was more work than usability.

    73s

    -N7MCS
     
  20. Nov 16, 2015 at 10:31 AM
    #20
    Chipskip

    Chipskip [OP] N7MCS

    Joined:
    Aug 31, 2010
    Member:
    #42519
    Messages:
    11,605
    Gender:
    Male
    First Name:
    Chip
    Green Ridge, MO
    Vehicle:
    07 Tundra
    April Update
    April 12th, 2013

    [​IMG]

    Well, after replacing the rack and pinion bushings, replacing the brakes, and getting the tires rotated and balanced I no longer have any shakes or vibrations in the truck. So, at this point I have no plans to replace the LCA bushings. They may need it, but they don’t NEED it. I am starting to look for a set of UCAs, with the lift, I need to upgrade them.

    But with the baby due in two weeks, I think I am only going to be doing little mods/upgrades for the next few months.
     

Products Discussed in

To Top