1. Welcome to Tacoma World!

    You are currently viewing as a guest! To get full-access, you need to register for a FREE account.

    As a registered member, you’ll be able to:
    • Participate in all Tacoma discussion topics
    • Communicate privately with other Tacoma owners from around the world
    • Post your own photos in our Members Gallery
    • Access all special features of the site

Winkle99 Build Thread

Discussion in '1st Gen. Builds (1995-2004)' started by Winkle99, Sep 24, 2017.

  1. Sep 24, 2017 at 8:16 PM
    #1
    Winkle99

    Winkle99 [OP] Don't Look Back

    Joined:
    Jul 19, 2017
    Member:
    #224477
    Messages:
    835
    Gender:
    Male
    First Name:
    David
    CO
    Vehicle:
    99 XCab 3.4 Manual 4x4 TRD SR5
    Here is my build log of mods, maintenance, and off road adventures.

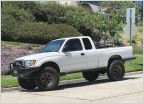
    I bought a stock 1999 Ext Cab, 4x4, TRD, SR5, 5VZ-FE 3.4 liter engine, 5 speed manual, clean body with 136,000 miles in March 2017 and named it Winkle, a name inspired from a 2011 thread where members debate the color of 8N1 - Blue Horizon Metallic. One comment, "That's periwinkle dude!", struck me funny.

    Background Story
    Just Another Story

    Summary
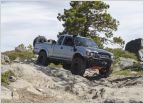
    As of Sept 2020:
    IMG_2800.jpg
    Wheeler Lake, Colorado

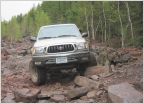
    Original configuration:
    Original.jpg

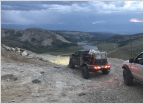
    2017 Off Road Excursions
    2018 Off Road Excursions

    2019 Off Road Excursions

    2020 Off Road Excursions

    2021 Off Road Excursions

    2022 Off Road Excursions

    2023 Off Road Excursions

    The first mods were protect my rust free frame with Eastwood Rust Encapsulator and Fluid Film, perform the Gray Wire Mod, and perform the Rear Diff Breather Mod.


    I bought a CB Radio and Lil Wil antenna from Right Channel Radios, and ordered front plate and rear tube bumpers from 4xInnovations and rock sliders from Demello Offroad.

    While I waited for the armor deliveries, I took some short day trips on some benign trails by my house to test Winkle and myself so I can be more prepared. I hope to join Tacoma World members on a longer off road trips and hopefully be ready for the 2018 season.

    After one of the day trips I notice something dripping on the garage floor.
    TransferCaseLeak.jpg

    I follow these excellent instructions to .


    Also while under the truck, I noticed the artistic splatter of fluid around the inboard side of the driver's side tire indicative of a wheel cylinder or axle seal leak. It was the axle seal. I paid the dealer to replace seals and bearings on both sides and watched my younger daughter's soccer games instead of fixing it myself.

    The bumpers arrived, soon followed by the rock sliders
    RawBumpers.jpg


    I dropped the armor off with Lee at Pristine Powder Coating.


    I picked up the black powder coated armor and prepared to install. I noticed the rock slider bracket that attaches near the bend in the frame in front of the front leaf spring mount was going to block the frame drain hole in the bottom center of the frame. I felt around inside the frame through the square hole on the frame's side and felt moist silt that had built up over time. Yikes! Gotta get that out. I drilled a new hole behind where rock slider bracket fits on the side of the frame where it is pinched.
    FrameDrainHoles1.jpg


    Then I sprayed water through each of the square holes on the side of the frame, from front to back, pushing any silt towards the back until clear water drained out. My driveway is sloped, which helped all the water drain out the holes.
    FrameDrainHoles2.jpg


    I sprayed Fluid Film on the frame and rock slider interfaces and mounted the bolt on rock sliders.
    FrameDrainHoles3.jpg


    I installed the bumpers. The front bumper has LED turn signals so I will be ordering a Triton EP35 flasher to fix the hyper blink. Here is a picture of the rear:
    RearBumper.jpg


    With the bumpers, rock sliders, and front grill installed, I wanted to try an intermediate trail. My younger daughter's soccer game was at 7:00 pm. I heard on the news that the aspen's were in full color at Kenosha pass. So spur of the moment on Saturday morning I thought I'd try Georgia Pass, a blue run in Funtrek's Guide.


    I headed west out highway 285, past Kenosha Pass. Evidently everyone in Denver heard the same news story I did because Kenosha Pass parking overflowed onto highway 285. At Jefferson, I turned north on 35 and then north on 54 up to Georgia Pass.
    Hwy54_1.jpg


    Hwy54_2.jpg

    Hwy54_3.jpg

    At the top of Georgia Pass, I intended to take a route east of Georgia Pass, traverse the face of Glacier Ridge and descend North down Number 10 hill, then west on Middle Fork Swan Road and end up on Tiger road into Breckenridge. Easy - just turn left at each intersection.

    I remembered Tacoma World posts about not wheeling alone and partnered with Mike and Melisa driving a Jeep. They came from Breckenridge up trail 355 and planned to take the same route as I planned back down to Breck. It was noon when we started on trail 258
    Trail258.jpg


    The weather continuously changed alternating from rain, sun, and occasional ice pellets. One time we were driving just under the base of the clouds, which looked cool. The trail was narrow, rough and steep in places with plenty of short water crossings from the rain. We descended alright, and ended up at a tree lined dead end. I must have missed a left turn somewhere! :facepalm:

    I quickly jumped out of the truck and ran up the muddy hill to warn Mike to stop because there was just enough room at the dead end for one truck to perform a 12 point turn to get out. Fortunately they were at a place where they could perform a 6 point turn to head back up the mountain. We both turned around.

    Unfortunately, Winkle's power steering pump started whining about needing replacement. So I will be ordering a new one on Monday.

    Unfortunately, as they headed back up, their driver side rear wheel got stymied against a ledge topped by a healthy tree root. The Jeep was stuck. I remember reading a TW post somewhere about someone liking rocks and fortunately, there were enough rocks lying around to build a Roman road.

    I grabbed my gloves and placed a bunch of rocks behind the wheel, Mike moved the Jeep backwards a little, I placed rocks in front of the wheel to complete the ramp, the Jeep climbed over the ledge and root. Problem solved. Unfortunately as the Jeep climbed, the tree clipped the Jeep's rear tail light, shattering it. Oops! I have to be aware that the design of my new rear tube bumper, which wraps around the quarter panel, sticks out enough to clip a tree.

    It was my turn to climb up over the obstacle. My mind flashed to a passage in
    World War one American flying ace, Eddie Rickenbacker's autobiography (one of my favorite books). Each of his first 5 sorties taught him something new about how to survive in the skies. If you live past the first 5, your chances of survival increase dramatically.


    I am recognizing better when to lock the rear end and I can engage it quickly by slowly rolling forward or backward while turning the front tires one way or the other. Winkle made it up with no problems.

    Once out of the trees I took a GPS reading on the iPhone to find out where we were so I could look it up at home. When I googled the coordinates at home, the satellite view looks like there is no trail. We were honoring the "Stay the Trail" etiquette and not tramping on some virgin soil. Here is a photo taken just after the GPS reading.

    MikeJeep.jpg

    I remembered reading it is best to get off the mountain before the late afternoon storms. Mike was thinking the same thing so we headed back past Glacier Ridge to the top of Georgia Pass, then down trail 355 to Tiger Road into Breckenridge. On the way down it started snowing.
    Trail355Snow.jpg


    I made it back home with plenty of time to watch my daughter's soccer game.

    The rock sliders were initiated with their first battle scars.
    RockSlidersInitiated.jpg
     
    Last edited: Jan 6, 2024
  2. Oct 15, 2017 at 8:22 AM
    #2
    Winkle99

    Winkle99 [OP] Don't Look Back

    Joined:
    Jul 19, 2017
    Member:
    #224477
    Messages:
    835
    Gender:
    Male
    First Name:
    David
    CO
    Vehicle:
    99 XCab 3.4 Manual 4x4 TRD SR5
    Installed a new power steering pump a few weeks ago. The old pump's screen was blocked with black residue. I bet that was causing most of the whining. I probably could have gotten away with just cleaning the screen since the old pump's bearing was still good. After filling up the reservoir with fluid, I turned the wheel back and forth to the stops to get air out of the lines. Did not see any bubbles in the reservoir. Pump does not whine at a neutral steering wheel position anymore. However, when steering, the pump whines more than I expect, making me think there is still a restriction somewhere in the system.

    I love chrome on classic cars, but not so much on a 4x4. So I ordered an all black front grill and replacement black door handles. I color matched the chrome Toyota badge. I used concentrated bleach (8.25% Sodium Hypoclorite) to eat away the chrome from the plastic. Dip the badge in a plastic container for about 8 hours or until it stops bubbling.
    IMG_0545.jpg

    There will be a black residue and some green.

    IMG_0542.jpg

    Clean off the black residue. I used a tooth brush.

    IMG_0556.jpg

    Repeat about 5 times or until the only plastic remains. I plan to change the rest of the badges black.
     
    Last edited: Feb 28, 2021
  3. Oct 15, 2017 at 4:37 PM
    #3
    cazinpa

    cazinpa Well-Known Member

    Joined:
    Dec 5, 2016
    Member:
    #204074
    Messages:
    429
    Gender:
    Male
    First Name:
    Andy
    Lancaster, PA
    Vehicle:
    '96 Tacoma
    A few tweaks
    Looks good. Cool tip on getting the chome off of plastic! Then what, krylon fusion paint?
     
  4. Oct 15, 2017 at 5:43 PM
    #4
    Winkle99

    Winkle99 [OP] Don't Look Back

    Joined:
    Jul 19, 2017
    Member:
    #224477
    Messages:
    835
    Gender:
    Male
    First Name:
    David
    CO
    Vehicle:
    99 XCab 3.4 Manual 4x4 TRD SR5
    I like Automotive Touchup products. I like their step by step instructions.
    AutomotiveTouchup.jpg
    One coat of plastic adhesion promoter, primer, bumper black and a few coats of gloss clear coat.

    You can see I am getting ready to paint the door badges. The bleach method takes much patience. I used one gallon on these two badges and it took six 8 hour immersions to get them looking like this. I also used oven cleaner on the last step to get some black residue off easier. Notice there is still some copper colored flakes remaining. I used 120 grit sandpaper to get the flakes off. I used oven cleaner on the SR5 badges (not shown) and it took off the chrome in one step. The SR5 badges are made of a more rubbery material compared to the Toyota Tacoma plastic badges. I tried oven cleaner on the Toyota Tacoma badges also, but did not have the same success as I had with the SR5 badges.

    To get the badges off, I set the truck in the sun on an 80 degree day for about 10 minutes. They came off easily with a gasket scraper with no scratches on the paint.
    TacomaBadge1.jpg

    TacomaBadge2.jpg
    The dirt and glue residue came off the door with a wet sponge and some elbow grease. I can vaguely see a shadow outline where the badge was originally attached, which shows me where to re-attach the badge. I plan to use 3M Plastic Emblem and Trim Adhesive found at any auto parts store to re-attach.
     
    Last edited: Mar 11, 2022
  5. Dec 12, 2017 at 7:59 PM
    #5
    Winkle99

    Winkle99 [OP] Don't Look Back

    Joined:
    Jul 19, 2017
    Member:
    #224477
    Messages:
    835
    Gender:
    Male
    First Name:
    David
    CO
    Vehicle:
    99 XCab 3.4 Manual 4x4 TRD SR5
    I've been pretty busy since joining @Star-Lord and the gang on an offroad excursion up 7 Mile Canyon on Oct 22.

    On October 30 I bought new Wheels from Groove Toyota - 17" Black Forerunner (PTR20-35110-BK) TRD wheels and tires from Discount Tire - 275 70 R17 (32.2") BF Goodrich KO2.
    I stayed under 33" to keep my stock gear ratio the same at 4.10. Shift points are a little different as expected. Steep climbs require downshifting earlier then my previous 31" tire but I find the performance acceptable. I was expecting a little faster crawl speed however it is not noticably faster to me. The Under 33" tire also enabled me to fit the spare in the stock location under the bed with minor modifications. I had to chamfer the 4xInnovation bumper tow hitch receptacle 30 degrees on the spare tire side (upper white arrow) and remove the legs on the spare tire mounting bracket (lower white arrow, one leg remains before it got cut off).

    IMG_0638_LI.jpg

    I had to try them out so they are a bit dusty:
    IMG_0712.jpg
     
    Last edited: Dec 16, 2017
    Deathbysnusnu likes this.
  6. Dec 12, 2017 at 8:23 PM
    #6
    Winkle99

    Winkle99 [OP] Don't Look Back

    Joined:
    Jul 19, 2017
    Member:
    #224477
    Messages:
    835
    Gender:
    Male
    First Name:
    David
    CO
    Vehicle:
    99 XCab 3.4 Manual 4x4 TRD SR5
    In early November, I performed the "pinch weld mod" to provide more clearance in the front wheel well for the larger tires. I had trouble finding out how to remove the plastic inner fender liner fasteners on the internet and broke a couple before I figured it out. Here are some detailed pictures in hopes that they help someone else in the future.

    The punch that I am holding on the right side of my thumb points to one of two tabs that need to be moved towards the center of the fastener.
    IMG_0643.jpg

    The fastener looks like this installed in the plastic inner fender liner.
    IMG_0644.jpg

    Use a screw driver to move the tab towards the center of the fastener and pry out the fastener slightly on that side. The tab should remain in the shifted position as you can see by looking down the fastener hole.
    IMG_0646.jpg

    Do the same on the other side and the fastener will pop out.
    IMG_0647.jpg

    One of the fasteners in the front of the wheel well does not have much clearance for a screw driver so one option is to use a wire or paper clip to squeeze both tabs to remove the fastener.
    IMG_0650.jpg

    With the plastic inner fender liner remove you can see the pinch weld protruding into the wheel well.
    IMG_0651.jpg

    I hammered the pinch weld flat. I noticed Toyota left me an unused fastener square hole that the punch points to in the picture. I am going to make use of that.
    IMG_0653.jpg

    I used my wife's hair dryer to heat up the plastic and flatten the inner fender liner at the pinch weld location.
    IMG_0652.jpg

    I made cuts in the corners (white arrows) to remove the stress and help flatten the plastic.
    IMG_0655_LI.jpg

    I used a silver sharpie to mark the location of the square fastener hole. Then cut the square out.
    IMG_0654.jpg


    I attached the inner fender with the old and some new fasteners from Toyota. Looks clean to me. Lets see how long the new fastener holds. So far so good.
    IMG_0656.jpg
     
    Last edited: Dec 12, 2017
    Deathbysnusnu likes this.
  7. Dec 12, 2017 at 8:45 PM
    #7
    Winkle99

    Winkle99 [OP] Don't Look Back

    Joined:
    Jul 19, 2017
    Member:
    #224477
    Messages:
    835
    Gender:
    Male
    First Name:
    David
    CO
    Vehicle:
    99 XCab 3.4 Manual 4x4 TRD SR5
    On Nov 21 2017 I bought a new suspension:

    Old Man Emu Dakar Leaf Springs
    Old Man Emu greasable shackels
    Specialty Products Company (Light Racing) Upper control arms
    Eibach D/O 1400.300.0650S (14" Tall, 3" inside diameter, 650# spring)
    ADS Bolt In Shocks 2.5" diameter front and rear.

    IMG_0671.jpg

    IMG_0669.jpg

    Slee Offroad in Golden installed the suspension and aligned.
    IMG_0710.jpg

    I like where Slee mounted the shock oil reservoirs - protected on top of the frame. View looking down into engine bay, passenger side:
    IMG_0679.jpg

    Distance from center of wheel to fender (inches):
    Stock suspension: Front 20 Rear 21
    New suspension: Front 24 Rear 25

    I was expecting a 2.5 to 3 inch lift, but got 4 inches (works for me). I believe my 18 year old suspension was sagging about an inch. I recall my daughter's 2002 Tacoma measurements were 21" in front and 22" in rear. Slee set 8 threads exposed above the front shock preload ring.

    No diff drop kit installed. I cleaned the CV boots and sprayed some silicone lubricant on them to minimize friction. I will watch the wear and I may try the boot slide mod if needed.

    With my recent modifications, Winkle gained about 283 pounds
    Bumpers - front/rear no winch 123 lbs
    Rock sliders 100 lbs
    5 tires - 12# increase/tire 60 lbs

    Winkle's total weight is 4210 pounds measured with only 1/8 tank of gas.

    The ride feels firm. Cornering feels like it grips better with no noticeable sway. It tracks straight especially when buffeted by the recently constructed off-road trail known as C470 between University and Quebec :). Washboard surfaces are much easier on my body now. I am very happy with the ride results.

    Here is how Winkle sits now.
    IMG_0683.jpg
     
    Last edited: Jun 29, 2020
  8. Dec 12, 2017 at 9:03 PM
    #8
    4xtacoma

    4xtacoma Well-Known Member

    Joined:
    Jan 21, 2017
    Member:
    #208234
    Messages:
    152
    Gender:
    Male
    First Name:
    Jake
    Grass Valley Ca
    Vehicle:
    00' sr5 trd 5 speed 4x4
    3 inch lift, 265 75 R16 mxt's
    Looks good man, sounds good too. I'm in the process of replacing my suspension and bringing my truck back to life. I really like the color of yours and your front bumper
     
  9. Dec 12, 2017 at 9:12 PM
    #9
    Winkle99

    Winkle99 [OP] Don't Look Back

    Joined:
    Jul 19, 2017
    Member:
    #224477
    Messages:
    835
    Gender:
    Male
    First Name:
    David
    CO
    Vehicle:
    99 XCab 3.4 Manual 4x4 TRD SR5
    Thanks! I am getting many complements on the look of the front. I wanted a clean look with no bull bars for less weight.
     
  10. Dec 12, 2017 at 9:17 PM
    #10
    Winkle99

    Winkle99 [OP] Don't Look Back

    Joined:
    Jul 19, 2017
    Member:
    #224477
    Messages:
    835
    Gender:
    Male
    First Name:
    David
    CO
    Vehicle:
    99 XCab 3.4 Manual 4x4 TRD SR5
    I tried out my new suspension and tires on Moab Hill.
     
  11. Dec 13, 2017 at 7:36 AM
    #11
    mtbjohn42

    mtbjohn42 Well-Known Member

    Joined:
    Mar 18, 2016
    Member:
    #181622
    Messages:
    195
    Gender:
    Male
    First Name:
    John
    Laporte, CO
    Vehicle:
    2005 Toyota Sequoia
    Hey man. I was in that sevenmile crew in one of the gunmetal Tacomas. The truck is looking awesome!!! Nice work!!!
     
    Winkle99[OP] likes this.
  12. Aug 19, 2018 at 9:02 PM
    #12
    Wulf

    Wulf no brain just damage

    Joined:
    Jan 30, 2015
    Member:
    #147523
    Messages:
    58,507
    Gender:
    Female
    First Name:
    Kira
    1789 28th St, Boulder, CO 80301
    Vehicle:
    rock raisin
    It was nice to meet you! :thumbsup:

    The pics in this thread don't do justice to how nice your truck is :D
     
    Winkle99[OP] likes this.
  13. Aug 26, 2018 at 10:25 PM
    #13
    seen20

    seen20 Well-Known Member

    Joined:
    Jun 11, 2018
    Member:
    #256165
    Messages:
    155
    Gender:
    Male
    First Name:
    Sean
    Vehicle:
    2000 3.4 Ext Cab 4x4 5-speed
    Adventure build
    I love your build! Mines ending up pretty similar.

    I also love your 4xinnovations rear bumper. From your experience do you think it would be at all possible to keep my 33in spare under the truck with that bumper?
     
  14. Aug 27, 2018 at 3:29 AM
    #14
    Winkle99

    Winkle99 [OP] Don't Look Back

    Joined:
    Jul 19, 2017
    Member:
    #224477
    Messages:
    835
    Gender:
    Male
    First Name:
    David
    CO
    Vehicle:
    99 XCab 3.4 Manual 4x4 TRD SR5
    I believe a 33 inch spare is too big for the stock spare tire location. Even after chamfering the 4xInnovations rear bumper as shown in post#5 above, I am not comfortable with the clearance between a 33 and the rear diff housing. That is why I chose the 32.2 inch (275 70 R17). I haven’t been airing down on the trails I’ve run so far. Airing down helps a little in sand, snow and mud but in the rocky mountains and the slick rock of Moab, I’d rather keep the roughly 0.5 inch that is lost from an underinflated tire. I prefer inducing less stress on tire sidewalls even though I have strong E rated sidewalls. I prefer all the engine’s torque be used to move the truck rather then some used to overcome the resistence of under inflated tires. The gain in traction from increased surface area is negligible above 14 psi. As pressure reduces below 14 psi, surface area increases but so does the chance the bead separates from the wheel. 4wd and rear lockers provide all the extra traction I need. Airing down provides a smoother ride, but I let my suspension handle that. I don’t mind getting jostled around a bit because I am off roading in the beautiful mountains enjoying the scenery, continuously amazed at how capable our vehicles are.
     
    Last edited: Sep 17, 2020
  15. Feb 2, 2019 at 6:17 PM
    #15
    Winkle99

    Winkle99 [OP] Don't Look Back

    Joined:
    Jul 19, 2017
    Member:
    #224477
    Messages:
    835
    Gender:
    Male
    First Name:
    David
    CO
    Vehicle:
    99 XCab 3.4 Manual 4x4 TRD SR5
    I added High Lift Jack mounting brackets and shovel mounting brackets from
    Fred Nelson Fabrication
    to the plastic bed liner in February 2018. I mounted the brackets at a location that allows the jack to rest on the wheel well. On the unseen side of the bed liner, there are 2 inch fender washers and a standard diameter washer to help distribute the load over the plastic. The optional bungees are redundant support. I wheeled with this jack mounting configuration all last season over very bumpy terrain including a few "all four tires off the ground" jumps and I see no fatigue in the plastic.
    IMG_1561.jpg

    Shovel mounting:
    IMG_1560.jpg
     
    Last edited: Mar 26, 2021
    This site contains affiliate links for which the site may be compensated.
    #15
  16. Feb 2, 2019 at 6:34 PM
    #16
    Winkle99

    Winkle99 [OP] Don't Look Back

    Joined:
    Jul 19, 2017
    Member:
    #224477
    Messages:
    835
    Gender:
    Male
    First Name:
    David
    CO
    Vehicle:
    99 XCab 3.4 Manual 4x4 TRD SR5
    In September 2018 at 141473 miles, before my 2 week trip through Utah, California, and Southwestern Colorado, I asked @thefatkid at Groove Toyota to install a new timing belt, water pump, thermostat, clutch, CV boots, and steering rack. There was no way I could get all that done before the trip. Winkle performed great. I had no worries and peace of mind made for a great vacation.
     
    Last edited: Mar 11, 2022
  17. Feb 8, 2019 at 5:26 PM
    #17
    Winkle99

    Winkle99 [OP] Don't Look Back

    Joined:
    Jul 19, 2017
    Member:
    #224477
    Messages:
    835
    Gender:
    Male
    First Name:
    David
    CO
    Vehicle:
    99 XCab 3.4 Manual 4x4 TRD SR5
  18. Mar 13, 2019 at 7:43 PM
    #18
    Winkle99

    Winkle99 [OP] Don't Look Back

    Joined:
    Jul 19, 2017
    Member:
    #224477
    Messages:
    835
    Gender:
    Male
    First Name:
    David
    CO
    Vehicle:
    99 XCab 3.4 Manual 4x4 TRD SR5
    Before:
    IMG_1769.jpg IMG_1770.jpg

    After:
    IMG_1771.jpg IMG_1772.jpg

    Thanks to @turbodb (post) and @BartMaster1234 (post) and this for their Tundra Brake upgrade posts. Their descriptions and pictures made the installation easy. Restored the stopping power that was lost from adding armor and bigger tires.

    I chose these parts:
    Toyota
    Front Rotor 43512-0C011 $99.58
    Front Rotor 43512-0C011 $99.58
    Disc Brake Pad Kit 04465-35290 $99.74
    Disc Brake Shim Kit 04945-35120 $28.69

    Napa
    Caliper 231mm (13WL) Eclipse Remanufactured Right $95.99 plus 55.56 core deposit
    Caliper 231mm (13WL) Eclipse Remanufactured Left $95.99 plus 55.56 core deposit
    32 oz bottle Valvoline Dot 3 Fluid $8

    LCE Performance
    Stainless Brake Line Kit - Tacoma to Tundra upgrade $185.02 delivered
     
    Last edited: Dec 30, 2021
  19. Mar 30, 2019 at 9:26 PM
    #19
    Winkle99

    Winkle99 [OP] Don't Look Back

    Joined:
    Jul 19, 2017
    Member:
    #224477
    Messages:
    835
    Gender:
    Male
    First Name:
    David
    CO
    Vehicle:
    99 XCab 3.4 Manual 4x4 TRD SR5
    xtremewlr and cazinpa like this.
  20. May 9, 2019 at 7:55 PM
    #20
    Winkle99

    Winkle99 [OP] Don't Look Back

    Joined:
    Jul 19, 2017
    Member:
    #224477
    Messages:
    835
    Gender:
    Male
    First Name:
    David
    CO
    Vehicle:
    99 XCab 3.4 Manual 4x4 TRD SR5
    Thanks! Photo taken at Oceano Dunes Sept 2018. I am having a lot of fun with the truck. Meeting new people, seeing new places.
     

Products Discussed in

To Top