1. Welcome to Tacoma World!

    You are currently viewing as a guest! To get full-access, you need to register for a FREE account.

    As a registered member, you’ll be able to:
    • Participate in all Tacoma discussion topics
    • Communicate privately with other Tacoma owners from around the world
    • Post your own photos in our Members Gallery
    • Access all special features of the site

TRD/ Magnuson 4.0 Supercharger Tips, Tricks, and Mods

Discussion in 'Performance and Tuning' started by 12TRDTacoma, Nov 8, 2017.

  1. Nov 8, 2017 at 9:30 AM
    #1
    12TRDTacoma

    12TRDTacoma [OP] Powered by Ford, GM, VW, and Mercedes

    Joined:
    Aug 20, 2012
    Member:
    #85133
    Messages:
    16,545
    Gender:
    Male
    First Name:
    Rob
    Concordia
    Vehicle:
    12 TRD Sport DCLB 4x4 Supercharged
    Boosted
    Very important note before we begin, I highly suggest you use your web browsers built in search function to find the section you are looking for that way you aren't scrolling aimlessly looking for a section that you may be going right past.

    Welcome to the Supercharger Bible thread! I congratulate you on finding this gem of a thread and If you are in here that must mean you have one (or are in the process of getting one) and want to begin the modification process. Enjoy and as always, boost on!

    TLDR version of the thread:

    https://youtu.be/Pc2gKKchNEg


    Discord:

    For current and long time members we now have a Discord of this page with all of information here present there. @Murphinator has been great in transferring and setting up all of the info I have placed here over to there. Myself and him moderate it and the page exists as a TW Live version of sorts. For a personal invite link invitation to the site. Please contact him or myself.

    - The TRD/ Magnuson blowers are great blueprint blowers, capable of putting out a lot more power over the rated factory 60HP additional that it adds to the stock 236HP. I have personally found over time and through finds of other members that they are choked down, bottlenecked, restricted, and leaky in many different areas direct from Magnuson themselves. Following some of these mods will net small improvements, but as always, consult to your immediate air fuel readings and proceed as you deem necessary. I am not responsible for things you blow up, however, I will have you know that when done right, all of these mods net safe and improve upon the OE from Magnuson/ TRD. There's your disclaimer. Not that you needed one. ;)

    - First and foremost... Maintenance:

    For those who are right around that time to do it, here is a detailed thread and write up on how to do it.

    https://www.tacomaworld.com/threads/trd-s-c-maintenance-how-to.331263/

    For those who would like a live action. Sort of instructional with explicit detail, here you go!

    https://youtu.be/OGVNta5p7wk

    https://youtu.be/x7zPNqXUPRU

    https://youtu.be/aSy28MmLGlI

    Included below is a resource to all original OE from Magnuson parts, you can find rebuild kits, couplers, seals, bearings, idlers, everything here. If you don't see something, call them.

    http://www.superchargersonline.com

    Attached below are some photos from my own about coupler mod day which will give you a better idea of what the insides look like and hopefully provide you some insight that the tutorial may have not explained so much in depth.

    20190426_104954.jpg

    This is the old spring loaded coupler, with about 55K on it. Still in usable condition, but not ideal, as it provides a small disconnect from immediate throttle response, and eventually makes noise due to part deterioration.

    20190426_105032.jpg

    If you want easier reassembly with the new snout coupler a little bit of grease inside of each hole will do the trick. Redline CV2 is a safe alternative to the grease Magnuson uses on the supercharger. Pictured below:

    20190426_105254.jpg

    This is the heart of your supercharger, the rotors. Pictured below.

    20190426_111848.jpg

    All set and ready to reinstall. Sidenote, standard red silicone works in place of the sealant which Magnuson uses on the supercharger. Make sure you wipe off as much of the previous sealant off of the dealing surface as possible.

    20190426_114904.jpg

    Rotors bearings have been repacked using CV2 grease and rotor assembly has been reinstalled and is ready for the snout cover assembly reinstall.

    20190426_115339.jpg

    Final steps

    20190426_120428.jpg

    Tuning:

    This is the absolute heart
    of this thread. Without tuning, these mods can be performed but their full potential cannot and will not be utilized. Myself and I am sure many others have had an absolute BURNING desire for @HPTuners to support the 1GR PCM. Let me be clear here. This retains FULL OE PCM functionality, there is no need for a piggyback PCM or standalone unit to be installed. Pandora's box to the easiest tuning EVER has been opened with this. So let's talk tuning, there is a fully dedicated thread for that portion of the supercharger. Credit goes out to @Hacktacular for starting that thread and myself as well as many others are endlessly thankful to @JustDSM and @nd4spdbh for getting us all tuned up squared away with engine and transmission tunes. Without further ado, for your reading and informational pleasure. The HPTuners thread:

    https://www.tacomaworld.com/threads/hp-tuners-for-2005-2015.600793/

    For more precise and direct information regarding HPTuners @JustDSM has been gracious enough to create a dedicated thread he has curated just for us and all noobies who want to become part of the HPTuner movement. He is one of the most active members and highly responsive to inquires of any sort so the thread will always be current and up to date with the latest and greatest info you can obtain. I highly suggest you visit this thread:

    https://www.tacomaworld.com/threads/hptuners-the-tacoma-faq.705981/

    Other tuners do exist for our trucks, however, none as ultimate in control over the original virgin Toyota PCM, for obvious reasons..

    UCON is still available, support, however, is spotty and unreliable. Also costs 3 times over what HPTuners would. You decide what flavor you would like.

    Currently these two options are the ones endorsed by myself and others of this thread. Stay away from Bullydog tuners and tunes as they have proven to be absolute garbage and run engines dangerous lean. There have been multiple reported instances of damaged engines due to lean running conditions. Just don't run BD at all.

    Supercharger Qwikchange pulley 5 rib design for the Chevy Cavalier/ Pontiac Sunfire M45 blower:

    Next up are the physical mods, here is where the fun begins. This can be bought from Pulleyboys based out of Washington. A true bolt on design. Pulley sizes available are 2.8" all the way down to 2.5". Tested and run by yours truly. No problems.

    https://www.tacomaworld.com/threads/supercharger-quick-change-pulley.497402/

    (EDIT)
    I am very late on this, but anyone who has or is thinking of purchasing the Pulleyboys variant of the qwikchange hub needs to check out this info regarding hub spacing from our very own @BillDaCat8 3 links are provided, but they give very important information about the issue.


    https://www.tacomaworld.com/threads...ricks-and-mods.518932/page-1354#post-23291573

    A secondary option on where to purchase the Qwikchange pulley and singular pulleys themselves exists at a much cheaper price over Pulleyboys and manufactured much better than the pulley boys qwikchange hub variant:

    http://www.smoothflowpulleys.com

    Additionally, if you would like to get in touch with the man himself and inquire about custom pulley sizes, designs for those custom sized pulleys, as well as purchasing, you may contact him directly at:

    Sales@smoothflowpulleys.com

    [​IMG]

    UPDATE:

    TRD/ Magnuson has done their research properly in attempting to get the pulley size right. The name of the game here is to stay within a 6-7.5 PSI boost range. That means pulley sizes of 3- 2.8" are the best ones to run in order to stay within the proper adiabatic ranges the supercharger wants to be in in order to minimize heat build up. It is best to stay within larger pulley sizes while working on opening up the intake/ exhaust, that means working on cam gears as well to work on a more complete burn.

    If you want to step down pulley sizes, be aware you are creating more heat which will pull the blower outside of efficiency ranges. Meth injection, or E85 will be required in order to make the power these pulleys are capable of making. Do your due diligence, as those are artificial fueling methods which introduce a level of cooling at the supercharger outlet which we do not have efficiency answers for. Here is an efficiency map to help you better understand what is going on:

    [​IMG]


    Please refer to this post for more information:

    https://www.tacomaworld.com/threads...ricks-and-mods.518932/page-1441#post-23545313


    Boost Bypass valve adjustment:

    (Thanks to @Roostfactor):
    A very difficult adjustment to do with the blower in place, but simple to do when the blower is off the vehicle due to it's location. The valve which is in charge of sealing the blower manifold to build boost pressure or allow vacuum during cruising and idle situations is maladjusted from the factory on most of these superchargers. They allow boost bleed out during full wide open throttle situations and are costing you boost. Adjust for better performance. Note: Adjustment to allow for a fully closed bypass valve at wide open throttle will cause slightly leaner readouts. I personally picked up .3 leaner points in my AFR.
    [​IMG]

    [​IMG]

    Adjustment is performed via the small Allen head stud which the bypass valve lever stops on when WOT is engaged. Adjust counter clockwise to allow for further valve butterfly stop. You can physically feel the valve bind when you have went to far. Back it out just a hair and you'll hear a solid "tink" sound, which is your good to go audible indicator that it is fully adjusted and ready for playtime. Call it a day and it's all done and sealing better.

    (Note: The blower is upside down in this photo, and the Allen head which requires adjustment has pink loctite on the threads of it.) This adjustment is accurate to a properly adjusted valve and is exactly where mine is adjusted to as well when I hear the audible "tink" sound.
    [​IMG]

    Restrictor jet mod:

    A now well known (and free) mod which involves removing hose from factory bypass valve in the rear of the supercharger to a port in the rear of supercharger itself. There is a small brass colored restrictor jet either stuck on the bypass valve vacuum port, or gets sucked into the hose. Remove it for better overall vacuum at idle and cruising, better bypass valve functionality (now moves as quick as the throttle body can) and better boost consistency. Added bonus is you gain back boost you should have with the pulley in place. Tested and run by yours truly, no problems.


    Post showing restrictor jet stuck in hose:
    https://www.tacomaworld.com/threads/trd-supercharger.4313/page-230#post-16411228

    Posts showing restrictor jet removed:
    https://www.tacomaworld.com/threads/trd-supercharger.4313/page-226#post-16409460

    https://www.tacomaworld.com/threads/trd-supercharger.4313/page-226#post-16410123

    The factory hose from bypass valve to supercharger leaks due to being oversized. It is advisable to either replace it with a smaller ID hose or to clamp it.


    FPR (Fuel Pressure Regulator) mod:

    A simple (and free) mod which allows you to boost reference your fuel injectors at 1:1 ratio. Remove your hose running from the intake air cleaner, cap off the now open air cleaner port to avoid unmetered leaks, and reconnect the open end of the hose to the boost port behind the two coolant lines at the supercharger.


    Post better highlighting the FPR mod in a picture using a boost gauge as well.
    https://www.tacomaworld.com/threads/trd-supercharger.4313/page-229#post-16411041

    Pulley RIP mod:

    Bridging the gap between COG pulley designs and V-Rib style pullies. Slits are cut into the pulley in order to obtain a higher level of grip and traction on the serpentine belt. Negates slippage on brand new, tired, and stretched out belts that may be slipping. If you are slipping for whatever reason and losing boost, this is the mod for you.


    Pulley wrap mod for pulley's 2.7 and below (@Roostfactor invention):

    [​IMG]

    Instructions to DIY, for additional clarification, or to purchase a pre-fabbed kit (which I did, because, well I got lazy) contact Roostfactor himself:

    - Here are the parts for the pulley wrap.
    - Larger washers are shown in photo
    - I make the brackets out of 1/8 x 1" stainless but a good steel (painted) would work. - Make sure you taper it as shown for two reasons, one is to prevent the belt from --possible rubbing and 2 to give the large washers a full surface to rest against.
    - 1 M8 x 30 10mm flange head bolt
    - 1 M8 x 40 10mm flange head bolt. You need these to be 10mm heads or you wont have enough room for adjustment.
    - I don't have the size of the smaller washer but you can see how it is ground down on one side. This allows for further adjustment.
    - Pulley comes from a Dayco Timing Belt Kit. Part # 84041 Rockauto has them cheapest I have found.
    - Use one thick washer or two thinner ones. If you don't the washer may bend into the slit in the pulley. There is a fair amount of load on this part so you want it to be solid.

    Option two: @BillDaCat8 has made another version of the pulley wrap mod which appears to be mostly bolt on. It may require some machining work however, contact him directly for more information if this post does not answer your questions:

    https://www.tacomaworld.com/threads...tricks-and-mods.518932/page-772#post-20755565

    OE tensioner shave stop mod:

    I don't know how I missed adding this, but better late then never. A mod exists for the OE tensioner which involves removing material off of the stop (about half of its material presently there) in order to allow for increased travel and decrease the chances of potential breakage down the road. This mod also helps for those running belt wrap mods and/ or smaller pulleys where the belt may cause the tensioner to ride up higher than it's otherwise normal resting spot in full OE configuration.

    https://www.tacomaworld.com/threads...-tricks-and-mods.518932/page-75#post-17016740

    OE billet tensioner upgrades:

    The OE piece is without a doubt up for the job in most instances, but there have been several documented cases of the OE tensioner failures snapping at the arm itself when swapping out to smaller pulleys and smaller belts to boot. Such are fallacies of cast aluminum items. If you want piece of mind in the serpentine system at all times, this is where your attention belongs.

    Be aware that as it stands due to the fact that these tensioners are originally crafted and made for Ford vehicles, mostly Mustangs (yes even the one that goes on our rigs), no tensioner in this section is 100% true bolt on straight from the box and modification or parts swap over will be necessary in one form or another in order to make them work.

    If you want a 2 piece reinforced version of a stocker, Steeda makes one for $165, readily available on most websites, including Amazon. Be aware that there have been mentioned fitment issues on this thread and will require modification in one form or another in order to fit on your truck.

    https://www.google.com/url?sa=t&rct=j&url=https%3A%2F%2Fwww.amazon.com%2FSteeda-Tensioner-Bracket-Billet-Mustang%2Fdp%2FB06XKY97LV&ved=2ahUKEwjs3K2dupveAhVhZN8KHfCoDUI4ChAWMAZ6BAgDEAE&usg=AOvVaw1O0SZaHxcGpbjNkyKRwRB3

    [​IMG]

    If you want a fully fabricated version with a stronger spring and much more beef than the Steeda, UPR makes one for $199. (NOTE: AS OF TIME OF THIS CURRENT WRITING, ACCORDING TO UPR, THEY HAVE PLACED PRODUCTION OF THIS TENSIONER ON AN INDEFINITE HOLD. ANY VENDOR THIS TENSIONER IS ORDERED FROM WILL NOT BE ABLE TO SHIP TO YOU AS THEY DO NOT HAVE ANY CURRENTLY IN STOCK.)

    Some pictures to compare stock vs. UPR
    [​IMG]

    [​IMG]

    There is also a version made by Thump. Very overpriced, and the UPR and Steeda are much more viable/affordable choices. Unfortunately UPR is currently unavailable.

    For those looking to do a simple tensioner pulley replacement, Gates PN 36375 is a direct fitment pulley replacement to the OE sized 54mm unit.

    A 50mm double bearing HD smooth pulley is available to purchase by a company named LFP based out of Texas on Ebay (DO NOT BUY GROOVED). The pulley is a fully direct replacement over the stock tensioner pulley that we use, however, is double the size due to the double bearing design, but will not require any spacing out from the tensioner arm in order to run due to it's massive size.

    https://www.ebay.com/itm/LFP-50mm-B...LEY-2012-CAMARO-ZL1-09-CTS-V-NEW/391425998187

    https://www.lethalperformance.com/t...let-aluminum-belt-tensioner-w-76mm-idler.html

    ARS billet tensioner, a beautiful unit, but highly overpriced as well. Do not buy a 76mm pulley with the unit. As our tensioner idler pulley's are substantially smaller. 50mm is the closest to stock size.

    https://americanracingsolutions.com...-street-performance-belt-tensioner-2003-2004/

    There is a version made by Roush. Seeing that most choices are either overpriced or not available as of time of this posting, may be a solid contender and worth consideration despite the fact it is still a cast aluminum unit. It appears to have been overhauled, uses a thicker tensioner arm and has a more HD tensioner spring assembly inside of it. Grind off the Roush logo and polish the whole arm for better "aesthetics."

    https://www.americanmuscle.com/roush-heavy-duty-belt-tensioner-0510-gt.html

    As discovered by @White lightning boosted not all tensioner assemblies are created equally. Differences at the bearing seating surface between the Roush and the Thump versions of these tensioners require modifications on the Roush version. A minor but CRITICAL mod which needs to be performed if you want to fit and run a double bearing roller to the tensioner assembly. The bearing can be installed either way, but the CORRECT way to install it to maximize clearance and run the assembly without causing potential interference elsewhere requires that you be able to see the snap ring on the bolt side. Pictures below of the differences between the right and wrong way to install.

    THIS IS WRONG:

    Resized_Resized_20190727_170516.jpg

    Resized_Resized_20190727_170600.jpg

    Resized_20190727_172115.jpg

    Resized_Resized_20190727_172121.jpg

    THIS IS RIGHT (NOTICE THE SNAP RING SHOWING IN THESE PHOTOS):

    Resized_20190727_172841.jpg

    Resized_20190727_172847.jpg

    THIS SHOWS THE FINAL MODIFIED HOUSING IN ORDER TO RUN THE DOUBLE BEARING IDLER CORRECTLY

    Resized_20190727_172636.jpg

    (EDIT)
    There may be potential issues with running stronger tensioners like the Roush on our setups. The long bearing/ tensioner bracket retaining assembly studs that Magnuson provides in the kit have broken off on at least two of our members (myself included in that) if not three of us. It can become a huge issue like it recently was for myself. There now may be some doubt that running a stronger tensioner is not the way as far as curbing belt slip is concerned. The OE provided tensioner with the LFP double bearing roller bolted in place of the single bearing roller, combined with a Gates RPM series OE length belt negates slip while denying excessive tension on those long stud assemblies.

    If you plan on running the Roush, just know, you may run into issues like these in the future due to the heavy duty tension it provides, further stressing the bearing retention studs. You have been warned.


    Upper and lower pulley retention studs:

    These are starting to have a history of documented failure, including on my own rig. Other reports include bending of the stud as well (which could be an early sign of failure). Folks continuously have been asking about the part number and where to obtain the stud. In the course of fixing my own truck, I scoured the internet in attempts of obtaining an alternative or preferably a stronger version and coincidentally found the manufacturer who makes these for Magnuson. They are built with the strength of what is equal to a chromoly bolt which has been rated by the mfr. as a grade 10 bolt. Not much we can do here but periodically replace them and treat them as maintenance items because you DO NOT want these guys snapping off like they did for myself and a few others leaving you needing a tow home and leading to other potentially costly repairs. 90,000- 100,000 miles is the upper tier limit on the time period you should wait until needing to replace these.

    The studs can be found at Superchargersonline and the part number for them is: M-71-76-10-134

    The lower stud tends to see the most severe duty between the two of them and if you can only obtain one from SCOL I would recommend replacing this one first.

    Timing Cover roller retention assembly studs:

    @Athlaos has gotten the connect on some awesome titanium studs which should be a major improvement over the OE studs. The stock ones have shown to fatigue over time and eventually can snap at or around the 100K mark. It would be a smart investment on your end to upgrade, especially if you use the Roush tensioner.

    https://www.tacomaworld.com/threads/upgraded-studs-for-trd-magnuson-supercharger-tensioner.799573/

    SIDENOTE: Due to current manufacturing constraints, these titanium studs are ONLY available via a group buy of 15+ or more. This comes direct from Athlaos himself.

    Lower Radiator Hose (thanks @Billdacat8 and @mr.trd for the PN):

    TRD P/N: PTR29-35061

    Silicone radiator hoses (upper and lower):

    HPS now makes silicone radiator hoses exclusive to our trucks with blowers please visit this link to get yours

    https://hpsperformanceproducts.com/...6-supercharged-57-2056?variant=37912709136574

    Belt sizes and options:

    - 70.5" length OE 3.0 pulley 5PK1790
    5050705
    Available in Dayco, Bando, Goodyear Gatorback, or Continental

    - 69.5 for smaller pullies (2.5") 5PK1765 5050695
    Available in Dayco brand, Bando, Goodyear Gatorback, or Continental

    For sizes 2.8-2.7" pullies a 70" belt is what I recommend, though I have no good source for a belt of that length in 5 rib. Any belt which is 5 ribs or more will fit, however, anything further than 5 rib will require cutting ofthe belt with razor blade. Place the number of ribs [X]PK1778 in the brand you desire in the search bar and you may be able to find it.

    There is a belt available overseas which can obtained from eBay. The effective length is 70" exactly and shaves off the extra half inch the OE size has. This belt is for folks wanting to run a 2.6-2.8 pulley, but are not running an upgraded strength tensioner: Part number AD05R1775 (it is a Gates belt)

    UPDATED:

    I have further researched belt part numbers for those wanting to run Gates FleetRunner green belts for increased longevity and increased pulley traction and have a small compiled list of near lengths close to what is required to run certain size pulley's on our superchargers. Below is a list of what size will be most compatible based on the size pulley you are running. All will require modification to fit our 5 rib pulleys.

    - For engine (NOT the blower!) serpentine belt setup: K070835HD is a direct OE replacement fit
    - For OE 3.0 pulleys (70.5"): K070705HD will require slicing off 2 ribs
    - For 2.8-2.7 pulleys (70.2"): K080702HD will require slicing off 3 ribs OR K120702HD will require slicing 7 ribs (you get 2 belts for the price of one!)
    - For 2.5-2.6 pulleys (69.56"): K060696HD will require slicing off 1 rib

    Gates RPM series:

    These belts are claimed superior to all other belt options for Superchargers. Running it will require the lowest configuration of 2.7, ideally OE sized 3.0 pulleys as the belts are designed to retain their length for the life of the belt with zero stretch factor premeditated on them due to their construction. Due to their inherent build nature which factors in zero stretch, sizing is critical otherwise snapping will occur. Be aware as well that those with the solid poly coupler installed in place of the OE spring loaded coupler will experience increased supercharger rotor noise at idle. This is NORMAL. Sizes are as as follows..

    For pulley configurations 3.0-2.8 (ideally kept at 3.0) (70.57"): K050705RPM
    If you do decide to play with these sizes with sizes below 3.0 be aware you may snap the belt. Belt sizing is THAT critical!

    Belt sizes for 2.5-2.7 currently do not exist in the RPM series at the time of this writing (69.5"-70"). HOWEVER, by running @Roostfactor belt wrap mod for pulley sizes 2.7-2.9 it should regain you the belt sizing you need to reclaim that lost half inch belt loss you would otherwise have if you did not run it, therefore please refer to the previous belt size for OE sized pulleys. It should put you back into the OE length sweet spot.

    For those running 2.5-2.6 pulleys I would strongly recommend running @BillDaCat8 belt wrap mod, as it reclaims lost spacing otherwise. If you are able to perform his belt wrap this would allow you to reclaim the belt length otherwise lost by stepping down sizes and it will allow you to run the OE length 70.5" size without further issues.

    For pulley configurations below 2.4 ideally 2.3-2.2 (69.01" length): K060690RPM will require slicing off 1 rib

    For pulley configurations below 2.2 ideally 2.1-2.0 (68.57" length): K060685RPM will require slicing off 1 rib

    Belt routing:

    This is a great reference to anyone confused on how their belt routing goes on their truck needing an easy to access diagram. (Thanks @stickyTaco)

    [​IMG]

    and a routing diagram of the main engine serpentine belt for the engine drive accessories:

    serpentinediagram.jpg

    Supercharger Drive Bearing Replacements:

    (big thanks to @DocME for doing the legwork on this):

    Ceramic bearing replacement retrofits:

    Thanks to @TRON for finding these. Ceramic bearing replacements exist for the idlers on the supercharger, benefits are smoother and cooler running bearings, which will outlast their steel ball bearing counterparts tenfold. More expensive pieces but worth it if you can afford the coin and to wait for them.

    These will replace the (4) 6303s and (1) 6203 needed when changing the bearings in the idler and tensioner pullies on the s/c belt drive.

    https://www.microbluebearings.com/products/6303-Ceramic-Ball-Bearing.html

    https://www.microbluebearings.com/products/6203-Ceramic-Ball-Bearing.html

    Lower idler:

    Currently, no suitable replacement for the 75.9mm (3.0") idler pulley right next to the main crank pulley exists for our trucks outside of Magnuson, HOWEVER, a great temporary or long term solution does exist in 71.1mm (2.8") pulley made by Dayco.

    PN: 89515

    Easily obtainable at any auto parts store, this will get you out of a bind if you ever thrash the lower pulley for whatever reason until you can either get a new 3.0 pulley from Magnuson or not. The pulley is made of metal and not aluminum like the original units, making it slightly heavier than the OE unit (is of no issue, however). This will NOT change the amount of boost you currently make. That being said, the bearing they use in it (C&U brand 6203) may not be up to snuff for the heavy RPM duty that our blowers spin to (most north of 12,000).

    Using the guide above on bearing replacements, you are able to swap out the bearing in it to a Timken 6203-RS-C3 and keep on trucking just fine. If you are unable to perform the swap for whatever reason, you will be fine using the supplied bearing. Just try not to give the truck too much juice on a frequent basis as there is currently no supplied information regarding the max RPM limits of the bearing by the company C&U.

    I currently run this pulley out of necessity, and as of current have experienced no issues whatsoever. I feel confident enough in it to be able to provide this recommendation to the group as future knowledge now.

    Snoutcutters:

    A snoutcutter is required for any pulley 2.7" or smaller. Sizes below 2.5 will require further trimming of the snout in order to clear without interference the tool is incapable of cutting down any further than sizes south of 2.5 (2.4 and downward). The tool is good for multiple go uses and can be obtained from:
    - ZZPerformance
    - URD

    https://zzperformance.com/3800/snout-machining-tool.html

    There are a lot of questions surrounding how far you should cut your snout. Don't overthink this one. Trim to the beginning of this gray line on the side of your blower. Warning, you WILL be cutting ALL day.


    WARNING: FOR THE LOVE OF GOD DO NOT USE AN IMPACT GUN TO CUT THE SNOUT!

    160 Degree Thermostat:

    After doing some research work for our trucks regarding the thermostat I found an undeniably similar if not identical bolt pattern to the thermostat to that of a Tundra housing, which I thought was a home run find as a whole. This led to quick further investigation work by @BillDaCat8 to find a direct bolt on unit by the same company which makes low temperature thermostats for the Tundra also makes units for the 4Runner of the 2003-2004 years equipped with 1GR-FE engines.


    With that being said, those in the market for a cooler 160* F thermostat will be pleased to know that Mishimoto offers a direct bolt on housing/ T- stat combination unit for the 4Runner for racing, towing, and heavy duty applications around some $66 on their website. No adapter plate required. ;)

    https://www.mishimoto.com/toyota-4runner-2003-low-temp-thermostat.html

    Recently @Torspd has found an available thermostat from AutoZone under the brand Duralast which is actually a rebranded Motorad 160 thermostat.

    https://m.autozone.com/cooling-heat.../duralast-kit-water-outlet/577311_656099_1640

    Spark plug P/N's:

    IMPORTANT FOOTNOTE -
    CONSUMABLE ITEM! KEEP 'EM CLEAN, MONITOR EVERY 10K AND REPLACE BEFORE 30K OR RISK MISFIRES.

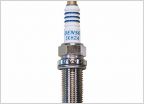
    - IKH-22/ 5345 Iridium Factory Denso
    Or NGK LFR7AIX-11/ 2309 (Recommended over Denso)

    https://www.google.com/url?sa=t&rct=j&url=https%3A%2F%2Fwww.amazon.com%2FDenso-IKH22-Iridium-Power-Spark%2Fdp%2FB000M6XNY2&ved=0ahUKEwivgKiCwq_XAhUp6IMKHWPqDBUQFgiXATAA&usg=AOvVaw3JgTBGuozTP8zMvqTJl0sU

    - IKH-24/ 5346 plugs Denso one step colder than stock and provides further support for Go-Fast mods (It is my advice that you DO NOT run this unless you are exceeding 400HP)

    Or: R7437-8/4901 NGK (Recommended over Denso)

    https://www.google.com/url?sa=t&rct=j&url=https%3A%2F%2Fwww.amazon.com%2FDenso-IKH24-Iridium-Power-Spark%2Fdp%2FB000M6WPXM&ved=0ahUKEwjd0fiXwq_XAhWSyIMKHbVIBTgQFgiXATAA&usg=AOvVaw3eilrrUauqcuyIVrewezza

    Bonus: @Kelvin has discovered a new type of spark plug made by NGK made of Ruthenium. They are still mostly unexplored territory, but may provide a more stable and complete burn process through each combustion cycle.
    @BillDaCat8 and myself are now running these in our trucks. They are originally meant for VWs and Audis, but they work on our application as well. The benefits over Iridium IKH-22 is immense! Notable smoother running idle and even more notable useable power in the powerband and has been obtained by running these. These can be found anywhere, but you can find these usually the same day at your local Napa auto parts store.

    NGK P/N: LFER7BHX/ 95125

    Spark plug service without removing supercharger:

    This method exists and is easy to do, but requires finesse and some patience. Skinny hands too, perhaps? @Murphinator has been kind enough to make a video for folks inquiring about spark plug service without removing the blower. It is currently the only video which exists for it on record.

    https://youtu.be/CxlcxrjXQcY

    Photo of the tools required provided by myself:

    20200522_091218.jpg

    Recommended fuel pumps:

    AEM 320LPH 50-1200 green top E85 capable fuel pump obtainable from Summit Racing (I personally run this pump, one of the best items I have ever purchased)

    https://www.summitracing.com/parts/...7cxHMHJsmDJZ7HFFTioqH0EtvIW3uTGMaAqSQEALw_wcB

    Aeromotive stealth 340LPH red top fuel pump

    https://www.google.com/url?sa=t&rct=j&url=https%3A%2F%2Fwww.amazon.com%2FAeromotive-11540-Fuel-Stealth-Tank%2Fdp%2FB019K9I198&ved=0ahUKEwjf6rWJwa_XAhVHzlQKHSaRDUwQFgg5MAg&usg=AOvVaw10pj3DDjJlGbHUkKyMV0mV

    This goes without saying you will need to replace the strainer that attaches to the pump. The best one to get which is very compatible with the fuel pump bucket is a Bosch 68021 strainer. Off a 2009 Highlander.

    https://www.google.com/url?sa=t&rct=j&url=https%3A%2F%2Fwww.amazon.com%2FBosch-68021-Fuel-Pump-Strainer%2Fdp%2FB001HSI80I&ved=0ahUKEwid8KPX4LTXAhVmqVQKHfGjCtwQFgihATAA&usg=AOvVaw0fsf5znmEsDZEA_zmlxMZh

    External Fuel Pump Check Valve:

    Some members have reported extended crank times running fuel pumps outside of the recommended ones above. (I'm looking at you Walbro 255LPH pumps) If you have extended crank tmes, but the pump operates correctly and is maintaining the proper pressure needed then you need an external fuel pump check valve, as the internal one is either defective or of low quality. Link included below.

    https://www.summitracing.com/parts/...pVBakd29lEyFNRLWO08xnHTJqF7SRc6YaAgKBEALw_wcB

    Fuel Rails:

    For those wanting some bling bling for their underhood assembly, it appears that the company Radium is now making billet fuel rails for the 1GR

    http://www.radiumauto.com/Fuel-Rails-Toyota-1GR-FE-Single-VVT-i-P2402.aspx

    CSF Radiator Mod:

    Thanks to @Roostfactor

    https://www.tacomaworld.com/threads...adiator-for-our-trucks-finally.539151/page-48

    Coolant pump mod:

    Fully drop in Bosch 03920-022-010 auxiliary coolant pump mod supplies 1.10 GPM faster over stock.

    http://www.autohausaz.com/search/pn.aspx?sku=13481346-0392022010&vehicle=2006 Mercedes CLS55 AMG 219.376&brand=Bosch&utm_source=google&utm_medium=nonpaid&utm_campaign=froogleSKU_Mercedes&gclid=Cj0KCQiA84rQBRDCARIsAPO8RFwXUlTh9I1ntt-f7J5HlvVV3j0Vjl_bUjmjXa8CH7aaJ37VbOkm_lwaAt6WEALw_wcB

    Plug is of Mercedes Benz design and requires cutting and reconnecting to work with new pump, however. You will need the following:

    - PN- 2305400081 x1 connector housing ($2 bought from your local Mercedes Benz dealer)
    - PN- 0005402505 x2 wiring w/ pins and gaskets already premade ($6 per from Mercedes Benz) wiring is pure silver strand, which can flow same amount of amperage though smaller as a whole compared to thicker copper wiring original plug has.

    No need for a fuse upgrade.

    @Lucario Runner discovered that ZZPerformance has a further upgraded coolant pump even more so than the Mercedes Bosch coolant pump which is also drop in style and uses the original "factory" plug. These pumps flow about .9 more GPM over the upgraded Mercedes pump and about 2 gallons more than the original units which came with our TRD/ Magnuson superchargers. These items are currently out of stock and ETA for when more will be available is unknown.

    https://zzperformance.com/products/zzp-high-output-intercooler-pump-stage-1

    HPS silicone radiator hoses:

    Silicone hose variants are available to us as the lower radiator hose is a difficult item to obtain even through the various resources we have available to us. HPS has been kind enough to step in and offer drop in silicone hose replacements for our upper and lower radiator hoses. As of thr time of this writing they are currently sold out.

    https://hpsperformanceproducts.com/...6-supercharged-57-2056?variant=37912709136574

    Intakes:

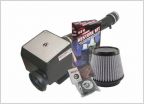
    The stock intake box is a bottleneck, remove secondary carbon filter to free up some boost

    - AFe Stage 2
    - AFe Momentum
    or
    - URD True CAI
    give best results.

    - For west coast folks (and all folks equipped with one currently) the Gen 2 TRD intake is capable of much more flow at the MAF as needed when making power levels at 2.5 pulleys and below (this is especially true with cam gears!) A close to true bolt on mod for all folks without suspension upper cross member braces. Please see link below if interested in mod:

    https://www.tacomaworld.com/threads...ricks-and-mods.518932/page-1292#post-23069972

    20200415_174039.jpg

    Information regarding where to obtain the CARB underhood label can be found in this post here:

    https://www.tacomaworld.com/threads...ricks-and-mods.518932/page-1340#post-23252978

    MAF:

    Thanks to @PhoS for discovering this: For those who require more airflow reading from their MAF and do not want to perform any sort of retrofit to their intake system (those who are topping out their G/ Sec (Lbs/ min) an alternative drop in replacement exists for the Tacoma intake system, however, be aware that with the increased reading in flow that it provides, it also drops some resolution as per @JustDSM. You will know this is happening when you get a CEL and the codes thrown are (P0101, P0103) this usually starts to happen after you drop down below 2.5 or 2.4 pulleys.

    PN: 197-6040 Denso

    Valve body upgrade:

    Pulleys below 2.7" run require a transmission valve body upgrade as the stock shifting is much too soft in engagement and flaring between 4-5 shift can occur even outside of boost. Another added benefit due to faster shifting between gears includes lowered overall transmission temperatures. Valve body upgrades can be performed at IPT, turn around time is 1 week, however. If you would like to do it yourself here is the listed part number. This is a shift kit and not a master rebuild kit:

    - RatioTek P/N
    RT-A750E-HD for TRD Supercharged applications (this is the one I run, highly recommended)
    A simple kit which comes with everything you need to obtain better shifting, better line pressure, and elimination of torque converter shudder including very detailed instructions on how the valve body is put together and what goes where

    The benefits of valve body modification are not only firmed shifting, but you will notice a very welcome increase in torque transfer to the wheels, and as a byproduct a bump in horsepower utilizing the same pulley you are now. (Yes I said the same pulley)

    Please see @Voodoo Rufus thread for pictures of the VB if desired. I took a few pictures when I did mine but I was too busy with ATF all over my hands.

    https://www.tacomaworld.com/threads/rufus-2007-dcsb-indigo-build.126755/page-2#post-14890046

    Valve body removal/ install instructions:
    https://www.google.com/url?sa=t&source=web&rct=j&url=https%3A%2F%2Fm.youtube.com%2Fwatch%3Fv%3DP1XdzmjdsPo&ved=0ahUKEwjboaSjvK_XAhVjx1QKHT42B_4QwqsBCFswBA&usg=AOvVaw12cTvmVJl4JDsGATQwzYAi

    Thanks to @mightytacoman for taking some time off his valve body build to document and making this excellent how-to. Needs just a bit of polishing to make the O.O perfect, but this should give you a great general idea of What is involved if you want to do it yourself:

    https://www.tacomaworld.com/threads/ratiotek-transmission-upgrade-how-to.528378/#post-16881448

    Cam Gears:

    A hot item on most of the current blower owners watchlist are cam gears. With the recent inauguration of 1GR support from @HPTuners @mightytacoman has been gracious enough to offer modified OE cam gears without needing to drop $1500 for a UCON. Offering a more complete burn by retarding timing on the exhaust just a few degrees (3 degrees is apparently the magic number), this mod will easily get most of the folks running smaller pulley configurations an additional 15HP extra. Potentially more. Thanks to @DocME and @BassAckwards for finding and posting install videos and instructions on this until-now, semi-mystery mod:

    https://www.tacomaworld.com/threads/hp-tuners-for-2005-2015.600793/page-88#post-20440018

    https://www.tacomaworld.com/threads/hp-tuners-for-2005-2015.600793/page-92#post-20446751

    Air Fuel Ratio/ Boost Gauge:

    These two gauges are absolutely essential to any boosted vehicle. If you do not know where your current air fuel ratio is at during power enrichment function, then you have a potentially dangerous problem on your hands. As you know, superchargers introduce a lot of forced air into the engine and therefore creates a lean condition. If your fuel control is not up to par for any reason, you need to be abl to see and understand that. A boost gauge is important to understand whether or not you have belt slippage or a boost bypass valve issue. Both gauges go hand in hand and are a wonderful aid when attempting to track down driveability issues.

    My current recommendations are:
    - AEM X-series gauges
    - Innovate MTX-L (FOR BOOST ONLY!)
    - Speedhut analog customs (if digital isn't your thing)

    Currently all gauges, minus the Speedhut gauges (which are available exclusively through them) are obtainable from places like Summitracing or similar sites.

    For any AFR gauge utilizing a Bosch LSU 4.9 sensor, do your best to either get just the gauge assembly alone, or if not possible, ditch the Bosch sensor and go with a Denso. The next section below indicates how adamant I am about throwing the Bosch sensor into the trash.

    AEM widebands are capable of logging serial data straight to HPTuners with a single cable connection via RS-232 to USB conversion If you would like further info please contact me.

    AFR Gauge sensor replacement:

    For owners with AFR gauges. When your Bosch LSU sensor dies. Just know that they are absolute garbage. Do not waste your money on them anymore. Replace them with Denso AFR sensors. More info here:

    https://www.tacomaworld.com/threads/bosch-lsu-4-9-pn-cross-reference-and-compatibility.501754/

    Filler neck reduction mod:

    A smaller filler neck to increase clearance between the blower and the oil cap exists, the replacement Is off a Tundra and require slight modification to make fit, but makes oil changes a little less of a hassle. Thanks to @loginfailed

    Part numbers:
    12196-38010 Tundra oil filler tube seal
    12185-38011 Tundra oil filler tube
    PTR04-12108-02 TRD oil cap

    The Tundra filler neck is nice and short compared the the Tacoma one.


    The Tundra filler neck has a deflector made into the bottom. The Tacoma one doesn’t. I’m not sure if it matters one way or the other, but I used a coping saw and cut it off.

    Before


    After


    Finished comparison. Before:


    After


    Repairing pulled threads on the intercooler lid (courtesy of @mr.trd):

    A handful of members have pulled the threads on their intercooler lid housing tie downs. For those wanting to repair theirs, just know you are not the first to experience this. You have two options, Heli-coil, or time-serts can restore pulled thread locations and will actually be more reliable than that soft aluminum that is on the blower.

    M6x1 repair kits will patch those pulled threads right up and get you right back in the game to reclaim some lost boost you previously had. :thumbsup:

    You can obtain the kit through Amazon unless you are in a hurry which any good parts stores should supply. Linked below is to a Heli-coil kit 5546-6

    https://www.amazon.com/dp/B0002KKPXK

    XL oil filter/ oil capacity increase:

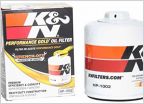
    An increase from the standard 5.4 - 5.5 qts. oil fill level to a 5.8 - 6.0 qts. is available for our trucks. This is especially an important mod for those who race their trucks at the track, or who rev the piss out of their daily driver on the regular. (Like myself) As you know, oil starvation due to low oil level, or lack of oil where oil pump is located is a very real thing. More oil is always a good thing.

    A PN: 51516 oil filter is commercially availble from nearly any auto parts store. This particular filter part number is made by WIX.

    [​IMG]

    Exhaust:

    You may think it may not matter and for the most part I may agree with you... If you are NA. That being said, when stepping down to pulley sizes below 2.7 or even 2.8 you may want to take a good look at your exhaust. There are many choke points, the factory exhaust manifolds are 2" ID the Y pipe is a major choke point and the piping throughout from the Y on rearward is 2 1/4" or smaller. My first suggestion would be to either get a JFR equal length Y pipe, (link to that thread HAS been posted below) or get your factory Y pipe modified, AND enlarge all piping from the Y rearward, at the very least to 2.5" opening up to 3". This will ensure proper engine breathing and open up some long lost power along the way.

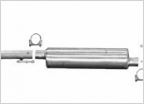
    Mufflers, you may not think it matters and that all are created equal, that is actually not true. Research is important regarding mufflers and exhaust in general, however, I have found minor improvements in muffler changes alone. Now sound is a personal choice, so I will not tell you what brand to get, however, know that by going one brand over the other you may be leaving 5-8 ponies off the table. My personal choice which netted me a notable gain in power is the Black Widow Venom 250 pictured below.

    20190412_144739.jpg

    My personal choices when it comes to exhaust as far as best flow goes to:

    - Black Widow
    - Corsa
    - Borla

    Be aware that the brands I have mentioned above have incredibly minimal to no drone and have a killer (to me) signature sound from the outside

    Because exhaust sound is entirely a personal preference it is my best advice that you do your due diligence before making a choice and swing over to YouTube to listen to exhaust clips of your brand in question.

    An interesting article worth the read if you have the time regarding muffler builds and how not all of them are created to gain the most HP in mind:

    https://www.autorevolutiononline.com/muffler-shoot-out/

    JFR Y pipe:

    Our Y pipes are very restrictive from the factory, it's not such an issue for NA trucks but once you are boosted all bets are off. Even OE pullied 3.0 Magnuson and TRD blowers can benefit from these. Our very own @Roostfactor has put mad work into researching and developing these beauties for our trucks. Go pick yourself one up as they are an incredible piece of engineering work and are designed to optimize the flow of our engines. Scientifically tuned, seriously!

    Dwayne's y-pipe.jpg

    https://www.tacomaworld.com/threads...pe-for-2nd-gen-tacoma-t4r-fj-cruisers.578228/

    Crossovers/ Dual Exhaust:

    GOPR0309_1614375787439.jpg

    GOPR0307_1614375787439.jpg

    20210225_225807.jpg

    Here to throw a further monkey wrench into your choices, for those wanting dual exhaust you have four choices, all which will affect flow and sound:

    - Straight pipe with no crossover between banks
    - H pipe (offers the the most top end power while sacraficing 2-3 HP in the mid end and a more muscular tone)

    IMG_1185_1024x10242x.jpeg.jpg

    - X pipe (offers the most mid end power with a small 2-3 HP loss in top end compared to the H pipe and a more exotic tone)

    51kyZhcRZ9L._AC_SY355_.jpg

    - Borla Switchfire pipe PN 60662 (this combines both the straight pipe and and the X pipe design into one) FOOTNOTE: Pipe measures 14" long out and 11" tall out of the box.

    featured_borla_switchfire.png

    Running dual exhaust will allow you to use smaller 2.5" piping all the way through if space is a premium in the undercarriage for you as it is for myself. Power levels will NOT be impacted by the use of smaller 2.5" piping as it is good for power levels up to 500HP which the majority of us here will never see.

    Cutouts:

    For those wanting to fabricate a "mild to wild" noise controlled setup, there is a company called Loud Valves who sells both vacuum activated and boost activated cutouts. They are sold from 2" - 3" sizing. Depending where and how they are configured they can be a big power adder for your truck.The boost activated cutouts fully open at 7 psi. Lucky us.

    BACKGROUND_1_1024x1024.png

    www.loudvalves.com

    Finally, for info and exhaust sound clips, please visit this thread:

    https://www.tacomaworld.com/threads/forced-induction-exhaust-setups-discussion.658615/

    Blower facts:

    Roots based MP90 made by Magnuson using Eaton rotors (NOT M90!)

    Factory intercooler setup: Air to Water design.

    Injectors supplied: TRD Orange Injectors 455 cc. Good for up to 400-440HP depending on operating fuel pressure. (yes I have checked)

    Fuel:

    Octane recommended is premium 91-93
    E85 octane fuel IS now available if running a custom tune like HPTuners

    _________________________________________

    - Link below is exclusive to this thread and will serve as a loan/ buy/ sell thread for boosted owners with parts exclusive (and even non exclusive parts) items to our superchargers.. you may post things like blower snout cutters/ snout sleeves/ pulley holders etc. etc. on there and the thread will serve as a new exclusive "classified" for us alone.

    https://www.tacomaworld.com/threads/supercharger-loan-buy-sell-thread.664742/

    _________________________________________

    NEW BONUS (CARB EO and original TRD/ Magnuson supercharger install manual):

    This section is for CARB EO documents and the original install manual provided with all the TRD/ Magnuson supercharger for these trucks (thank you @wrmathis for the install manual) for all emission related documents for states which still require a periodic inspection, this will be updated as more documents come to my attention.

    The first PDF pertains to the TRD supercharger itself

    The second is for the TRD intake

    The third is JBA shorty headers

    If you have any item to add to this list please bring it to my attention and I will update. Thank you.
     

    Attached Files:

    Last edited: Apr 10, 2024
    This site contains affiliate links for which the site may be compensated.
    #1
  2. Nov 8, 2017 at 9:53 AM
    #2
    inwood customs

    inwood customs Roaming potato

    Joined:
    Sep 11, 2016
    Member:
    #197024
    Messages:
    4,644
    First Name:
    Dave
    Vehicle:
    2006 v6 potato bugTuRD
    K&n, flowmaster, plastidip, chipped, hids, daves
  3. Nov 8, 2017 at 10:03 AM
    #3
    snowsk8air2

    snowsk8air2 how hard can it be?

    Joined:
    Sep 16, 2011
    Member:
    #63607
    Messages:
    10,182
    Gender:
    Male
    First Name:
    Ryan
    Flagstaff, AZ
    Vehicle:
    Supercharged TX Pro
    2011 S/C and basic mods
    Subd for go fast ideas
     
  4. Nov 8, 2017 at 10:08 AM
    #4
    Voodoo Rufus

    Voodoo Rufus Well-Known Member

    Joined:
    Jul 3, 2009
    Member:
    #19255
    Messages:
    821
    Gender:
    Male
    First Name:
    Jason
    Bakersfield, CA
    Vehicle:
    07 Sport Indigo Ink DCSB 4WD
    Magnuson S/C, Relentless armor, Icon/Dakar suspension, Konig CountersteerX 17", KO2's, Hellwig rear swaybar, BudBuilt Trac Bar, Level 10 VBU, Weathertech floorliners, Cravenspeed antenna, Redline elite hood struts, RollnLock, Satoshi, CBI sliders
    Level 10 valve body upgrade kit is also an option. I did it on mine as opposed to shipping the VBU to IPT.
     
  5. Nov 8, 2017 at 10:09 AM
    #5
    GT7

    GT7 One piece at a time

    Joined:
    Aug 15, 2014
    Member:
    #136201
    Messages:
    2,502
    Gender:
    Male
    First Name:
    Grant
    Phoenix
    Vehicle:
    2013 DCLB
    Please give us a review
     
  6. Nov 8, 2017 at 10:14 AM
    #6
    ThomasMore66

    ThomasMore66 We can't stop here, this is bat country!

    Joined:
    Feb 9, 2013
    Member:
    #97155
    Messages:
    7,289
    Gender:
    Male
    Dallas/Fort Worth & Durango
    Vehicle:
    Supercharged 2013 TRD Offroad 4wd
    TRD Supercharger, TRD exhaust, Leather seats, running boards removed (why it came with them I cannot imagine), Salex organizers, BAMF behind-the-grill light bar, Rigid SR-20 and SR-Q - Spots mounted behind stock grill, color-matched grill, WeatherTech FloorLiner DigitalFit floor mats, Tech Deck, Avid bolt-on slider/step converted to weld on by TW member Achirdo, Diaz Fabrication Model T, Icon Stage 4 with OME Dakar rear leaf springs, OME Driveshaft spacer, Toytec 1" Front Diff Drop, FN BFD 18"x9" GMG Wheels, BFG KO2 285-65-18 tires, Ultragauge mounted above mirror, Tuffy Box lockable storage, MattGecko rear window security bar, Relentless Fab tailgate protector, CSJumper 700 lumen flood pattern back-up LED's, modified BeeRadd under-hood lighting with two KC Cyclones; KB Voodoo cargo management system and standard rails, AllPro hi-lift jack mount, 48" hi-lift, RCI Metalworks aluminum front skid, Flyzeye 3VP-RS in glovebox and console, AFE CAI, Coupe fuse box cover, battery hold-down bracket and CAI air-box cover, Wurton pod led's installed as bed lights on Lowbrow Customs motorcycle fork brake line aluminum brackets, Pop-n-Lock PL5400, Extang Solidfold 2.0, Rechelon Retro's, Moromoto LED fogs, URD Y-pipe, Walbro 255lph fuel pump, Speedhut AFR and Boost gauges, Cravenspeed gauge holder, CMC by Tandem Automotive, 70mm throttle body, CSF radiator, Doug Thorley shorties, Vibrant 7101 cats, SOS Offroad front and rear bumpers, Smoothflow 2.5” SC pulley, Steeda SC belt tensioner, roostfactor belt wrap kit, switch Pro 9100 in custom Tandem Automotive holder, WAT trans valvebody, FIC 650cc injectors, HP Tuner.
    Sub'd for all my modding needs. Not aggressive huh? I seen some shit on here...
     
    BikerinBlak909 likes this.
  7. Nov 8, 2017 at 10:18 AM
    #7
    12TRDTacoma

    12TRDTacoma [OP] Powered by Ford, GM, VW, and Mercedes

    Joined:
    Aug 20, 2012
    Member:
    #85133
    Messages:
    16,545
    Gender:
    Male
    First Name:
    Rob
    Concordia
    Vehicle:
    12 TRD Sport DCLB 4x4 Supercharged
    Boosted
    Lol. Very aggressive, but these are the mods, tips, and tricks to go faster!
     
  8. Nov 8, 2017 at 10:22 AM
    #8
    ThomasMore66

    ThomasMore66 We can't stop here, this is bat country!

    Joined:
    Feb 9, 2013
    Member:
    #97155
    Messages:
    7,289
    Gender:
    Male
    Dallas/Fort Worth & Durango
    Vehicle:
    Supercharged 2013 TRD Offroad 4wd
    TRD Supercharger, TRD exhaust, Leather seats, running boards removed (why it came with them I cannot imagine), Salex organizers, BAMF behind-the-grill light bar, Rigid SR-20 and SR-Q - Spots mounted behind stock grill, color-matched grill, WeatherTech FloorLiner DigitalFit floor mats, Tech Deck, Avid bolt-on slider/step converted to weld on by TW member Achirdo, Diaz Fabrication Model T, Icon Stage 4 with OME Dakar rear leaf springs, OME Driveshaft spacer, Toytec 1" Front Diff Drop, FN BFD 18"x9" GMG Wheels, BFG KO2 285-65-18 tires, Ultragauge mounted above mirror, Tuffy Box lockable storage, MattGecko rear window security bar, Relentless Fab tailgate protector, CSJumper 700 lumen flood pattern back-up LED's, modified BeeRadd under-hood lighting with two KC Cyclones; KB Voodoo cargo management system and standard rails, AllPro hi-lift jack mount, 48" hi-lift, RCI Metalworks aluminum front skid, Flyzeye 3VP-RS in glovebox and console, AFE CAI, Coupe fuse box cover, battery hold-down bracket and CAI air-box cover, Wurton pod led's installed as bed lights on Lowbrow Customs motorcycle fork brake line aluminum brackets, Pop-n-Lock PL5400, Extang Solidfold 2.0, Rechelon Retro's, Moromoto LED fogs, URD Y-pipe, Walbro 255lph fuel pump, Speedhut AFR and Boost gauges, Cravenspeed gauge holder, CMC by Tandem Automotive, 70mm throttle body, CSF radiator, Doug Thorley shorties, Vibrant 7101 cats, SOS Offroad front and rear bumpers, Smoothflow 2.5” SC pulley, Steeda SC belt tensioner, roostfactor belt wrap kit, switch Pro 9100 in custom Tandem Automotive holder, WAT trans valvebody, FIC 650cc injectors, HP Tuner.
    And street racing is bad...almost like having a conversation about politics.
     
  9. Nov 8, 2017 at 10:22 AM
    #9
    12TRDTacoma

    12TRDTacoma [OP] Powered by Ford, GM, VW, and Mercedes

    Joined:
    Aug 20, 2012
    Member:
    #85133
    Messages:
    16,545
    Gender:
    Male
    First Name:
    Rob
    Concordia
    Vehicle:
    12 TRD Sport DCLB 4x4 Supercharged
    Boosted
    All street racing is done in a small town somewhere in Mexico.
     
  10. Nov 8, 2017 at 10:29 AM
    #10
    Torspd

    Torspd Tor-nication

    Joined:
    Sep 18, 2009
    Member:
    #22958
    Messages:
    25,682
    Gender:
    Male
    First Name:
    Tor
    The Great America!
    Vehicle:
    MMVI 4.4L 4x4 Access Cab
    Torspd Custom Turbo kit [] Borg Warner 9180EFR Turbo [] Haltech Elite 2500 [] TiAL Q BOV [] TiAL V44 Wastegate @ 15psi [] CP Pistons [] CP Carrillo Rods [] ARP Head studs [] ARP Main Studs [] ARP Header - Head Studs [] Ported Heads w/ 1mm oversized valves intake/exhaust [] Brian Crower Forged Stroker Crank [] Darton M.I.D. Sleeved Block [] Kelford Camshafts [] Torspd 160* T-stat mod [] APR Large Fuel Rail [] Walbro 460 LPH E85 Fuel Pump [] FueLab FPR [] APR T56 Conversion Kit [] KP RACING Built T56 [] McLeod Racing Custom Twin Disk Clutch [] One Piece Aluminum Driveshaft [] MGW Shifter [] Custom lowering kit [] Ohlins Front Coilovers [] QA1rear shocks [] Custom Ron Davis Radiator [] Dual SPAL Electric Fans []
    Your post is long. That is all.
     
  11. Nov 8, 2017 at 10:30 AM
    #11
    Torspd

    Torspd Tor-nication

    Joined:
    Sep 18, 2009
    Member:
    #22958
    Messages:
    25,682
    Gender:
    Male
    First Name:
    Tor
    The Great America!
    Vehicle:
    MMVI 4.4L 4x4 Access Cab
    Torspd Custom Turbo kit [] Borg Warner 9180EFR Turbo [] Haltech Elite 2500 [] TiAL Q BOV [] TiAL V44 Wastegate @ 15psi [] CP Pistons [] CP Carrillo Rods [] ARP Head studs [] ARP Main Studs [] ARP Header - Head Studs [] Ported Heads w/ 1mm oversized valves intake/exhaust [] Brian Crower Forged Stroker Crank [] Darton M.I.D. Sleeved Block [] Kelford Camshafts [] Torspd 160* T-stat mod [] APR Large Fuel Rail [] Walbro 460 LPH E85 Fuel Pump [] FueLab FPR [] APR T56 Conversion Kit [] KP RACING Built T56 [] McLeod Racing Custom Twin Disk Clutch [] One Piece Aluminum Driveshaft [] MGW Shifter [] Custom lowering kit [] Ohlins Front Coilovers [] QA1rear shocks [] Custom Ron Davis Radiator [] Dual SPAL Electric Fans []
    Or Slab City. It's in Cali and Lawless. Perfect for some hooning.
     
  12. Nov 8, 2017 at 10:30 AM
    #12
    Lucario Runner

    Lucario Runner Resident Truck/SUV racer

    Joined:
    Jun 29, 2011
    Member:
    #59067
    Messages:
    7,056
    Gender:
    Male
    First Name:
    Robert
    San Antonio, TX or nearest race track
    Vehicle:
    06 Toyota 4Runner
    AFE stage II intake, APR X1, URD 70mm Throttle Valve (ported and knife edged), NST intake manifold spacer, URD spec U headers, Denso IKH20, URD fuel pump, APR fuel rail, URD Y pipe, URD spec u catback, lightweight water pump pulley, Greddy sandwich cooler plate, Earls oil cooler, IPT valve body, FJ TRD shocks, Cusco front and rear sway bars, Energy Suspension rear track rod bushings and rear link bushings, Carbotech pads, Stoptech ss brake lines, Stoptech slotted rotors, Motul 600 rbf, Limited Grill, Painted hatch cover by me, Painted valve covers by me, Cobra CB, TRD rad and oil cap, Escort 8500, Autometer oil psi and temp gauges, AEM wideband afr gauge, Flexpod, Pioneer 400w speakers.
    In b 4 phun police
     
  13. Nov 8, 2017 at 10:31 AM
    #13
    12TRDTacoma

    12TRDTacoma [OP] Powered by Ford, GM, VW, and Mercedes

    Joined:
    Aug 20, 2012
    Member:
    #85133
    Messages:
    16,545
    Gender:
    Male
    First Name:
    Rob
    Concordia
    Vehicle:
    12 TRD Sport DCLB 4x4 Supercharged
    Boosted
    Of course it is. It is the Webster's dictionary to our Superchargers.

    If you want the sparknote version, wander over to the TRD Supercharger thread. :D
     
    Stryker420 likes this.
  14. Nov 8, 2017 at 10:32 AM
    #14
    12TRDTacoma

    12TRDTacoma [OP] Powered by Ford, GM, VW, and Mercedes

    Joined:
    Aug 20, 2012
    Member:
    #85133
    Messages:
    16,545
    Gender:
    Male
    First Name:
    Rob
    Concordia
    Vehicle:
    12 TRD Sport DCLB 4x4 Supercharged
    Boosted
    I AM the fun police. Who's having fun?!?! Huh?! Huh?! Let me find out which one of you is having fun, just you wait!
     
  15. Nov 8, 2017 at 10:34 AM
    #15
    CleanupBoss

    CleanupBoss Well-Known Member

    Joined:
    Nov 29, 2014
    Member:
    #143275
    Messages:
    151
    Gender:
    Male
    First Name:
    Chet
    Sparks, NV
    Vehicle:
    SR 5 with Leer shell
    S/C w/ Gibson exhaust Araid CAI, afr/boost gauges in Craven Speed mount, LED camper shell lighting kit clear bra, fogs, Leer shell w/keyless entry & Thule roof rack system Pop & Lock tailgate handle Rugged country 30" light bar for lower front bumper, Baja Designs SR2 flush mount rear bumper lights, DB Customz grill w/ 3" cube lights, Viair 2 gal tank, Viar Compressor
    I like the free,restrictor jet mod...something that my restricted mechanical abilities just might be able to handle
     
    Stan_Twizzly and 12TRDTacoma[OP] like this.
  16. Nov 8, 2017 at 10:34 AM
    #16
    Sterling_vH111

    Sterling_vH111 Go do something real instead.

    Joined:
    Oct 4, 2015
    Member:
    #165793
    Messages:
    2,581
    Gender:
    Male
    First Name:
    Sterling
    socal
    Vehicle:
    2012 DCLB Prerunner V6
    Secretly Long Travel & Supercharged
    Great thread, if I ever have the funds for a Magnuson Supercharger after suspension is settled, definitely doing many of these!
     
    BassAckwards and 12TRDTacoma[OP] like this.
  17. Nov 8, 2017 at 10:38 AM
    #17
    12TRDTacoma

    12TRDTacoma [OP] Powered by Ford, GM, VW, and Mercedes

    Joined:
    Aug 20, 2012
    Member:
    #85133
    Messages:
    16,545
    Gender:
    Male
    First Name:
    Rob
    Concordia
    Vehicle:
    12 TRD Sport DCLB 4x4 Supercharged
    Boosted
    Can I get a sticky please mods? @chris4x4 or @tcBob

    The supercharger crew needs an exclusive information thread. :)
     
    Athlaos and BassAckwards like this.
  18. Nov 8, 2017 at 10:44 AM
    #18
    nd4spdbh

    nd4spdbh Well-Known Member

    Joined:
    Oct 7, 2013
    Member:
    #114055
    Messages:
    13,906
    Gender:
    Male
    SoCal
    Vehicle:
    13 DCSB TRD OR v6 Auto

    was going to tag you, but i see you already found this...... not that you need more power... first outing on the LT and 35s and you snap a CV!
     
  19. Nov 8, 2017 at 10:50 AM
    #19
    Voodoo Rufus

    Voodoo Rufus Well-Known Member

    Joined:
    Jul 3, 2009
    Member:
    #19255
    Messages:
    821
    Gender:
    Male
    First Name:
    Jason
    Bakersfield, CA
    Vehicle:
    07 Sport Indigo Ink DCSB 4WD
    Magnuson S/C, Relentless armor, Icon/Dakar suspension, Konig CountersteerX 17", KO2's, Hellwig rear swaybar, BudBuilt Trac Bar, Level 10 VBU, Weathertech floorliners, Cravenspeed antenna, Redline elite hood struts, RollnLock, Satoshi, CBI sliders
    GT7[QUOTED] likes this.
  20. Nov 8, 2017 at 10:56 AM
    #20
    12TRDTacoma

    12TRDTacoma [OP] Powered by Ford, GM, VW, and Mercedes

    Joined:
    Aug 20, 2012
    Member:
    #85133
    Messages:
    16,545
    Gender:
    Male
    First Name:
    Rob
    Concordia
    Vehicle:
    12 TRD Sport DCLB 4x4 Supercharged
    Boosted

Products Discussed in

To Top