1. Welcome to Tacoma World!

    You are currently viewing as a guest! To get full-access, you need to register for a FREE account.

    As a registered member, you’ll be able to:
    • Participate in all Tacoma discussion topics
    • Communicate privately with other Tacoma owners from around the world
    • Post your own photos in our Members Gallery
    • Access all special features of the site

TodayWasTHeDaY's Canadian Supercharged Stick Shift Taco

Discussion in '2nd Gen. Builds (2005-2015)' started by TodayWasTHeDaY, Aug 22, 2020.

?

Should I or should I not?

  1. Should

    83.3%
  2. Should not

    0 vote(s)
    0.0%
  3. Abstaining from voting due to political/religious/nefarious reasons

    16.7%
  1. Aug 22, 2020 at 11:16 AM
    #1
    TodayWasTHeDaY

    TodayWasTHeDaY [OP] Hoser

    Joined:
    Jul 10, 2017
    Member:
    #223673
    Messages:
    1,999
    Gender:
    Male
    First Name:
    Russ
    Calgary
    Vehicle:
    2015 DCSB SC M/T TRD Sport
    :canada:
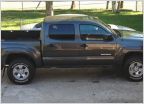
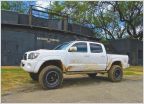
    It all started when I traded in a blue 2008 sport double cab for this Magnetic Grey 2015 sport double cab. Jumped on it because manual Toyota's tend to be unicorns and it was newer with less mileage of course. Stuck a supercharger on it cause these trucks are fun as hell with the added pep and it was something I wanted to do for a long while.

    Tacomaworld got me by the short and curlys thanks to the supportive and badass supercharged community on here. I have less money and my truck goes a lot faster. I'd do it again in a heartbeat.

    Everything installed by myself except for the upgraded fuel pump, differential gears and the custom exhaust from headers back. It's always nice to have the tools and knowledge to do things yourself and it saves lots of money that can be used for more mods and tools. Also, not being billed hourly means you can take your time and do it to your own standards.
    Freshly lifted May 2023
    PXL_20230517_015446779.jpg
    Fully debadged

    Older pics

    https://youtu.be/GNmZBlvggAE
    https://youtu.be/YHaj6_rAWXw

    Engine Mods:

    -Ported/smoothed/port-matched Magnuson supercharger (post #2) and intake runners (post #3)

    -2.3 Smoothflow quick change pulley with ripp mod

    -Aquamist HSF-3 methanol injection system with 750 cc/min spraying (two 375 cc/min nozzles installed) proportionally with injector pulses. (post #8)

    -Mightytacoman 3° retard cam gears

    -Solid Offroad poly motor and trans mounts (post #298)

    -AFE Magnum cold air intake with 3" 4runner/FJ intake tube to 76mm Tundra throttle body (URD adaptor and SC intake smoothed out and port matched for a smooth step down from the throttle body). 4runner/FJ MAF spiced in and adjusted for flow in Hptuners. AFE Momentum scoop added. (post #102)

    -URD equal length headers (the 05-11 ones, wink wink nudge nudge), ARP stainless header studs 434-1301

    -NST gold crank, SC crank, water pump & alternator pulleys

    -Roush SC belt tensioner with LFP 50mm double bearing pulley

    -Mishimoto dual row radiator, HPS silicone coolant hoses, dual auxiliary electric fans mounted on intercooler (post #455). Bullet Proof Manufacturing cooling panel (post #464)

    -Walbro 255 fuel pump

    -UPR billet catch can

    -Battery relocation to behind rear passenger seat and larger SC intercooler reservoir mounted where battery used to be. Napa Legend AGM battery NAB 349AGM. HKB Electronics Mk3 blade voltage booster. (post #13)

    -ZZP high output SC coolant pump, 9.25 gpm (post #143)

    -NGK Ruthenium spark plugs (LFER7BHX/95125)

    -Full dual exhaust installed, 2 1/2" piping, no cats, dual resonators, dual Magnaflow mufflers, x-pipe, side exits behind driver and passenger rear wheels. (post #267 and #275)

    -Canton Accusump, wired using a Hella ignition controlled time delay relay to pre-lube the engine with oil during start up. Kill switch by front drivers seat/shifter. (post #304)

    No belts or radiator shroud gives the best view of the blingy pulleys.


    Custom aluminum headlight fluid cap.... Because I'm a dork.


    Drivetrain Mods:

    -Spec Stage 3+ clutch (post #4)

    -URD lightweight steel flywheel (post #4)

    -Core/Hurst T-handle short throw shifter (post #6)

    -Eaton Detroit Truetrac LSD 913A541(post #98)

    -4.56 gears in both differentials, ECGS bushing installed in front diff during regear

    -Archive Garage Hammer Hangers, cross brace and rear bump stops (post #311)

    -Elka 2.0 IFP front struts and rear shocks with Icon RXT leaf packs and front Wheelers Superbumps for an approximately two inch lift (post #450)

    -Cheap ass leaf spring clamps (Superior 13-1401A) to reduce axle wrap (post #60 and #62)


    Random and Interior Mods:

    -JustDSM HPTuner'd with rev hang deleted. So much to be had with a great custom tune.

    -AEM 30-4110 afr and 30-4407 oil pressure gauge (post #138)

    -Lotek gauge pillar w/Speedhut boost gauge, Aquamist gauge and ram ball mount for Bullydog Gt platinum digital gauge (can display four parameters and read and clear DTC's on the fly). Currently have battery voltage, vehicle load, coolant temp and fuel pressure set up on the BD display (post #140)

    -Bussman RTMR powering three gauges and an ignition controlled relay powering the SC intercooler pump. 5 fused outputs and five fused switchable relays (post #139). One switch to energize relay powers dual pusher fans mounted to intercooler for better AC performance in summer.

    -Black cat customs gauge cluster faceplate (post #7)

    -Gas pedal spacer (3/4") to bring pedal level with brake pedal for heel toe shifting (post #39)

    -Full time traction control disable switch (post #245, post #141)

    -Remote start was already dealership installed by previous owner. AutoStart AS-2382TWU

    -Uniden R-8 Radar Detector mounted to rear view mirror with a Blendmount and mirror tap for power (post #303)

    -Hypertech 730117 speedometer calibrator

    -Factory black heated leather ass warmers

    -Up2NoGood's heated mirror kit

    -Joying 8" Android Head Unit (post #244) with pushbutton anytime Backup Camera button. Painted radio surround and steering wheel black during install.

    -CDT Audio Unity 8.0 PLUS 2” wideband driver replaced the stock tweeters, CL-69 SUBCF 6x9's with baffles, U-500 Crossover for wideband speakers (post #276)

    -Back wall and three out of the four doors have Kilmat 50 mil sound deadening butyl mat. Need to get that last door done and maybe do the floor someday.

    -Debadged warning labels on the sun visors (post #56 & #57)

    -Dashboard Porn
    PXL_20211123_185310045.jpg


    Exterior Mods:

    -20% XPEL-ST ceramic window tint on all side and back windows, medium smoke tail and brake light tint (post #435)

    -Headlight Services Harness and Osram H4 Super Bright bulbs

    -Osram 35w gy6.35 HIR tail light bulbs

    -Diode Dynamics SS3 Pro Yellow Foglights

    -Grillcraft upper and lower billet grill

    -Stealth Custom Series dark bronze F5 rims

    -Nokian Rotiiva 265/70r 17 (31.6-32")

    -Locking tailgate

    -Bakflip MX4 tonneu cover (replacing Bakflip HD due to hail damage insurance claim)

    -Bed mat and extra tie downs installed

    -Energy Suspension poly radiator bushings 9.4101G

    -Rear diff breather mod into drivers side rear bed cubby

    -Bash guard for methanol tank in truck bed (post #58 & #59)

    -Bullaculla tow plug relocate bracket

    -Fully debadged

    -Cut down radio antenna (post #41)

    -Trimmed mudflaps (post #36)

    -Favorite tools (post #253)


    Mods That Turned Into Big Piles of Flaming Shit: :bananadead::poking:

    -Clutchmasters Hydro bearing (post #4 & #86 & #98), removed March 2021 after main seal blew all brake fluid out of system. Lasted 2800km.


    Wish List:

    -Full time traction control kill switch so I don't have to hold the button for five seconds when I'm stopped. I think this one will be best incorporated after a Tru-trac gets installed.

    -Cutting brake would be fun as hell (researched and it's just not very feasible for a taco with rear drums, almost need a custom axle and possibly dedicated rotors, an open diff, possible diff disconnects, etc.)

    -Hammer hangers with brace

    -Better radiator and possibly building a shroud to guide air through radiator. **Decided Bullet Proof Fabricating cooling panel is good enough.

    -Install my Bussman RTMR and run the SC intercooler pump off it.

    -Some sort of flow switch for intercooler

    -Better head unit and speakers and sound deadening

    -Under hood lighting

    -Maybe a mild lift (thinking 1") at some point

    -FJ transfer case. Never been a fan of the electronic actuators. FJ diff tube

    -Solid motor and trans mounts

    -Poly cab mount bushings (bought but have yet to install)

    -Relocate my catch can for the third time

    -Window tint and possibly windshield tint


    The "Dreaming" Wishlist:

    -Built and sleeved motor (bought a wrecker 1GR May 2023 so this may actually happen someday).

    -Interested in the possibility of adding a rear mounted turbo to twin charge. SC takes care of the low to mid range and turbo for mid to high end.


    Big thanks to these guys:

    @12TRDTacoma for his SC Bible thread and help with belts and pulleys.

    @Athlaos for being a badass fellow Canadian. When plans fell through for us to change my clutch at his place it inspired me to tackle the job on my own.

    @BassAckwards for his excellent thread on how to change a clutch on our trucks.

    @JustDSM for all the personalized tuning and being great to deal with.

    @Roostfactor, @BillDaCat8, @Torspd, @mightytacoman and countless others in the SC thread or in PM's for tips and advice.
     

    Attached Files:

    Last edited: Dec 25, 2023
  2. Aug 22, 2020 at 11:19 AM
    #2
    TodayWasTHeDaY

    TodayWasTHeDaY [OP] Hoser

    Joined:
    Jul 10, 2017
    Member:
    #223673
    Messages:
    1,999
    Gender:
    Male
    First Name:
    Russ
    Calgary
    Vehicle:
    2015 DCSB SC M/T TRD Sport
    Ported/Smoothed Supercharger

    Ported SC a conservative amount. The inlet at the rotors basically can't be ported at all due to thin wall thicknesses everywhere. The whole inlet from the throttle body to the rotors can be smoothed but can't grind too much because of thin wall thickness. I opened the outlet probably 15% at the rotors, inlet at the rotors 2% (guessing) and smoothed the inlet runners and ported and port matched the SC outlet into the runners. Smoothed the inlet from the throttle body too.

    Used a pencil type Pneumatic grinder but it was fairly awkward working at an angle in the front. You can see some scratches to the right side of the V where the grinder got away from me and cut through the tape. Steady, steady hand needed. I ended up using a small hand file a lot. Lots of sanding with paper to smooth things out. Went to about 180 grit on everything because from everything I read a little bit of roughness allows a layer of air for most of the airflow to slide over. Too smooth can actually make less flow. There is a 2-3mm lip underneath the left side of the v shaped outlet port that I mostly shaved away. The widest part at the bottom of the v can't be widened anymore due to the way the casting is.

    Very difficult to remove much material from anything due to the way the casting is. I could have opened up the outlet more but it was a pain in the ass and if the inlet can't be opened up then effeciency goes out the window. People have wrecked blowers where they blow less air after being over-ported so I went modest.

    Also cut away the parts of the two barbed hose fittings (brake booster and vsv) that stick out on the inside of the sc intake.

    Before pic - I removed material that was sharpied and kept the bevel edge.
    [​IMG]

    Work in progress
    [​IMG]

    Finished - some edge scratches due to grinder getting away from me. very awkward to grind at an angle.
    [​IMG]

    Also port matched the URD adaptor to the intake of the SC. Although possible to smooth out and port it somewhat the SC inlet will never be able to match the 76 mm opening of the throttle body. The adaptor steps down to the SC inlet size. There is an inside ridge on the inlet flange that can be ground down and the throttle body adaptor can be matched to that.

    After doing that I attached the throttle body adapter to the (removed) SC and smoothed and ported it as much as I could. The SC inlet doesn't have much material that can be removed past where the throttle body bolts on. A lot of what I reduced was on the inside corner of the SC inlet and the throttle body adaptor had an asymmetric outlet shape to match that after i was done.

    Port Matched URD Throttle Body Adaptor/SC Inlet.
    1000002895.jpg
    1000002894.jpg
    1000002893.jpg
    1000002892.jpg
    1000002889.jpg

    Slight Knife Edging (I hesitate to call it that) on Throttle Body Inlet.
    1000002897.jpg

    Impossible to tell what gains have been made through this because I did this over a two month period along with changing the clutch, installing lightweight flywheel and NST pulleys, cam gears, 4runner intake tube with tundra throttle body, and URD equal length headers.

    The truck does accelerate noticeably quicker and smoother now but a lot of factors at work.
     
    Last edited: Dec 23, 2023
  3. Aug 22, 2020 at 11:28 AM
    #3
    TodayWasTHeDaY

    TodayWasTHeDaY [OP] Hoser

    Joined:
    Jul 10, 2017
    Member:
    #223673
    Messages:
    1,999
    Gender:
    Male
    First Name:
    Russ
    Calgary
    Vehicle:
    2015 DCSB SC M/T TRD Sport
    Instake Runner Porting/Smoothing/Port Matching to SC

    Intake Runner
    Top port is untouched, middle port is roughly ground down. The side edges that still look like a lip are actually divots and if you ground those down you'd probably put a hole through to the outside.
    [​IMG]

    Finished (or close to it)
    [​IMG]

    SC Outlet Port Matching
    Removed a bit of material to smooth the radius into the runners and port matched it together to the runners. Awkward spot also and had to resort to a lot of hand sanding.
    [​IMG]

    Also installed cam gears and painted the valve covers during this phase.
     
    Last edited: Apr 26, 2021
  4. Aug 22, 2020 at 2:50 PM
    #4
    TodayWasTHeDaY

    TodayWasTHeDaY [OP] Hoser

    Joined:
    Jul 10, 2017
    Member:
    #223673
    Messages:
    1,999
    Gender:
    Male
    First Name:
    Russ
    Calgary
    Vehicle:
    2015 DCSB SC M/T TRD Sport
    Clutch/Flywheel Install

    Winter/springtime covid unemployment project. Spec stage 3+ clutch, Clutchmasters Hydro bearing (POS) and URD lightweight steel flywheel install. Replaced rear main seal as well. Installed non-SIA URD equal length headers while the transmission was out. This involved tapping threads slightly larger for shorter ARP studs (434-1301, hole was chased with a 8 mm x 1.25 tap).

    This thread by @BassAckwards and youtube videos by KFlo Tacoma were a big help.

    https://www.tacomaworld.com/threads...lightweight-flywheel-install-write-up.577836/

    Big honking transmission


    Clutchmasters Hydro-bearing installed (lasted about 2800 km before seal cpmpletely blew and I labeled it as a bona fide piece of crap)


    URD lightweight steel flywheel


    Spec Stage 3+ clutch


    Spec Stage 3+ pressure plate


    TIME Magazine Man of the Year
     
    Last edited: Mar 5, 2021
  5. Aug 22, 2020 at 5:47 PM
    #5
    TodayWasTHeDaY

    TodayWasTHeDaY [OP] Hoser

    Joined:
    Jul 10, 2017
    Member:
    #223673
    Messages:
    1,999
    Gender:
    Male
    First Name:
    Russ
    Calgary
    Vehicle:
    2015 DCSB SC M/T TRD Sport
    Painted my pulley orange with leftover high temp primer and paint and cured it with a heat gun.
    It spins so fast now that some of the paint flew off.:beavisd: Fuck


    Presenting my art deco themed 2.3 SC pulley....
    Recently (April 2021) painted it black so it looks less stupid.

     
    Last edited: Jun 10, 2021
    BassAckwards likes this.
  6. Aug 22, 2020 at 5:52 PM
    #6
    TodayWasTHeDaY

    TodayWasTHeDaY [OP] Hoser

    Joined:
    Jul 10, 2017
    Member:
    #223673
    Messages:
    1,999
    Gender:
    Male
    First Name:
    Russ
    Calgary
    Vehicle:
    2015 DCSB SC M/T TRD Sport
    Hurst/core short throw shifter with the T-handle

    Absolutely love the shit out of this thing and it has consistently remained one of my favorite things with this truck. Throw in an HPTuner rev hang delete and a gas pedal spacer and things just get FUN in the best way possible.

    Hurst/Core short throw shifter


    Covid germ-death sauce dispenser courtesy of wifey.


    The Manual Gearbox Preservation Society :burnrubber:

    https://thecurbshop.com/collections/tmgps

     
    Last edited: Dec 20, 2020
    SnozzCumber and BillDaCat8 like this.
  7. Aug 22, 2020 at 7:15 PM
    #7
    TodayWasTHeDaY

    TodayWasTHeDaY [OP] Hoser

    Joined:
    Jul 10, 2017
    Member:
    #223673
    Messages:
    1,999
    Gender:
    Male
    First Name:
    Russ
    Calgary
    Vehicle:
    2015 DCSB SC M/T TRD Sport
    Black Cat Customs Gauge Face Install

    Replaced the stock gauge face with a Black Cat Customs gauge face (bottom pic) that is black and cleaner looking. Since I'm in Canada I opted to get rid of MPH and stuck with only KPH.

    Install
    I took pictures of where the needles were resting with the truck off and at idle to make sure the needles were where they were supposed to be when finished. Once the cluster was out and the clear plastic removed, the needles had to be pulled and the old gauge face popped out easy and the new face popped in. Needles re-installed and then the cluster was jammed back in truck. Had to pop the cluster out a couple of times to pop a couple of the needles off and on again to fine tune and used a GPS and my Bullydog gauge speedometer to cross reference with the dash speedometer.

    Stock gauge face


    New gauge face installed
     
    Last edited: Dec 17, 2020
    BassAckwards and Canadian Caber like this.
  8. Aug 28, 2020 at 7:24 PM
    #8
    TodayWasTHeDaY

    TodayWasTHeDaY [OP] Hoser

    Joined:
    Jul 10, 2017
    Member:
    #223673
    Messages:
    1,999
    Gender:
    Male
    First Name:
    Russ
    Calgary
    Vehicle:
    2015 DCSB SC M/T TRD Sport
    Aquamist HSF-3 Install

    Unit is tied into the injectors and operates proportionally to the injector duty cycles. Installed the reservoir and pump in the back corner of the box so it's easy to fill up and access but I need to make a steel guard to shield things. I usually strap stuff down anyways when carrying things in the box. Lots of planning, wire, meth delivery hose, wire loom and electrical tape needed to make this install happen.

    Aquamist Pump maintains constant line pressure at all times by recirculating meth in an internal loop when not spraying.


    5 L tank that perfectly fits a standard 3.78 L washer fluid jug when the level is around the low level sensor.

    Currently 750 cc/min (two 320 cc/min nozzles installed). Fast acting valve mounted on the air filter housing sprays proportionally to injector pulses.


    The controller is hidden beside the glovebox and behind the dash. Attached with super strength Velcro so it doesn't rattle around.


    When I did this install I attempted make the empty fuse holders in the cab usable. After unplugging the approximately 800 plugs and removing the fuse box I struggled for a couple hours trying to split this thing in half before it defeated me in mortal combat. :infantry:

    Seemed impossible for me to separate without breaking so ended up putting it all back together.

    Fun and Games...

    As a result I have too many fuse taps that will have to be reworked someday into something not hackish looking.
     
    Last edited: Dec 28, 2020
  9. Sep 1, 2020 at 12:27 PM
    #9
    Athlaos

    Athlaos Zero-Force Member

    Joined:
    Nov 24, 2010
    Member:
    #46672
    Messages:
    2,541
    Gender:
    Male
    First Name:
    Leigh
    Edmonton
    Vehicle:
    2011 SR5 Manual TRD SC 1.87" pulley
    A flux retro-capacitance encabulator
    I'm not sure how I never looked at this before now. I like all the details you've paid attention to. Great install of the Aquamist kit!
     
  10. Sep 1, 2020 at 12:34 PM
    #10
    TodayWasTHeDaY

    TodayWasTHeDaY [OP] Hoser

    Joined:
    Jul 10, 2017
    Member:
    #223673
    Messages:
    1,999
    Gender:
    Male
    First Name:
    Russ
    Calgary
    Vehicle:
    2015 DCSB SC M/T TRD Sport
    Thanks buddy!
     
    Athlaos[QUOTED] likes this.
  11. Sep 2, 2020 at 6:55 PM
    #11
    cmoterboat

    cmoterboat Well-Known Member

    Joined:
    Oct 10, 2015
    Member:
    #166309
    Messages:
    86
    Gender:
    Male
    First Name:
    Carson
    Vehicle:
    2006 Silver Tacoma TRD
    Whoa, this is sick.

    Never have heard of using methanol injection but i don’t know nuthin about supercharging

    what it do?
     
    Athlaos and TodayWasTHeDaY[OP] like this.
  12. Sep 2, 2020 at 7:18 PM
    #12
    TodayWasTHeDaY

    TodayWasTHeDaY [OP] Hoser

    Joined:
    Jul 10, 2017
    Member:
    #223673
    Messages:
    1,999
    Gender:
    Male
    First Name:
    Russ
    Calgary
    Vehicle:
    2015 DCSB SC M/T TRD Sport

    Thanks for the compliment!

    I'm actually using winter windshield washer fluid in the system lol. The -40 celcius stuff we use in the winter is an almost 50:50 mix of distilled water and methanol.

    The methanol content boosts the octane level to keep knock (pre-detonation) from happening. The water component cools the intake temperatures when the mist changes state to a gas. Different ratios of water:meth can be used but 50:50 is a good combination.

    In a nutshell it keeps everything running good and happy under boost.
     
    cmoterboat[QUOTED] and Athlaos like this.
  13. Sep 14, 2020 at 5:12 PM
    #13
    TodayWasTHeDaY

    TodayWasTHeDaY [OP] Hoser

    Joined:
    Jul 10, 2017
    Member:
    #223673
    Messages:
    1,999
    Gender:
    Male
    First Name:
    Russ
    Calgary
    Vehicle:
    2015 DCSB SC M/T TRD Sport
    Battery Relocation

    Lots of wire loom and electrical tape. Ran the wires inside frame to back of cab and in through there to behind the rear passenger seat. Tied in to stock wiring from the alternator by chopping the battery clamp off and re-terminating everything to a remote jumper post station. First week after the job was done I jump started a damsel in distress at my son's daycare.

    Ran all the cables to where they needed to be and coiled the excess in the engine bay and the cab so when everything was ready to go I could move the battery and tie in all the wiring in one day. Being Canada it decided to snow and rain on me on the day I did this and I got sick.

    Afterwards I removed the stock intercooler reservior and mounted a bigger one where the battery used to be.

    Intercooler reservior


    Remote battery jump terminals

    Have a breaker at the hot from the battery with a fuse on the black to ground. The breaker is awesome - whenever the battery needs disconnected press a button. Additional fuse in engine bay near jumper terminals. Napa AGM Battery installed with a HKB mini blade alternator voltage booster.

    Mini fuse holder to relay to drive the Aquamist pump.


    A year later I finally decided to buy a fire extinguisher just in case:sandwich:
     
    Last edited: Jan 23, 2021
    BassAckwards, b3itz and Athlaos like this.
  14. Sep 14, 2020 at 5:14 PM
    #14
    Athlaos

    Athlaos Zero-Force Member

    Joined:
    Nov 24, 2010
    Member:
    #46672
    Messages:
    2,541
    Gender:
    Male
    First Name:
    Leigh
    Edmonton
    Vehicle:
    2011 SR5 Manual TRD SC 1.87" pulley
    A flux retro-capacitance encabulator
    That’s wicked. What would you say are the benefits of a larger tank for the intercooler?
     
  15. Sep 14, 2020 at 5:20 PM
    #15
    TodayWasTHeDaY

    TodayWasTHeDaY [OP] Hoser

    Joined:
    Jul 10, 2017
    Member:
    #223673
    Messages:
    1,999
    Gender:
    Male
    First Name:
    Russ
    Calgary
    Vehicle:
    2015 DCSB SC M/T TRD Sport
    Everyone said the intercooler radiator for our chargers does a good job. The intercooler itself is tiny and heat soaks easy with smaller pulleys. I figured more coolant capacity with increased flow (installed a slightly faster pump too) would take a little more time before heat soak became an issue. I hated the little plastic reservoir that came with the charger and the aluminum one should act as a bit of a radiator by letting heat out of its increased surface area.

    I might be making shit up now idk:D

    This was done before meth addiction set in to cool things
     
    SnozzCumber and Athlaos[QUOTED] like this.
  16. Sep 14, 2020 at 5:28 PM
    #16
    Athlaos

    Athlaos Zero-Force Member

    Joined:
    Nov 24, 2010
    Member:
    #46672
    Messages:
    2,541
    Gender:
    Male
    First Name:
    Leigh
    Edmonton
    Vehicle:
    2011 SR5 Manual TRD SC 1.87" pulley
    A flux retro-capacitance encabulator
    Me having two stock pumps in parallel results in 30% faster flow or so. How much does your new pump increase flow over stock?

    More fluid is always better I think. I've been lucky, never had leaks with the stock coolant reservoir, otherwise I would have looked into some kind of replacement. A bigger tank would also result in extra time before a leak drains the system, should a leak occur.
     
  17. Sep 14, 2020 at 5:38 PM
    #17
    TodayWasTHeDaY

    TodayWasTHeDaY [OP] Hoser

    Joined:
    Jul 10, 2017
    Member:
    #223673
    Messages:
    1,999
    Gender:
    Male
    First Name:
    Russ
    Calgary
    Vehicle:
    2015 DCSB SC M/T TRD Sport
    I can't figure out what the stock flow rate is. Do you happen to know?
     
    Athlaos[QUOTED] likes this.
  18. Sep 14, 2020 at 5:42 PM
    #18
    Athlaos

    Athlaos Zero-Force Member

    Joined:
    Nov 24, 2010
    Member:
    #46672
    Messages:
    2,541
    Gender:
    Male
    First Name:
    Leigh
    Edmonton
    Vehicle:
    2011 SR5 Manual TRD SC 1.87" pulley
    A flux retro-capacitance encabulator
    I seem to remember Rob putting it on Pg1 of his tips and trick thread
     
  19. Sep 14, 2020 at 5:50 PM
    #19
    TodayWasTHeDaY

    TodayWasTHeDaY [OP] Hoser

    Joined:
    Jul 10, 2017
    Member:
    #223673
    Messages:
    1,999
    Gender:
    Male
    First Name:
    Russ
    Calgary
    Vehicle:
    2015 DCSB SC M/T TRD Sport
    He has an upgraded pump that he says runs 1.10 gal/m faster than stock but no mention of the stock value.

    Think I have the same pump that maybe came with a different plug (was plug and play for me). Part number is mostly the same.

    Mine: 03920-022-002 (flow rate 5.28 gal/m)

    One in the Bible thread: 03920-022-010
     
    Athlaos[QUOTED] likes this.
  20. Sep 14, 2020 at 6:01 PM
    #20
    TodayWasTHeDaY

    TodayWasTHeDaY [OP] Hoser

    Joined:
    Jul 10, 2017
    Member:
    #223673
    Messages:
    1,999
    Gender:
    Male
    First Name:
    Russ
    Calgary
    Vehicle:
    2015 DCSB SC M/T TRD Sport
    Stealth tits
     
    Last edited: Dec 15, 2020

Products Discussed in

To Top