1. Welcome to Tacoma World!

    You are currently viewing as a guest! To get full-access, you need to register for a FREE account.

    As a registered member, you’ll be able to:
    • Participate in all Tacoma discussion topics
    • Communicate privately with other Tacoma owners from around the world
    • Post your own photos in our Members Gallery
    • Access all special features of the site

geekhouse23's "LIFE'S WAITING TO BEGIN" Overland & Home build and all the Adventures in between!

Discussion in '2nd Gen. Builds (2005-2015)' started by geekhouse23, Nov 11, 2013.

  1. Nov 11, 2013 at 5:44 PM
    #1
    geekhouse23

    geekhouse23 [OP] The "Liftman" - @DrFunker

    Joined:
    Jul 14, 2013
    Member:
    #108251
    Messages:
    15,597
    Gender:
    Male
    Vehicle:
    2GMGMDCSB4WDTRDFTMFW!! TL;DR
    mostly stock, grocery gettin' Prius
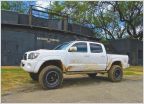
    Meet Caitlyn! Yes, that is her name because she's a girl, but she has balls.

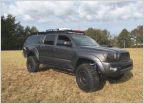
    This is my brand new 2013 Tacoma DCSB off-road Edition in Magnetic Grey Metallic purchased September 2012. First truck ever! :D

    I would like to thank TW for helping me in so many ways. Very nice and patient group of guys and gals willing to help explain and give advice where needed. Also helping spend my money. Compared to others here on the forum and where I want this build to go, I really haven’t done anything :rolleyes:

    6DBE36CB-D72F-4AC6-BC5C-4096FDC22F98.jpg


    [​IMG]

    F9674E82-B35E-40E3-81A4-C1F0DA375D47.jpg

    MODIFICATIONS:

    Engine/Drivetrain:
    J&L oil separator
    Safari Snorkel
    UNI Filter Mod LINK
    MBRP cat-back exhaust
    TRD oil cap
    TRD radiator cap

    Suspension:
    Front:
    KING coilovers w/ 650lb coils
    LR UCAs
    Plastics Guy bumpstops
    Swaybar removed - 5/22/2021

    Rear:
    12" King smoothies with remote reservoirs
    Deaver U402 stage III leaf packs
    BAMF shock relocation
    BAMF hammer hangers
    BAMF shackles
    CB Drop Kit
    2* Axle shims from Headstrong Offroad LINK
    Wheeler's Offroad U-bolt flip kit
    Wheeler's superbumps
    Custom cross brace for BAMF hangers

    Wheels:
    Weds Hase spec II 17x8.5 -6 offset on 285/70/R17 General Grabber X3's

    Armor:
    #JerryBerryBought aka #BankruptBilt (Pelfreybilt) aluminum front bumper w/ center hoop (now full hoops added on for extra #OLAF points) YAAAS! sticker
    #JerryBerryBought aka #BankruptBilt (Pelfreybilt) high clearance steel rear bumper with swingout
    BAMF bumper support brackets
    Avid Off-Road Sliders w/Kickout (converted 5/17/14 from Bolt-on to weld-on thanks to NWiTACO)
    B.A.M.F LCA skids LINK
    #JerryBerryBought aka #BankruptBilt (Pelfreybilt) IFS skid LINK
    #JerryBerryBought aka #BankruptBilt (Pelfreybilt) Mid skid LINK
    #JerryBerryBought aka #BankruptBilt (Pelfreybilt) Transfer Case skid LINK
    #JerryBerryBought aka #BankruptBilt (Pelfreybilt) Gas Tank skid LINK
    Diff Armor plate thanks to NWiFAB/NWiTACO!! LINK
    All-Pro E-Locker Guard Exterior:
    Tacoma bed mat
    Black "TRD Off Road" bedside stickers LINK
    TRD Pro Grille from Cali Raised LED
    DIY Undercoating
    Color matched LEER 100R topper with windoors
    KBVooDoo tailgate cap
    Hooke off road tailgate enforcement
    BHLM courtesy of MMSport
    BTLM from Amazon

    Interior:
    ScanGuage II LINK
    Wet Okole seat covers LINK
    2 Maglites mounted on underside of console arm rest
    WeatherTech FloorLiners LINK
    ImMrYo Rear-View Mirror Lift Bracket LINK
    Hypertech Speedometer Calibrator LINK
    USED Salex Center console and Glovebox Organizer
    BirdDawg Heavy Duty Tech Deck LINK
    Ram ball mount; iPhone Ram mount; Ram Mount Composite Short Double Socket Arm
    Blue Ridge Overland Gear visor organizers
    1000 Watt Cobra inverter
    Molle panel behind the rear passenger seats
    Olecoot seat spacers; both driver and passenger seats done
    Blueridge Overland Gear "Tacoma Attic"

    Communications:
    Cobra 19DXIV 40 Channel Mobile Compact CB Radio LINK
    Cobra HG S300 Highgear External Noise-Cancelling Speaker LINK
    PA Horn SPEAKER w/ Plug & Wire - 5 inch for CB / Ham Radio LINK
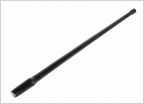
    4' Firestik
    Rago Fabrication Stainless Steel CB antenna mount

    Lighting:
    MESOJDM LED interior kit; White map lights and white dome lights
    DIY Bed LEDs LINK
    DIY Hood LEDs
    40" Baja Designs S8 LED light bar mounted on the Prinsu Roof Rack
    Amazon license plate LEDs
    Walmart LED reverse bulbs
    Lifetime LED headlight bulbs
    LED amber corner LED bulbs
    20" single row Lightforce LED bar courteousy of #RandyFab
    Black Oak LED 2x1 pods on the rear rack as "Sasquatch"/Landing lights
    Rigid Industries flush mounted "reverse" lights :luvya:
    Rigid DOT/SAE 2x2 Duallys (foglights)

    Storage:
    PrInSu CabRac LINK
    PrInSu TopRac
    Frontrunner cargo boxes

    On-Board Air:
    ARB CKMA12 LINK

    Security:
    Pop & Lock
    Window security bar mod LINK
    Tailgate Anti-Theft Mod LINK
    Bed Mat Security Mod
    Bed Storage Locks Mod LINK
    Gates Locking Gas Cap LINK
    Infinite Rule shackle lock
    BOLT receiver lock - matched to ignition key
    BOLT lock for Swingout - matched to ignition key

    Miscellaneous:
    Additional D-Rings in Bed LINK
    DIY Tool mount (bensonX) LINK
    Diff breather mod LINK
    Horns relocation mod
    Redline Tuning hood struts (all black) LINK
    All-Pro Extended brake lines (front and rear) CMC LINK
    Blue Seas fuse block and circuit breaker
    Various OTRATTW switches LINK
    Remote Start
    HELLA SuperTone Horns LINK
    Trasharoo Bag LINK
    RTT!!
    Flattened pinch weld
    4 gallon Rotopax fuel can
    (2) 2 gallon Rotopax water cans
    Upgraded to Energy Suspension body/radiator mount bushings LINK
    Poly Performance Fairlead :luvya:
    DIY limb risers for maximum #EAF points!
    Total Chaos bed stiffener brackets
    MESOJDM "gasshole"
    StopTech slotted rotors w/ TRD performance pads LINK
    PowerStop KOE15389DK Autospeciality Replacement Rear Brake Kit- OE Rotors & Ceramic Brake Pads LINK
    X2Power 31M Battery w/ Slee Offroad terminal extension (positive) and SDHQ billet terminal (negative)

    Recovery:
    Basic tool kit
    First aid Kit
    Jumper cables
    Jump Pack
    Billet 4x4 solid steel receiver bracket w/ shackle (rated to 20,000 lbs) LINK
    Various Shackles
    ARB recovery strap LINK
    Tow strap (Harbor Freight)
    30' Bubba Rope LINK :goingcrazy: CHEAPEST PRICING!! :goingcrazy:
    Hi-Lift Xtreme and various accessories
    small shovel
    ClayCrusher's soft shackle (2) LINK
    2 pairs of MaxTrax LINK
    Tepui duffle bag

    Maintenance tracking:
    Tires rotated 15,000 miles
    Tires rotated 19,600 miles
    Oil change and tire rotation completed at Toyota 23,4xx miles
    Oil change, diff fluid change, tire rotation at Toyota 29,xxx miles
    Oil change and tires rotated 33,7xx miles
    Oil change and tires rotated 40,1xx miles

    REFERENCE
    -- Air Filter: Purolator A35578
    -- Cabin Filter: Purolator C35644
    -- Differential Gear Oil: 75W-90 Synthetic
    -- Driveshaft Grease: Mobil 1 Synthetic
    -- Front Diff. Fill Plug Torque: 29 ft/lbs
    -- Front Diff. Drain Plug Torque: 48 ft/lbs
    -- Front Diff. Oil Capacity: 1.59Q
    -- Ignition Coil Torque: 7.5 ft/lbs
    -- Oil Capacity: 5.5Q
    -- Oil Filter: OEM P# 90915YZZD3
    -- Oil Type: Mobil 1 Synthetic 5W-30
    -- Rear Diff. Bolts Torque: 36 ft/lbs
    -- Rear Diff. Oil Capacity: 3.12Q
    -- Spark Plug Torque: 15 ft/lbs
    -- Transfer Case Bolts Torque: 27 ft/lbs
    -- Transfer Case Oil Capacity: 1.1Q
    -- Transmission Fluid: Toyota ATF WS

    -- Pre-Wheeling Checklist (Colinb17)

    To Do LIST:

    Mods to look into:
    locker anytime - LINK
    ABS disable mod - LINK
    Homelink
    Illuminated 4x4 switch..
    kill switch mod - LINK

    “Down the road” plans:

    - 4.56 gears front and rear with ARB Air Lockers

    What others are saying:

    I found myself on Pintrest!
    https://www.pinterest.com/pin/371969250450061713/

    Featured on Relentless fab's website to show off the bed bars!!


    Inspiration:

    Stock (best one I could find):
    [​IMG]

    Lockable Bed Storage Mod LINK
    [​IMG]

    DIY Tool mount (bensonX) LINK
    [​IMG]

    Blue Seas fuse block and circuit breaker mounted and wired
    [​IMG]

    Switches in their new home
    [​IMG]

    Switches lit up!
    [​IMG]

    CB installed
    [​IMG]

    OBA:
    [​IMG]

    6/23/14 Badlands trip with NWiTaco and LoadedTaco:
    [​IMG]

    Wheeling with LoadedTaco and NwiTaco June 2014:

    https://youtu.be/bTgaex0VFb8

    6/21/14 - Almost 2 years of owning her, hit 10,000 miles:
    [​IMG]

    8/16/15:
    6168f3a5b8e83cf9007cd6785a5d2da1_e0e810275a99a62ae573a478b8e08df9f7e77a93.jpg

    Snorkel Completed!! 12/12/15

    6a63a613f58b61140f4de1c02e162867_a638e2fec72ea41adf1821394eb7115087fbc378.jpg

    c19e85fb63570484857d579349de2061_894d65b013d1a5fd6a51fc37f918857a44ce4459.jpg

    12/13/15:
    6a63a613f58b61140f4de1c02e162867_a638e2fec72ea41adf1821394eb7115087fbc378.jpg

    3/12/16 - 12" 5125's with BAMF shock relocation

    e4be36580de580e5ecbe504bf87a8a97_fb66b2f07e8313048f053a6701cfd16ce7dc5270.jpg

    3/19/16 - Pelfreybilt bumper installed!!!!

    db405bd45a83fdd9c4b425b99f4edaa1_04761cc911a1e20712f8ba117fad6a5d7f007059.jpg

    4/16/16; 20" LED bar installed and the energy suspension radiator mount bushings installed LINK :

    f4fe8fbbbac6d8da4537ba43bd7c8886_8082806e8eb791a7a9facde500a1c07de0ad928f.jpg

    5/7/16; Hood vinyl and front side windows tinted:

    57479d0f6579e3c6ea81dde16e1d461e_6ff812214cd1cf7dccda133408f6f7047f71af55.jpg

    7/11/16:


    8/13/16:
    Limb riser project completed for some MAJOR #EAF points! :woot:


    Flexin'! :muscleflexing:


    4/29/18:

    Pelfreybilt rear steel bumper installed!!

    A90D588A-6ABE-47B8-A470-1644C3659C9D.jpg

    5/18/18:

    TRD Pro Grille from CaliRaised LED!

    [​IMG]

    7/13/18:

    Molle Panel behind the rear passenger seats

    [​IMG]

    7/22/18:

    Uni-Filter mod and axle shims

    [​IMG]

    [​IMG]

    7/27/18:

    MesoJDM interior LED mod

    [​IMG]

    7/31/18:

    MesoJDM gasshole installed

    [​IMG]

    [​IMG]

    [​IMG]

    8/5/18:

    Wheeler's Offroad u-bolt flip kit in, all-poo crap out

    [​IMG]

    [​IMG]

    New superbump perches:
    [​IMG]

    Edge trim installed on Prinsu fairing

    [​IMG]

    AJT designs climate control knobs:

    [​IMG]

    DuroBumps bumpstops in the front to replace the Wheeler's superbumps:

    [​IMG]

    SAE/DOT Rigid duallys for foglights:

    [​IMG]

    Amber covers for the Rigid fogs (during winter only) and a new Lightforce 20" SR LED bar to replace the shitty Amazon one:

    [​IMG]

    SuperbrightLED shifter bulb:

    [​IMG]

    Warn winch line sleeve and Warn Epic Hook

    [​IMG]

    Maintenance item:

    [​IMG]

    New toy!

    [​IMG]

    New Tomei Shift Knob

    [​IMG]

    #RANDYFAB mod

    [​IMG]

    Amazon Winch Sack (cover) installed

    [​IMG]

    ATO shackle flip removed and BAMF beef hangers installed 6/8/19

    [​IMG]

    Crossbrace welded up, painted and installed:

    [​IMG]

    [​IMG]

    12" King RR smoothies
    [​IMG]

    Cheap alternative to the Maxtrax spare tire mount; $20 > $150
    [​IMG]

    TW GB foxwing finally installed and deployed:

    [​IMG]

    Deaver U402 Stage III leaf packs and BAMF shackles installed:
    [​IMG]

    9/1/19 - Met up with Mark and his gf who are touring the States to see the sights and find a new home. GREAT time. Truly.

    [​IMG]

    [​IMG]

    5/22/2021

    B18590E2-7A79-409F-814E-93FD77F6018C.jpg

    5/21/2022

    Weds Hase spec II 17x8.5 -6 offset on 285/70/R17 General Grabber X3's

    6DBE36CB-D72F-4AC6-BC5C-4096FDC22F98.jpg
     
    Last edited: May 27, 2024
    This site contains affiliate links for which the site may be compensated.
    #1
  2. Nov 11, 2013 at 5:45 PM
    #2
    geekhouse23

    geekhouse23 [OP] The "Liftman" - @DrFunker

    Joined:
    Jul 14, 2013
    Member:
    #108251
    Messages:
    15,597
    Gender:
    Male
    Vehicle:
    2GMGMDCSB4WDTRDFTMFW!! TL;DR
    mostly stock, grocery gettin' Prius
    ON DECK MODS:

    - Reinforced knuckles
    - New hubs and bearings
     
    Last edited: May 27, 2024
    Slashaar and ChadsPride like this.
  3. Nov 11, 2013 at 6:41 PM
    #3
    Gus 524

    Gus 524 Well-Known Member

    Joined:
    Apr 22, 2012
    Member:
    #77417
    Messages:
    523
    Gender:
    Male
    First Name:
    Justin
    MN
    Vehicle:
    09 tacoma SR5 4WD 4-cylinder
    wow looking good! Keep it up.
     
  4. Nov 11, 2013 at 6:46 PM
    #4
    ChamYota

    ChamYota Crash Bandicoot Or Groot AKA Cham "Scottalot" Yota

    Joined:
    Jul 6, 2011
    Member:
    #59431
    Messages:
    12,354
    Gender:
    Male
    First Name:
    Cam
    Columbia,South Cakalacky
    Vehicle:
    05' Taco 4x4 swapped/ 2007 Toyota Land Cruiser
    H1 Morimoto projector with XB35 4300K bulbs with Mini-gatling gun shrouds, BHLM. Debadged,OEM roof rack,TW sticker,Sockmonkey Beside decals,265/70/16 Nitto terra grapplers with dick cepek DC'2 wheels,weathertech floor liners(front/back),USA Spec Ipod reader,Scanguage II,Bestop Supertopper and more in the works...
    dopeness :cool:
     
  5. Nov 11, 2013 at 7:05 PM
    #5
    geekhouse23

    geekhouse23 [OP] The "Liftman" - @DrFunker

    Joined:
    Jul 14, 2013
    Member:
    #108251
    Messages:
    15,597
    Gender:
    Male
    Vehicle:
    2GMGMDCSB4WDTRDFTMFW!! TL;DR
    mostly stock, grocery gettin' Prius
    Thanks guys :thumbsup:

    It's getting there..slowly but surely :eek:
     
  6. Nov 11, 2013 at 10:05 PM
    #6
    rileySB

    rileySB RileySB

    Joined:
    Apr 8, 2013
    Member:
    #101692
    Messages:
    888
    Gender:
    Female
    First Name:
    Gen
    Santa Barbara, CA
    Vehicle:
    13 DCSB OR 4x4
    5100/887, Dakars, 285s, Built Right UCAs, Icon rears
    You've been holding out?? :bowdown: Looks like you've been busy. Curious to see what your new project will look like!

    Love the tool mounts, where did you get the metal plate to attach the quick fists to?

    Quickfistmount1_zps76c1c6e3_3c37e443e524131910a9b6b97cb87f7a814a5269.jpg
    Quickfistsmount2_zps183d0756_f46394c3e66df932b286062bdce8a3faf00cbf5b.jpg
     
    Slashaar and Manfred like this.
  7. Nov 12, 2013 at 4:11 AM
    #7
    dougtara

    dougtara Well-Known Member

    Joined:
    Aug 9, 2013
    Member:
    #110097
    Messages:
    59
    Gender:
    Male
    First Name:
    Doug
    Fayetteville, NC
    Vehicle:
    '09 Prerunner DCSB
    borla headers and exhaust 2" lift icon rear shocks bilsten 5100 coilovers specter cold air intake falken rocky mtn 285 satoshi grill land cruiser badged HID 4" BAMF antenna mount with 4' firestick
    nice build... keeping it classy
    i love the tool mounts with the rubber clamps
     
  8. Nov 12, 2013 at 7:33 AM
    #8
    geekhouse23

    geekhouse23 [OP] The "Liftman" - @DrFunker

    Joined:
    Jul 14, 2013
    Member:
    #108251
    Messages:
    15,597
    Gender:
    Male
    Vehicle:
    2GMGMDCSB4WDTRDFTMFW!! TL;DR
    mostly stock, grocery gettin' Prius
    I had a shop make them (I lack the necessary tools). It took a week because the shop couldn't handle a simple drawing I gave them from BensonX's thread, see here:
    http://www.tacomaworld.com/forum/2nd-gen-tacomas/260147-diy-hi-lift-tool-mounts.html

    Thanks man :thumbsup:
     
  9. Nov 13, 2013 at 6:30 AM
    #9
    geekhouse23

    geekhouse23 [OP] The "Liftman" - @DrFunker

    Joined:
    Jul 14, 2013
    Member:
    #108251
    Messages:
    15,597
    Gender:
    Male
    Vehicle:
    2GMGMDCSB4WDTRDFTMFW!! TL;DR
    mostly stock, grocery gettin' Prius
    Waiting on delivery:
    - 2̶0̶1̶3̶ ̶O̶E̶M̶ ̶g̶r̶i̶l̶l̶ ̶ (Thanks rileySB) (delivered: 11/18/13)
    - D̶e̶v̶i̶l̶s̶ ̶H̶o̶r̶n̶s̶ ̶f̶r̶o̶m̶ ̶A̶n̶d̶r̶e̶s̶ (delivered: 11/15/13)
    - L̶E̶D̶ ̶s̶t̶r̶i̶p̶s̶ ̶f̶o̶r̶ ̶u̶n̶d̶e̶r̶ ̶h̶o̶o̶d̶ ̶l̶i̶g̶h̶t̶i̶n̶g̶ (delivered: 11/29/13)
    - T̶u̶n̶d̶r̶a̶ ̶"̶4̶x̶4̶"̶ ̶e̶m̶b̶l̶e̶m̶ ̶f̶o̶r̶ ̶t̶a̶i̶l̶g̶a̶t̶e̶ (delivered: 11/13/13)
    - 8̶5̶ ̶t̶o̶ ̶9̶0̶ ̶F̶J̶ ̶e̶m̶b̶l̶e̶m̶ (delivered: 11/26/13)
    - F̶l̶y̶z̶e̶y̶e̶ ̶V̶1̶ ̶p̶a̶c̶k̶a̶g̶e̶ ̶i̶n̶ ̶b̶l̶a̶c̶k̶ (Black Friday deal) (delivered: 12/7/13)
    - A̶l̶l̶-̶P̶r̶o̶ ̶o̶r̶d̶e̶r̶:̶ ̶e̶x̶t̶e̶n̶d̶e̶d̶ ̶b̶r̶a̶k̶e̶ ̶l̶i̶n̶e̶s̶;̶ ̶f̶r̶o̶n̶t̶ ̶a̶n̶d̶ ̶r̶e̶a̶r̶ ̶a̶n̶d̶ ̶U̶-̶b̶o̶l̶t̶ ̶f̶l̶i̶p̶ ̶k̶i̶t̶ (Black Friday free shipping) (Ordered: 11/28/13 delivered: 12/17/13)
    - B̶l̶u̶e̶ ̶S̶e̶a̶s̶ ̶f̶u̶s̶e̶ ̶b̶l̶o̶c̶k̶ ̶w̶i̶t̶h̶ ̶c̶i̶r̶c̶u̶i̶t̶ ̶b̶r̶e̶a̶k̶e̶r̶ (delivered: 12/13/13)
    - Y̶o̶t̶a̶m̶a̶c̶ ̶f̶u̶s̶e̶ ̶b̶l̶o̶c̶k̶ ̶m̶o̶u̶n̶t̶i̶n̶g̶ ̶p̶a̶n̶e̶l̶ (delivered 12/10/13)
    - C̶u̶s̶t̶o̶m̶C̶a̶r̶G̶r̶i̶l̶l̶s̶.̶c̶o̶m̶ ̶S̶m̶a̶l̶l̶ ̶p̶e̶r̶f̶o̶r̶a̶t̶e̶d̶ ̶m̶e̶s̶h̶ (delivered: 12/18/13)
    - A̶i̶r̶d̶o̶g̶'̶s̶ ̶S̶u̶p̶e̶r̶b̶u̶m̶p̶ ̶s̶h̶i̶m̶ ̶k̶i̶t̶ (delivered: 12/22/13)
    - C̶o̶l̶o̶r̶ ̶m̶a̶t̶c̶h̶e̶d̶ ̶p̶a̶i̶n̶t̶ ̶f̶r̶o̶m̶ ̶A̶u̶t̶o̶m̶o̶t̶i̶v̶e̶ ̶T̶o̶u̶c̶h̶u̶p̶;̶ ̶o̶r̶d̶e̶r̶e̶d̶ ̶a̶d̶h̶e̶s̶i̶v̶e̶ ̶p̶r̶o̶m̶o̶t̶e̶r̶,̶ ̶1̶G̶3̶ ̶p̶a̶i̶n̶t̶ ̶a̶n̶d̶ ̶c̶l̶e̶a̶r̶ (delivered: 12/30/13)
    - O̶T̶R̶A̶T̶T̶W̶ ̶s̶w̶i̶t̶c̶h̶e̶s̶ ̶(̶H̶o̶o̶d̶ ̶a̶n̶d̶ ̶B̶e̶d̶ ̶L̶i̶g̶h̶t̶s̶)̶ ̶6̶ ̶p̶o̶s̶i̶t̶i̶o̶n̶ ̶s̶w̶i̶t̶c̶h̶ ̶h̶o̶l̶d̶e̶r̶ ̶4̶ ̶p̶a̶n̶e̶l̶ ̶p̶l̶u̶g̶s̶ (delivered: 1/7/14)
    - W̶h̶e̶e̶l̶e̶r̶s̶ ̶S̶u̶p̶e̶r̶ ̶B̶u̶m̶p̶s̶ ̶f̶r̶o̶n̶t̶ ̶a̶n̶d̶ ̶r̶e̶a̶r̶ (Back Ordered; Ordered: 1/14/14; Shipped: 1/29/14; Delivered: 2/4/14)
    - D̶2̶9̶X̶L̶ ̶a̶d̶d̶ ̶a̶ ̶l̶e̶a̶f̶ (delivered: 1/23/14)
    - m̶i̶l̶i̶t̶a̶r̶y̶ ̶s̶p̶e̶c̶ ̶b̶a̶t̶t̶e̶r̶y̶ ̶c̶o̶n̶n̶e̶c̶t̶o̶r̶s̶ (delivered: 1/22/14)
    - N̶o̶L̶o̶s̶s̶ ̶V̶a̶l̶v̶e̶ ̶C̶a̶p̶s̶ (delivered: 1/22/14)
    - D̶a̶k̶a̶r̶s̶!̶ (Ordered: 2/3/14; Delivered: 2/7/14)
    - 3̶0̶'̶ ̶B̶u̶b̶b̶a̶ ̶R̶o̶p̶e̶ (4banger4x4 setup the sale) (delivered: 2/18/14)
    - C̶o̶b̶r̶a̶ ̶1̶9̶D̶X̶ ̶I̶V̶ ̶C̶B̶ ̶r̶a̶d̶i̶o̶ (delivered: 4/11/14)
    - L̶a̶t̶e̶s̶t̶ ̶O̶T̶R̶A̶T̶T̶W̶ ̶s̶w̶i̶t̶c̶h̶e̶s̶ ̶(̶C̶B̶,̶ ̶Z̶o̶m̶b̶i̶e̶ ̶l̶i̶g̶h̶t̶s̶,̶ ̶R̶e̶a̶r̶ ̶l̶i̶g̶h̶t̶s̶ ̶(̶m̶i̶d̶d̶l̶e̶ ̶f̶i̶n̶g̶e̶r̶)̶,̶ ̶L̶E̶D̶ ̶b̶a̶r̶,̶ ̶R̶o̶c̶k̶ ̶l̶i̶g̶h̶t̶s̶)̶ (delivered: 3/20/14)
    - B̶A̶M̶F̶ ̶L̶C̶A̶ ̶s̶k̶i̶d̶s̶ ̶(̶t̶h̶a̶n̶k̶s̶ ̶M̶a̶d̶T̶o̶y̶)̶ (delivered: 3/27/14)
    - P̶e̶l̶f̶r̶e̶y̶b̶i̶l̶t̶ ̶I̶F̶S̶ ̶s̶k̶i̶d̶ ̶p̶l̶a̶t̶e̶ (delivered 4/16/14)
    - r̶e̶m̶a̶i̶n̶i̶n̶g̶ ̶C̶B̶ ̶s̶u̶p̶p̶l̶i̶e̶s̶ (delivered: 4/11/14)
    - B̶A̶M̶F̶ ̶C̶B̶ ̶a̶n̶t̶e̶n̶n̶a̶ ̶m̶o̶u̶n̶t̶ (delivered: 5/17/14)
    - R̶e̶m̶a̶i̶n̶i̶n̶g̶ ̶P̶e̶l̶f̶r̶e̶y̶b̶i̶l̶t̶ ̶s̶k̶i̶d̶s̶;̶ ̶m̶i̶d̶,̶ ̶t̶r̶a̶n̶s̶f̶e̶r̶ ̶c̶a̶s̶e̶ ̶a̶n̶d̶ ̶t̶a̶n̶k̶ ̶s̶k̶i̶d̶ ̶(̶w̶o̶n̶'̶t̶ ̶b̶e̶ ̶d̶e̶l̶i̶v̶e̶r̶e̶d̶ ̶u̶n̶t̶i̶l̶ ̶a̶f̶t̶e̶r̶ ̶M̶o̶a̶b̶)̶ (delivered: 6/1/14; picked up from LoadedTaco: 6/2/14)
    - H̶i̶-̶l̶i̶f̶t̶ ̶j̶a̶c̶k̶ (delivered: 5/21/14) a̶n̶d̶ ̶a̶c̶c̶e̶s̶s̶o̶r̶i̶e̶s̶ (delivered: 5/23/14)
    - H̶e̶l̶l̶a̶ ̶S̶u̶p̶e̶r̶t̶o̶n̶e̶ ̶H̶o̶r̶n̶s̶ (delivered: 5/17/14)
    - F̶i̶r̶s̶t̶ ̶g̶e̶n̶ ̶m̶u̶d̶f̶l̶a̶p̶s̶ ̶(̶T̶W̶ ̶m̶e̶m̶b̶e̶r̶)̶ (delivered: 5/19/14)
    - A̶l̶l̶-̶P̶r̶o̶ ̶e̶-̶l̶o̶c̶k̶e̶r̶ ̶a̶r̶m̶o̶r̶ (Free Shipping with Memorial Day discount) (delivered: 5/29/14)
    - 2̶1̶S̶R̶ ̶B̶l̶i̶t̶z̶P̶r̶o̶ ̶L̶E̶D̶ ̶b̶a̶r̶ (delivered: 6/4/14)
    - W̶h̶e̶e̶l̶e̶r̶s̶ ̶S̶t̶e̶e̶l̶i̶e̶s̶ (delivered: 6/16/14)
    - T̶r̶a̶s̶h̶a̶r̶o̶o̶ ̶B̶a̶g̶ (delivered: 7/3/14)
    - H̶y̶p̶e̶r̶t̶e̶c̶h̶ ̶I̶n̶l̶i̶n̶e̶ ̶S̶p̶e̶e̶d̶o̶ ̶C̶o̶r̶r̶e̶c̶t̶o̶r̶ (delivered: 7/9/14)
    - S̶w̶a̶y̶b̶a̶r̶ ̶r̶e̶l̶o̶c̶a̶t̶i̶o̶n̶ ̶k̶i̶t̶; purchased from another member (delivered: 7/9/14)
    - 3̶0̶"̶ ̶C̶R̶E̶E̶ ̶D̶R̶ ̶S̶P̶O̶T̶ ̶L̶E̶D̶ ̶b̶a̶r̶ (delivered: 7/15/14)
    - R̶a̶m̶ ̶b̶a̶l̶l̶ ̶m̶o̶u̶n̶t̶ (delivered: 9/17/14)
    - i̶P̶h̶o̶n̶e̶ ̶R̶a̶m̶ ̶m̶o̶u̶n̶t̶ (delivered: 9/17/14)
    - R̶i̶g̶i̶d̶ ̶I̶n̶d̶u̶s̶t̶r̶i̶e̶s̶ ̶4̶0̶1̶5̶5̶ ̶F̶o̶g̶ ̶L̶i̶g̶h̶t̶ ̶K̶i̶t̶ ̶f̶o̶r̶ ̶T̶o̶y̶o̶t̶a̶ ̶T̶u̶n̶d̶r̶a̶ (delivered: 9/17/14)
    - 1̶0̶ ̶L̶E̶D̶ ̶s̶t̶r̶i̶p̶s̶ ̶f̶o̶r̶ ̶r̶o̶c̶k̶ ̶l̶i̶g̶h̶t̶i̶n̶g̶ (delivered: 9/18/14)
    - R̶a̶m̶ ̶M̶o̶u̶n̶t̶ ̶C̶o̶m̶p̶o̶s̶i̶t̶e̶ ̶S̶h̶o̶r̶t̶ ̶D̶o̶u̶b̶l̶e̶ ̶S̶o̶c̶k̶e̶t̶ ̶A̶r̶m̶ (delivered: 9/20/14)
    - Deposit placed for the RTT GB!! :goingcrazy:
    - P̶r̶I̶n̶S̶u̶ ̶C̶a̶b̶R̶a̶c̶ (delivered: 10/3/14)
    - S̶m̶i̶t̶t̶y̶b̶i̶l̶t̶ ̶T̶r̶a̶i̶l̶ ̶S̶h̶a̶d̶e̶ (delivered: 10/26/14)
    - u̶s̶e̶d̶ ̶T̶h̶u̶l̶e̶ ̶s̶k̶i̶/̶s̶n̶o̶w̶b̶o̶a̶r̶d̶ ̶r̶a̶c̶k̶ (delivered: 11/13/14)
     
    Last edited: Nov 25, 2014
    Slashaar and ChadsPride like this.
  10. Nov 14, 2013 at 10:42 AM
    #10
    Ulysiss

    Ulysiss Well-Known Member

    Joined:
    Jan 2, 2013
    Member:
    #94263
    Messages:
    1,466
    Gender:
    Male
    First Name:
    Ulysiss
    La Puente, SGV
    Vehicle:
    2013 Long Bed, PreRunner, TRD Sport
  11. Nov 14, 2013 at 9:37 PM
    #11
    geekhouse23

    geekhouse23 [OP] The "Liftman" - @DrFunker

    Joined:
    Jul 14, 2013
    Member:
    #108251
    Messages:
    15,597
    Gender:
    Male
    Vehicle:
    2GMGMDCSB4WDTRDFTMFW!! TL;DR
    mostly stock, grocery gettin' Prius
    :thumbsup:
     
  12. Nov 14, 2013 at 9:52 PM
    #12
    geekhouse23

    geekhouse23 [OP] The "Liftman" - @DrFunker

    Joined:
    Jul 14, 2013
    Member:
    #108251
    Messages:
    15,597
    Gender:
    Male
    Vehicle:
    2GMGMDCSB4WDTRDFTMFW!! TL;DR
    mostly stock, grocery gettin' Prius
    Received a package from Andres today...

    [​IMG]
     
    Last edited: Jan 15, 2014
    Slashaar likes this.
  13. Nov 16, 2013 at 10:56 AM
    #13
    geekhouse23

    geekhouse23 [OP] The "Liftman" - @DrFunker

    Joined:
    Jul 14, 2013
    Member:
    #108251
    Messages:
    15,597
    Gender:
    Male
    Vehicle:
    2GMGMDCSB4WDTRDFTMFW!! TL;DR
    mostly stock, grocery gettin' Prius
    WELL, the man in brown didn't show up yesterday with the OEM grill :facepalm:

    In my frustration, I went on photoshop and designed these :spy:

    Option A

    [​IMG]

    OR

    Option B

    [​IMG]
     
    Last edited: Apr 7, 2014
    Slashaar and ChadsPride like this.
  14. Nov 16, 2013 at 8:23 PM
    #14
    Gus 524

    Gus 524 Well-Known Member

    Joined:
    Apr 22, 2012
    Member:
    #77417
    Messages:
    523
    Gender:
    Male
    First Name:
    Justin
    MN
    Vehicle:
    09 tacoma SR5 4WD 4-cylinder
    I'm digging option B. Also where are you planning on puting the devil horns?
     
  15. Nov 16, 2013 at 9:16 PM
    #15
    geekhouse23

    geekhouse23 [OP] The "Liftman" - @DrFunker

    Joined:
    Jul 14, 2013
    Member:
    #108251
    Messages:
    15,597
    Gender:
    Male
    Vehicle:
    2GMGMDCSB4WDTRDFTMFW!! TL;DR
    mostly stock, grocery gettin' Prius
    Thanks!

    Which ever lettering I decide to go with are going to be color match to the truck and outlined in white. I am really trying to go all out satoshi, deep lip grill and take my time and do it right. I have already had a few people PM me to make them one when I haven't even started it yet :eek:

    I am not :homer: nor do I want to steal business from him :smack:

    I plan on keeping track of the time and money I spend on it though. And taking pics along the way and keeping everyone updated. I was REALLY hoping to get started this weekend :frusty:

    Horns will be painted...er uh "derped" and put on my "bro" grill for now :rolleyes:
     
    ChadsPride likes this.
  16. Nov 21, 2013 at 9:42 PM
    #16
    geekhouse23

    geekhouse23 [OP] The "Liftman" - @DrFunker

    Joined:
    Jul 14, 2013
    Member:
    #108251
    Messages:
    15,597
    Gender:
    Male
    Vehicle:
    2GMGMDCSB4WDTRDFTMFW!! TL;DR
    mostly stock, grocery gettin' Prius
    Made some progress over the past few days, here are some pics:

    [​IMG]

    [​IMG]

    [​IMG]

    [​IMG]

    [​IMG]

    [​IMG]

    [​IMG]

    [​IMG]

    Cardboard "template" is in its rough stages. The top and bottom of the grill is two different sizes in regards to width. With the cardboard, I was able to cut it to compensate for the change in width. I believe from top to bottom there is a 1/2" difference in width. I still have to test fit it on the truck, check the clearance and then make changes as needed.

    Should have some time this weekend to "tweak" the template and finalize everything before the real work begins :eek:

    UPDATE 11/23/13:

    Test fitted the grill to the truck today. Everything lines up PERFECTLY :yay:

    There is about 1/4" gap between the headlight housing and the cardboard template.

    [​IMG]

    - I plan to use a piece of ABS to try to reinforce the bottom of the lip, it's pretty flimsy.

    I hope to re-use the center plastic that was cut out to see if I would potentially make SOME :spy:

    Going to decide on which toyota emblem I like better and order it next week. It will be color matched and outlined in white. Stay tuned!!

    UPDATE 12/4/13:

    For the emblem, I went with the 85-90 FJ emblem. It is going to be color matched magnetic grey and outlined in white. I chose this emblem for a really clean look.

    For the pieces that need to be add to the sides of the grill, I am going to fab some pieces using aluminum flashing after the template I made from cardboard. Then I will resin that in and bondo over it. My original plan was to use the plastic from the center of the grill, heat mold it and epoxy and bondo but aluminum is really easy to work with.

    For the chrome grill surround, my plan is to contact the dealership and see if they can paint it. I know this is not DIY and I am upset, but here is the reasoning in doing it this way; the dealership, hopefully, could add a chemical/something to the paint to make it more flexible so that it would not chip and it would not peel from the chrome. I have read another thread where the TW member was able to do this and I am hoping to do the same.

    For the mesh, I am REALLY hoping Homer offers 2012+ mesh sheets that I can buy (support TW members :cool: ). Otherwise, I will be getting the "small perforated" grill mesh sheet from customcargrills.com.

    UPDATE 12/7/13:

    [​IMG]

    [​IMG]

    Got the aluminum cut, bent and test fitted on the grill today and I think it looks GREAT. Still have some minor trimming and bending to do but that's pretty much what it is going to look like. I hope to test fit it on the truck this weekend to make sure everything lines up. I expect no issues because I just used the template I created.

    I am going to run to the hardware store today or tomorrow for some resin and bondo.

    UPDATE 12/9/13:

    Resin is 90% complete. Have a few minor areas to go over and then bondo can proceed. So far, this process is not bad at all; just really messy. Might add some fiberglass to the reverse side for strength assuming it will bond appropriately. Here is a pic I took tonight:

    [​IMG]

    Really happy with how it is turning out, was unable to test fit the grill to the truck tonight; hockey game was on and we received about 6" of snow.

    UPDATE 12/12/13:

    Began to clean up excess resin left over in preparation for bondo. Still have to test fit the grill to the truck before bondo can begin; hopefully I can do it tomorrow after work. I still need to order the mesh and figure out how to mount it and also talk to the dealership and see if they will paint the chrome grill surround.

    Teaser:

    [​IMG]

    UPDATE 12/19/13:

    Haven't updated in a while so I figured I update those who are even still reading this post :eek:

    I am going to start the process of bondo, sanding, bondo, sanding, bondo, sanding, bondo, sanding, bondo, sanding this weekend. I still have to go pick up the sandpaper but will do that saturday morning. BUT, before I proceed, I HAVE TO test fit the grill before I go any further.

    I have been doing a LOT of research and *cough* drooling *cough* over other's 2012+ satoshi grills, especially Homer's ;)
    I found this thread here and will probably be using this process for attaching the mesh to the grill:
    http://www.tacomaworld.com/forum/2nd-gen-tacomas/232626-so-i-started-2012-satoshi-6.html#post5524876

    **EDIT: don't think I will be using this process above ^^^; looks like in the right (or wrong) light the mesh looks mangled. If you scroll down to post #117, you will see what I mean. Not going to work for the quality satoshi I am going for..no offense OP**

    Which reminds me, I received the mesh yesterday from customcargrills.com. I hope to start mocking up the mesh the way I want. I do not want a flat mesh like the 05-11 grills. I would like to break it up a bit for a more "textured" look; again like Homer's.

    Also, I took the chrome surround to the body shop and they wouldn't color match it. I plan on calling another dealership and seeing who they recommend. If I strike out again, I'll just paint and clear it myself following this process here: http://www.tacomaworld.com/forum/2nd-gen-tacomas/300047-color-match-grill.html

    **Have read a lot of threads where people say it takes 11-12 hours to complete the whole grill (dremel, fiberglass, bondo sand and paint). I am at 11 hours now NOT including, sanding, more bondo-ing, paint, cutting/molding attaching and painting the mesh AND I still have the FJ emblem to paint and secure to the mesh..I hope that shows the workmanship and time I am putting into this Satoshi :eek:**

    [​IMG]

    [​IMG]

    [​IMG]

    UPDATE 12/22/13:

    Applied the first coat of primer today!! FINALLY. Still have a bit of sanding to do but I have to run to the store to get some 220g sandpaper. I don't expect to do much until next weekend as it is the holidays. I am going to talk to my future father in law tonight about cutting the mesh to size for the grill. I also sanded the chrome surround so when the paint from Automotive TouchUp arrives, I can paint. :cool: Enjoy the holidays everyone!!

    Finishing up things with the lip now hope to be done (painted black) by the time the paint comes (got the shipping confirmation email today :eek: ) so I can spray the chrome surround and start on the lettering. Not sure if I want to attach them as is or cut up the emblem see HERE

    :goingcrazy:

    UPDATE 12/28/13:

    Sanding, sanding and even more sanding!

    I sanded everything down today until it was nice and smooth and sprayed another coat of filler primer on the grill today. I must say it is looking great! Just have a tiny bit more sanding to do in some areas and then I can paint the whole thing black :cool:

    [​IMG]

    I finished sanding the chrome grille surround with 220G sandpaper and it is now ready for paint that should be here on Monday.

    I also made the template for the mesh today. As hoped, it will look similar to homer's mesh on his 2012 prototype :yay:

    UPDATE 12/29/13:

    :(

    Test fit the grill today and the sides hit the headlight housing...

    [​IMG]

    GEEKHOUSE23's Satoshi version 2.0 coming soon...

    UPDATE 1/11/14:

    After much destruction and sadness, I started on "GEEKtoshi 2.0" today.

    This time around I will be building the sides in 3 pieces. You can see I started by building the middle piece. This is the most crucial part of the Satoshi grill; it MUST clear the headlight housing PERFECTLY to not hit. It only took about 20 minutes to fab both sides; this time with 1/4" lip (see pic below) to rest on the plastic lip on the inside of the grill. This was done for strength, rigidity, and a LOT less bondo work. The aluminum sits almost flush. Once I got them to where I was happy, I "tacked" the pieces with a hot glue gun and went out to the truck. Fits great and I have about 1/4"-1/2" clearance between the headlight housing and the aluminum sides. I came inside, didn't even remove the hot glue "tacks" and went to work with the resin. I am going to let it set overnight before putting another coat of resin on.

    [​IMG]
    [​IMG]

    UPDATE 1/27/14:

    For those still following this build, sorry I haven't updated in a while :rolleyes: I have been very busy lately. I have finished building the sides necessary to make this a full deep dish satoshi build. I put one layer of fiberglass on the back side for strength and reduced flex during the bondo process. I am thinking that I MIGHT put another layer or two of fiberglass for a total of 3 layers might be overkill BUT I really don't want to have to build this a third time :frusty:

    Once I am done with the fiberglass layering, I will test fit it to the truck again. Another cold few days here though so I will finish up the fiberglass, then test fit the grill on a day where it isn't so cold. I apologize to anyone who is upset with how long it is taking me, believe me, I am upset too. Pictures to follow soon..

    UPDATE 1/29/14:

    Tonight, I finished the reverse side fiberglass layering and decided to put 1 or 2 coats of fiber glass strips on the inner lip. This was done to insure a good hold since the sides are built in 3 pieces. Inner lip is drying now, I will put another layer on later tonight once this one is dry.

    [​IMG]

    UPDATE 2/2/14:

    Today I finished the second coat of fiberglass on the inner lip and started bondo-ing. I also test fit the grill to the truck today before the bondo was put on. Here are a couple pics testing the grill to the truck.

    [​IMG]

    [​IMG]

    UPDATE 3/8/14:

    Got a few things done today :eek:

    First on the list was to do another test fit. Everything fits like a glove still!!! Still have about 1/4"-1/2" between the sides and the headlight housing. :yay: Starting to sand some more today and was going to apply another layer of bondo to fill all the remaining tiny holes, but my can of compressed air broke! I will be picking one up tomorrow and working on the remaining bondo work then. Instead I got the mesh cut, sized, bent and test fitted!! I think it looks great. I also starting working on how I am going to attach the "TOYOTA" emblem to the mesh (still thinking on how exactly I want to attach it).

    Warmer weather needs to come soon so I can paint everything and finish this project up :goingcrazy:

    Here are some pics showing the mesh (it's bent only very slightly) and a teaser or two :anonymous:

    [​IMG]
    [​IMG]
    [​IMG]
    [​IMG]

    UPDATE 3/30/14:

    Nothing much to show; got everything wet sanded and ready for the first coat of filler primer. I was going to paint this weekend but I was busy with other projects and I wanted to wait until its just a bit warmer to paint. Still have to paint (grill insert, mesh, Chrome surround and FJ emblem :eek: ) and figure out how I am going to attach the letters (thinking of JB welding bolts to the back so I can remove it easily to fix dings and scratches). Been getting messages from some people asking if I am going to build any grills and while I would love to, I just don't think I have the time right now. I might come up with some other service pertaining to the Satoshi build process for 2012+ but still working on finding someone to test the process out on. Stay tuned!!

    UPDATE 4/14/14:

    It has been a while!! I have been super busy with interviewing a few times a week for a new job that I have not had much time for anything. I was able to have a couple hours to work on this thing tonight so here is tonight progress!

    - Attached the mesh to the grill temporarily. I have to still test fit it and trim some more to make sure it doesn't rub or scratch anything on the truck. The edges are SHARP!! :eek:
    - lined up the "TOYOTA" emblem, centered etc and JB welded bolts to the reverse side of the emblem. Going to let them cure for at least 24 hours and then test fit it again to make sure everything lines up.

    After test fitting and trimming everything, I can FINALLY start to paint everything. The insane Midwest weather is really preventing me from making any real progress on this project. I.e. Saturday the 12th it was sunny and 80 degrees; today, Monday the 14th, it was 32 degrees and snowing!! Trying to have everything painted and buttoned up to be put on the truck by the end of this month. That's the plan at least :eek:

    Tonight's pictures:

    [​IMG]

    [​IMG]

    [​IMG]

    UPDATE 4/20/14:

    I'M IN THE HOME STRETCH!! :yay: :goingcrazy:

    Finally we had 3 straight days of amazing weather and was able to start and finish painting and clearing everything. I gotta say that I did not expect a color match rattle can job to look so good but it does!! Everything is now curing in my paint booth which might also be my garage ;) and will stay there curing for 24 hours and then I will be doing the final assembly of everything this week!! Here are some pictures I have of the work that was done over the past 3 days:

    I had the use JB weld to attach the zip tie point that are going to hold the mesh in place. The 3M tape didn't hold well to the fiberglass on the rear. No biggie.

    [​IMG]

    Fabbed center piece and grill mesh:

    [​IMG]

    Mesh came out looking good; painted and cleared. Looks really glossy but you can't tell from this picture.

    [​IMG]

    Bad pic, but here is the color matched grill surround I did. From chrome to this!! looks 1000000 times better!

    [​IMG]

    TOYOTA emblem color matched and outlined in while as promised. Had to make a few touch ups but you can't really tell from far away :eek:

    [​IMG]

    I will be taking MUCH better pictures in the next few days once everything is assembled and then on the truck.

    UPDATE 4/21/14:

    GEEK-TOSHI IS FINISHED!!

    I got home from work today and assembled the grill. I have to say, it looks damn good.

    Mesh attached:

    [​IMG]

    FJ emblem attached:

    [​IMG]

    Grill surround waxed and fully attached:

    [​IMG]

    [​IMG]

    [​IMG]

    Satoshi mounted:

    [​IMG]

    [​IMG]

    [​IMG]

    [​IMG]

    UPDATE 5/18/18:

    Laid the satoshi to rest. Served me well throughout the years. Currently living in the crawl space/loft in the garage. Had been wanting a pro grille for the longest time and the satoshi was in ROUGH shape.

    [​IMG]
     
    Last edited: May 24, 2018
  17. Nov 24, 2013 at 3:54 PM
    #17
    geekhouse23

    geekhouse23 [OP] The "Liftman" - @DrFunker

    Joined:
    Jul 14, 2013
    Member:
    #108251
    Messages:
    15,597
    Gender:
    Male
    Vehicle:
    2GMGMDCSB4WDTRDFTMFW!! TL;DR
    mostly stock, grocery gettin' Prius
    :devil:

    [​IMG]

    Removed the sliders today :(

    Drivers side paint started to chip and peel REALLY bad. I could have done a touch up job but it was about 20F today. Not too sure how well it will last either.
     
    Last edited: Jan 29, 2014
    ChadsPride likes this.
  18. Dec 5, 2013 at 2:10 PM
    #18
    LoadedTaco

    LoadedTaco Kick A$$ Member

    Joined:
    Aug 21, 2012
    Member:
    #85218
    Messages:
    2,837
    Gender:
    Male
    First Name:
    Peter
    Burr Ridge Il
    Vehicle:
    2012 Red Baja
    Looking good in here! Where in Illinois are you?
     
  19. Dec 5, 2013 at 2:27 PM
    #19
    geekhouse23

    geekhouse23 [OP] The "Liftman" - @DrFunker

    Joined:
    Jul 14, 2013
    Member:
    #108251
    Messages:
    15,597
    Gender:
    Male
    Vehicle:
    2GMGMDCSB4WDTRDFTMFW!! TL;DR
    mostly stock, grocery gettin' Prius
    Thank you sir! :thumbsup:

    Chicagoland area :anonymous:
     
    Last edited: Dec 8, 2013
  20. Dec 23, 2013 at 3:40 PM
    #20
    Li0nel1234

    Li0nel1234 Well-Known Member

    Joined:
    Dec 15, 2013
    Member:
    #118634
    Messages:
    455
    Gender:
    Male
    First Name:
    Lionel
    Denver
    Vehicle:
    14 TRD OR DCSB SSM
    I hope you go with option B.

    I think I'm going to go with those spray painted in stencil when I do mine. I bought an OEM grill off a TW member to do it on.
     

Products Discussed in

To Top